If you are trying to download or upgrade MS Office 2013 or 2016, or with Office 365, you may come across errors while activation of the Office suite, for instance, you may see an Error code 0x4004f00c. Fortunately, there are a few fixes available for this that can help you to finish the activation process smoothly and continue using Office. Let’s see how.
Method 1: By Downloading Office Suite from Official Microsoft Website
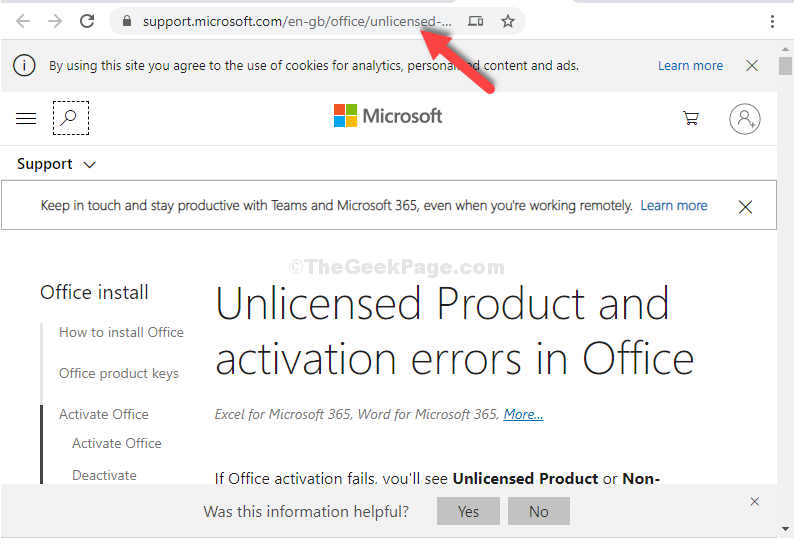
Step 1: Open your browser, type the below link in the address bar and hit Enter:
https://support.microsoft.com/en-gb/office/unlicensed-product-and-activation-errors-in-office-0d23d3c0-c19c-4b2f-9845-5344fedc4380?ui=en-us&rs=en-gb&ad=gb#bkmk_fixit_2016

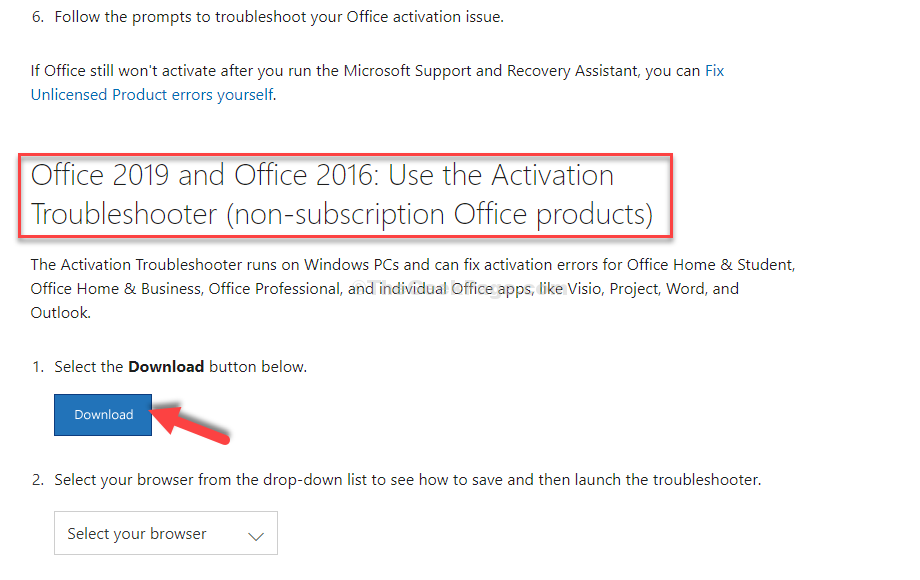
Step 2: Scroll down and look for the Download link for the Office version you are using.
For instance, we are using MS Office 2016 version, so we clicked on the Download button for the same.

That’s it. This should fix your error, but if this doesn’t work, try the 2nd method.
Method 2 – Repair Office
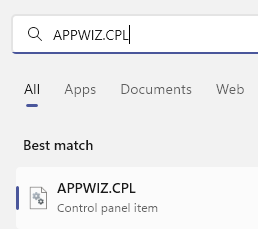
1 – Search appwiz.cpl in windows search and then click on appwiz.cpl

2 – Now, Do a right click on your office and select change

3 – Now, select quick repair and Click on repair

Let this repair your Office and then try again
Method 3: Using Command Prompt
Step 1: Click on the Start button on your desktop and type Command Prompt in the search field. Right click on the result and select Run as administrator to open the Command Prompt in admin mode.

Step 2: Once the Command Prompt window opens, press the Windows key + E together on your keyboard to open the File Explorer.
Now, click on This PC shortcut on the left and select the C Drive on the right.

Step 3: Next, follow the below path, step by step as shown:
- Go to Program Files (x86)
- Go to Microsoft Office
- Go to Office 16
Now, copy the path from the location bar.

Step 4: Go back to the Command Prompt window (admin mode), type cd, press the space bar, and paste the copied path as below. Hit Enter:
cd C:\Program Files (x86)\Microsoft Office\Office16

Step 5: Now, type the below command and hit Enter again:
cscript ospp.vbs /dstatus

Step 6: Copy the last 4 digits of the installed product key as shown.

Step 7: Type the below command and press Enter again:
cscript ospp.vbs /unpkey:"LAST_FIVE_PRODUCT_KEY_CHARACTERS"
*Note – Replace the highlighted part with the last four digits of the installed product key that you copied and remove the quotes.

That’s it. You should not see the error code anymore. But, if the problem persists, try the 3rd method.
Method 4: Through Settings App
Step 1: Click on the Start button on your desktop and select Settings from the context menu, located above the Power option.

Step 2: In the Settings window, click on Network & Internet.

Step 3: Next, click on the Proxy option on the left, and on the right side, under the Manual proxy setup section, turn off Use a proxy server option.

You can also try the 4th method in case if this still does not help.
Method 5: By Disabling Windows Firewall
Step 1: Click the Start button on your desktop and type Control Panel. Click on the result.

Step 2: In the Control Panel window, type Firewall in the search box and hit Enter.
Click on Windows Defender Firewall.

Step 3: Now, click on Turn Windows Defender Firewall on or off.

Step 4: Now click on the radio button next to Turn off Windows Defender Firewall under Private network settings and also under Public network settings.
Press OK to save the changes and exit.

That’s all. This should help resolve your problem. But, if the above methods do not help, you can disable any 3rd party firewall you might have installed or disable any active VPN.