Microsoft has been really helpful to its loyal Windows users for years, but when you experience that much-dreaded BSOD (Blue Screen of Death) with the even scary Memory Management error, it becomes absolutely unhelpful. While there can be many reasons behind this error, fortunately, there is a way you can avoid this annoying situation and continue to use your Windows 10 PC happily. So, how do you fix this BSOD error? Let’s find out how.
How to Fix Memory Management BSOD Error in Windows 10 via Control Panel
Step 1: When you see the Blue Screen of Death Memory Management error, simply Restart your PC, press the F8 button immediately, and start the system in safe mode.
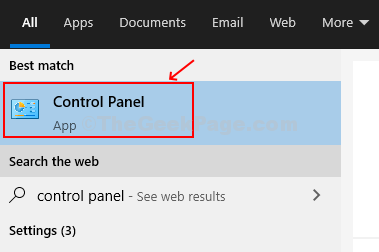
Step 2: On the desktop, click on the windows icon, type Control Panel in the search box and hit Enter. Click on the result.

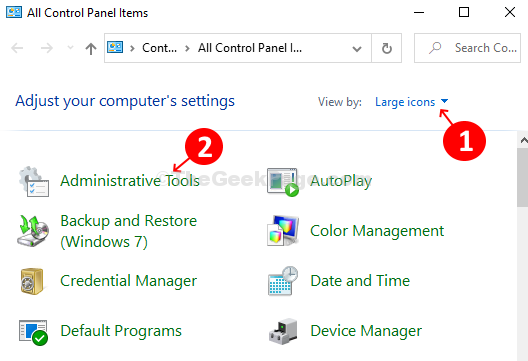
Step 3: In the Control Panel window, click on Administrative Tools.

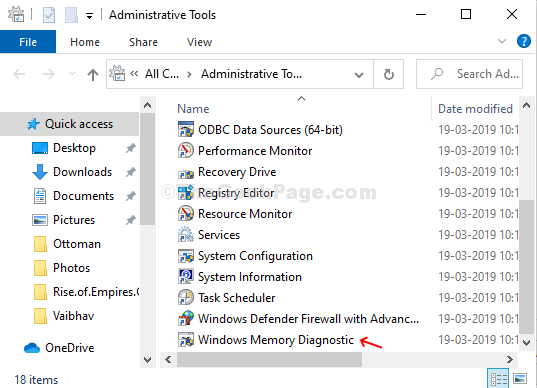
Step 4: In the Administrative Tools window, on the right side of the pane, find and double-click on the Windows Memory Diagnostic option.

Step 5: It will open a Windows memory prompt with two choices – Restart now and check for problems (recommended), and Check for problems the next time I start my computer. Select the former option to restart your computer.

It will automatically run the diagnostics tests to check for any problem which takes several minutes, so have patience and don’t turn off your PC. Let the diagnostic test complete. Once completed, it will again restart your PC.
*Note – Your PC should be working fine now. If you still face the same issue, you can clean your RAM, Hard Drive, or any other external devices and attach them again.