Fix-1 Modify Registry on your computer-
Modifying the value of ‘Start‘ D-WORD value will solve this problem for you.
1. At first, press Windows key+R together. This will launch a Run window.
2. Then, type “regedit” and hit Enter to access the Registry Editor.

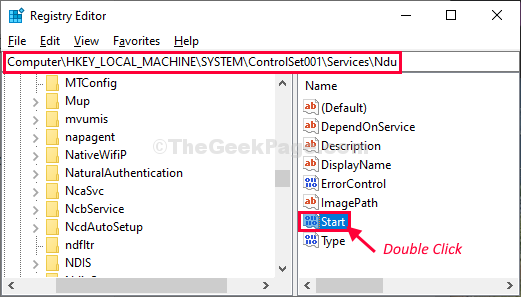
3. In Registry Editor window, go to this location-
4. You need to double click on “Start” to modify it.

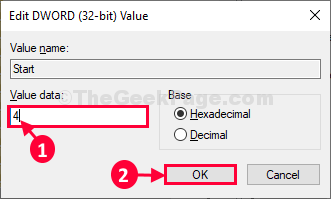
5. You have to set the ‘Value data:‘ to “4” and then click on “OK“.

Reboot your computer.
After rebooting your computer the memory leak issue will be fixed.
Fix-2 Disable SysMain service-
Disabling the Sysmain service on your computer will solve this issue.
1. Click on the Search box and type “services“.
2. Now, click on “Services“.

3. Scroll down and find “SysMain” in the list of services.
4. Now, double click on “SysMain” to modify it.

5. Then, click on the ‘Startup type:‘ and choose “Disabled” from the drop-down list.
6. Click on “Stop” to stop the service.

7. Finally, click on “Apply” and then on “OK” to save the changes on your computer.

Now, reboot your computer.
After rebooting the memory leak issue will be solved.