Whenever you leave your Windows laptop idle for more than a minute, it times out and goes dark. It can be annoying, especially, if you want the Cortana to be on for some reason or you want to look at the screen for a little longer.
This is a common issue, but thankfully there’s a way you can adjust the timeout settings for your laptop’s lock screen and keep it on as long as you want. Le’s see how.
Solution: Using Settings App
Step 1: Click on the Start button on your desktop and select the Settings option (Gear icon) located above the Power option in the context menu.
![]()
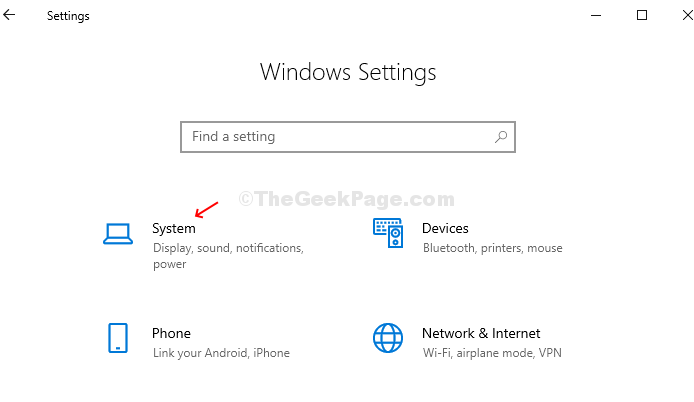
Step 2: In the Settings window, click on the Systems option.

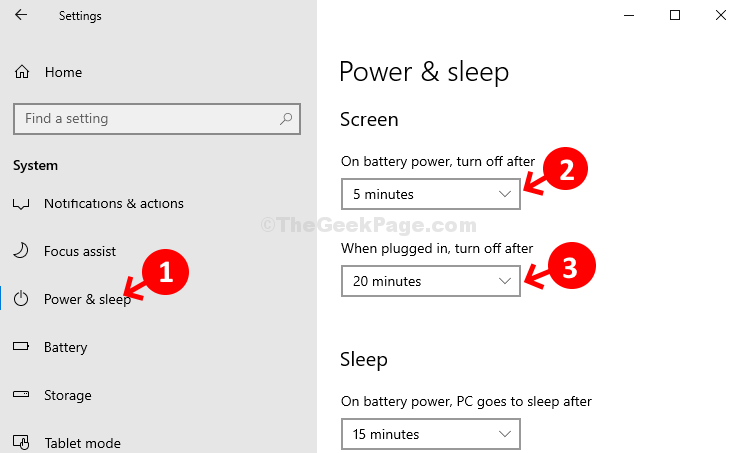
Step 3: Now, on the left side of the System window, scroll down and click on Power & Sleep. On the right side of the pane, under the Screen section, select the time from the drop-down (set it as per your requirement) under On battery power and under When plugged in, turn off after. This will customize your screen timeout.
Here, we set the On battery power to 5 minutes and When plugged in, turn off after to 20 minutes.

Step 4: Now, go to the Sleep section. Under this, select your preferred time from the drop-down under On battery power, PC goes to sleep after.
Here, we set it to 25 minutes.
Under When plugged in, PC goes to sleep after section, set it to Never.

That’s it! You are done customizing the lock screen timeout of your Windows 10 PC.