IP address or Internet Protocol address is a unique number assigned to each PC in this world that gets linked to any internet-based activity you do. It’s basically a digital address that allows one connected system to connect with another device on the internet. In fact, every website on the internet has its individual IP address.
However, most of us do not know what is an IP address, why is it used, and where is it found. While we addressed the first question above, answering the 2nd question, you may need the IP address to find the identity and location of a computer for troubleshooting systems on a network for shared web hosting, for SEO purposes, and more. Here’s how to find your IP address.
Method 1 – Checking the IP Address of your Windows PC via Settings App
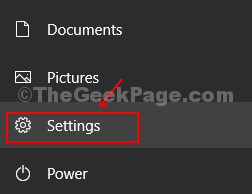
Step 1: Click on the Start button, click on Settings in the context menu (located above the power button) to open the Settings app.

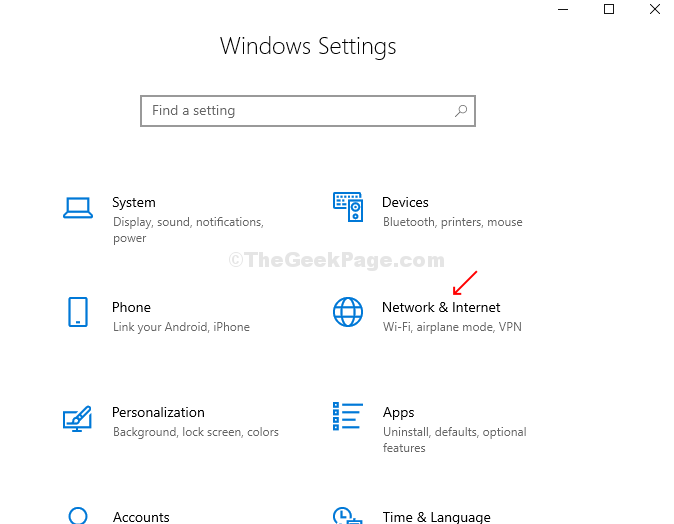
Step 2: In the Settings app, navigate to Network & Internet and click on it.

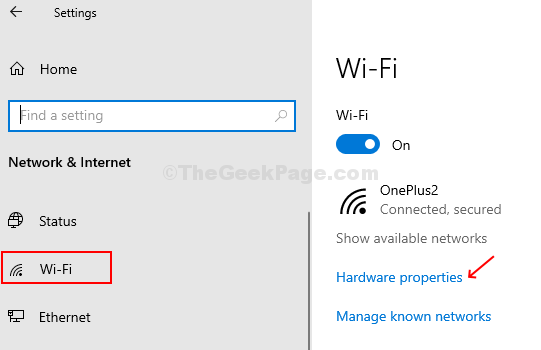
Step 3: If your computer is running on Wi-Fi go to the Network & Internet window, click on Wi-Fi on the left-hand side of the window. Now, click on Hardware Properties on the right-hand side of the window under the active connection.

Step 3: Under Properties, you can find the IPv4 address.

If your computer is running on Ethernet, then click click on Ethernet on the left-hand side of the Network & Internet window and you will find the IPv4 address under Properties on the right-hand side of the window.
Method 2: Checking the IP Address of your Windows PC via Command Prompt
Step 1: Click on the Start button, type Command Prompt in the search box, right-click on the result and click on Rus as Administrator to open Command Prompt with administrator rights.

Step 2: In the Command Prompt window, type ipconfig and hit Enter.

Step 3: You can now find the IPv4 addresses under the active connection. In this case, it’s under the Wireless Lan Adapter Wi-Fi.
