Most printers back in earlier days were used to be connected to the Windows system via a cable wire. But now due to improvements in technologies, you can connect the printer wirelessly to any Windows system and can send the printing command over the wireless network.
This has made it easier for users to share the printer among many computers. But in order to connect and pass the printing command over the network, you need to know the IP address of your printer.
Not many Windows users are aware of how to find the printer’s IP address. If you are also looking forward to knowing your printer’s IP address, follow this article which assists the user on how to get the IP address of the Printer.
How to Check your Printer IP Address in Windows 11
Step 1: Press the Windows and R keys together on the keyboard to open the run box.
Step 2: Then type control in the textbox of run and press Enter key.

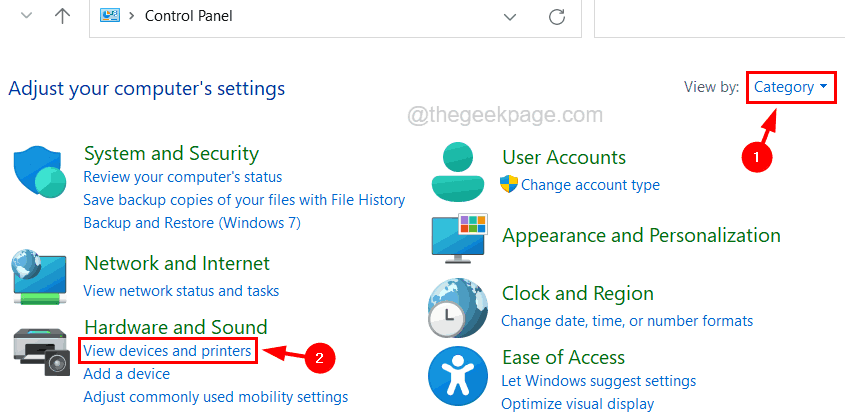
Step 3: Once the control panel page opens, select Category from the View by option as shown below.
Step 4: Click View devices and printers just below the Hardware and Sound option as shown in the screenshot below.

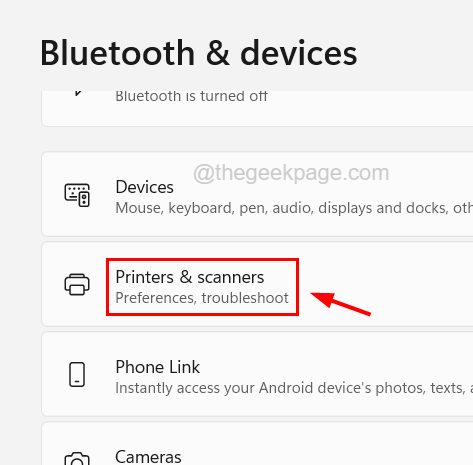
Step 5: This opens the Bluetooth & devices page.
Step 6: Click Printers & scanners option on the Bluetooth & devices page.

Step 7: Select the printer from the list of printers and scanners as shown below.

Step 8: Now click the Printer properties option to open the Properties window of the Printer.

Step 9: In the Properties window under the General tab, you will get to see the IP address of the printer in the Location textbox as shown below.

Step 10: Alternatively, you can also get the IP address of the printer by clicking on the Port tab and checking the Port details.

Step 11: Once done, you can close the properties window.