Microsoft word offers a wide range of tools to write and save word documents. It also has a set of inbuilt tools to work on images and pictures. Suppose you are writing a document and need to insert an inverted image, but you have a color copy of the particular image. What will you do? Simple, all you need to do is convert the color image into an inverted image and then use it in your document. Do not worry if you don’t know how to do the task. This article guides you on converting the color image into an inverted image.
How can we invert the color of an image?
1. Use MS Word
You can directly change or invert the color of an image using MS Word. This feature is available in the new versions ( 2016, 2019, Microsoft 365).
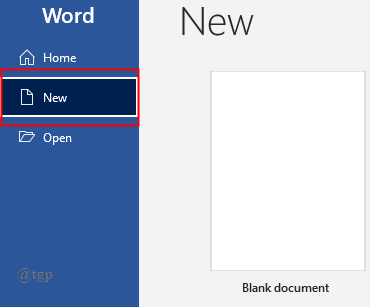
Step1: Open a blank MS Word document.

2. Once the document opens, click on Insert> Picture > This Device.

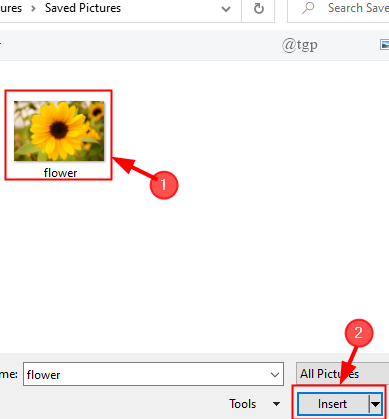
3. Select the image you wish to use and click on Insert.

4. Now, click on the image to select it and go to the Picture format and click on Artistic Effects.

5. A drop-down menu will appear, Select the inverted image effect or the effect you wish to apply. Once done, the color of the image is inverted.

6. You can also add different effects to your images. This is done by clicking on the “Artistic effects Options”. This will open a Format Picture tab on the right side of the document, where you can format based on your need.

2. Use Paint
This is the oldest way of inverting the color of an image. If you are using MS Word 2013 or older, then this process helps.
Step 1: Right-click on the image you want to invert the color and click on Open with and select Paint.

2. Once the image opens in Paint, click on Select > Select All.

3. Now, after the image is selected, right-click on the image and select Invert color.

5. The color of the image is inverted.

NOTE: Paint has only one option to change the color of the image.
6. You can also edit your image further using the inbuilt set of tools present in Paint. This step is optional.
7. Now, copy the image by clicking ” cltr+C “ and paste it into your word document by clicking ” Cltr+V “.
8. The image is now inserted and you can work on your document.
That’s all. Hope this article is informative.
Comment below and let us know your experience.
Thank you.