Many users are reporting that whenever they try to change any file extension, a dialogue box opens up that says If you change file name extension, it may become unstable. It is nice that windows give out these types to prompts but sometimes it is too much, and many users want to get rid of the message. So, we have found some ways by which you can get rid of this dialogue box while changing file extensions.
Solution 1 – Change Registry value
You can solve the issue of this prompt message by changing the values of the Windows system policies, you have to edit it in the registry editor. Follow the steps below to do the same.
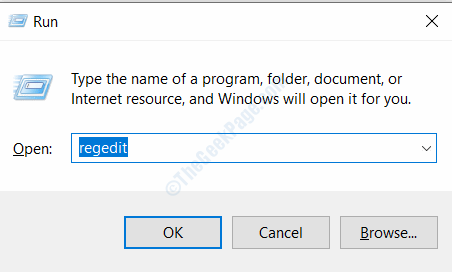
STEP 1: Open Run box by pressing Windows + R, type regedit and press enter button. It will open the registry editor window.

STEP 2: Select Yes from the user access control prompt.
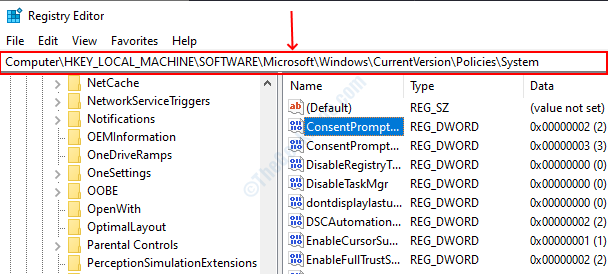
STEP 3: In the Registry editor window, paste the following path in the address bar.
Computer\HKEY_LOCAL_MACHINE\SOFTWARE\Microsoft\Windows\CurrentVersion\Policies\System

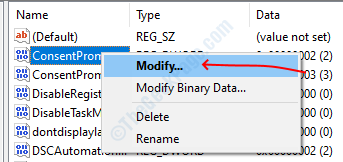
STEP 4: Locate ConsentPromptBehaviorAdmin in the right side, right click and select modify.

STEP 5: Change the value data to zero, click OK, and then close the registry editor. Reboot your computer and you won’t have to face the message again.

Solution 2 – Hide extensions for known extensions
Another solution to this problem is to hide the extension that are known to the system, that way it won’t pop up that message when you change the file extension.
STEP 1: Open the File Explorer and go to the View tab.
STEP 2: Click on the options button, it will open the folder options window.

STEP 3: Head to the view tab in the folder options, check the checkbox that says hide the extension for the known file types. Click the OK button and close the window, you can change the file extension without any prompt now.

Solution 3- Set up a hotkey for the yes option
You can also set up the auto hotkey for the yes option in the prompt so it will automatically select the yes option and you don’t have to face it. Follow these steps to set up the hotkey for the action.
STEP 1: Download the installer of the auto-hot-key from here. Open the installer file and install it on your computer.
STEP 2: After installing the Auto hotkey software, open Notepad, and paste the following script in it.
While, 1
{
WinWaitActive, Rename ahk_class #32770
send y
}

STEP 3: Click the File from the main menu and select save as, select all types option from the drop down in file type option. In the file name text box, give a file and add the .ahk file extension to it and then click the Save button.

STEP 4: Head to the folder where you have AHK file, double click to run the script. It will now automatically select the yes option whenever the file extension prompt comes up.