Microsoft introduced a new Virtualization software called Hyper-V in 2016. This software allows windows users to create and manage multiple operating systems on your laptop. There are three types of Hyper-V software that is Hyper-V Servers, Hyper-V Windows Servers and Hyper-V Windows. Hyper-V Windows is the version that should be on your system to make use of virtualization and must meet some system requirements in order to be supported. So you must be wondering how to check whether it is supported or not on your laptop. In this article we will guide you on how to see if Hyper-V is supported on your Windows 11 PC or not.
Steps to follow to know if Hyper-V is supported on your Windows 11 system
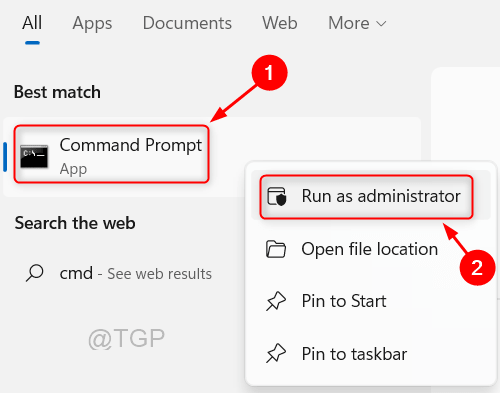
Step 1: Open Command Prompt as administrator.
Press Win key on your keyboard and type cmd.
Right-Click on the Command Prompt app from the search results.
Then, Click on Run as administrator from the context menu.

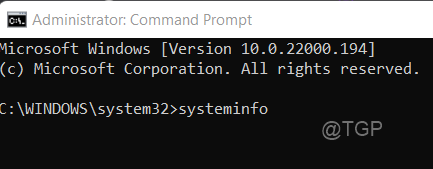
Step 2: In the Command Prompt window
Type systeminfo and hit Enter key.

Step 3: The Command Prompt starts loading all the information about the system one by one.
At the end, you will find the Hyper-V information on your system as shown in the below picture.
If it meets all the requirements and supported on your system, then it will show Yes.

This method helps you in knowing whether the Hyper-V software is supported on your Windows 11 system or not.
Hope this article was helpful and please let us know by leaving the comments.
Thank you for reading!