iTunes is one of the most popular media players that’s also available for Windows 10 now. It’s known for its huge media library consisting of thousands of music files, plenty of TV shows, full-length movies, podcasts, and so on. This huge collection only clogs up your hard drive space causing it to slow down.
So, to reduce the stress on on your hard drive you can transfer the iTunes library content to another PC. Let’s see how.
Solution: Using A USB Flash Drive
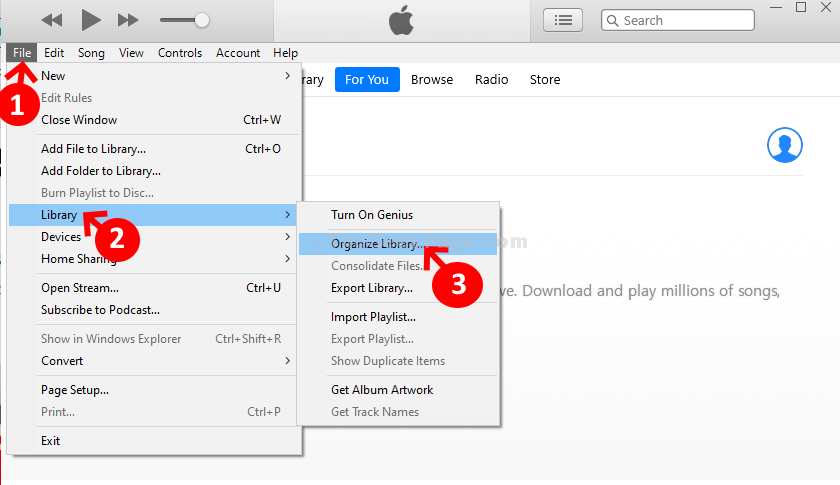
Step 1: Open the iTunes app, go to the File tab on the upper left of the screen, click on it, and select Library from the context menu. Then, click on Organize Library.

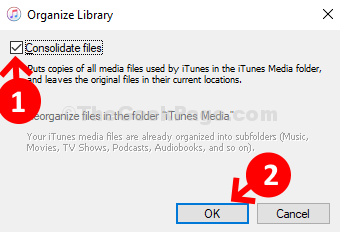
Step 2: Now, in the Organize Library dialog box, check the box next to Consolidated files. Press OK to save and exit.

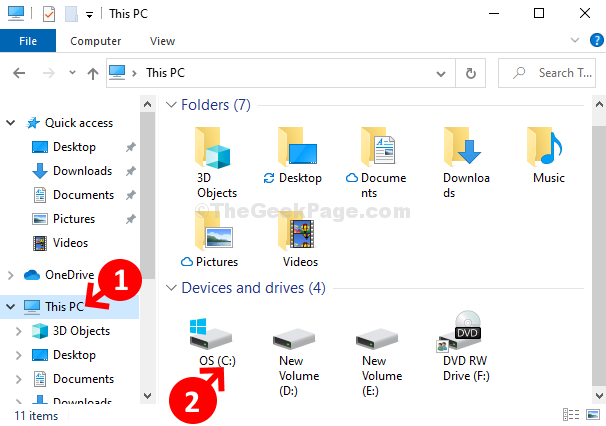
Step 3: Now, press the Windows key + E together on your keyboard to open the File Explorer. Click on This PC shortcut on the left and then double-click to open the C drive. Here we clicked on OS (C:).

Step 4: Next, navigate to the below path one by one to reach the iTunes folder:
- double-click on Users
- double-click on your current user account. Here we click on madhu.
- double-click on Music.
- Now, you reach the iTunes folder.

Step 5: Right-click on the iTunes folder and select Copy from the context menu.

Step 6: Now, paste this file onto your USB flash drive/pen drive, connect the pen drive to the other computer, and copy this iTunes folder to that computer.

Step 7: Now, press the Windows key + E together on your keyboard to open the File Explorer on the new PC. Navigate to the same path to reach the iTunes folder in the same manner as shown in Step 4.
You will see an iTunes folder in the new PC as well if you have been already playing iTunes on it. However, if you do not want to overwrite the content or overload it with too much of content, delete the old folder. Right-click on the iTunes folder, and click on Delete.

Step 8: Now, select the new iTunes folder (that you transferred from the old PC using pen drive) and drag-and-drop it to the Music folder of the new PC.

That’s it. You are done transferring the iTunes library to the new computer.