In case if you are unable to run a setup to install or uninstall a problematic application from your Windows 10 and windows 11 device and wondering what to do about it, here is our guide on how to download and run Program Install and Uninstall troubleshooter on your computer. Just follow the process step by step and you will be able to install or uninstall the application very easily on your computer.
Run Program Uninstall Troubleshooter to Uninstall–
If you are unable to uninstall any application package from your computer, follow these steps-
1. Download MicrosoftProgram_Install_and_Uninstall.meta on your computer. Click on “Download” to download it on your computer.
2. Now, go to the download location on your computer.
3. Double click on “MicrosoftProgram_Install_and_Uninstall.meta” to run the troubleshooter on your computer.

4. In Program Installer and Uninstaller window, click on “Next” to run the troubleshooter on your computer.

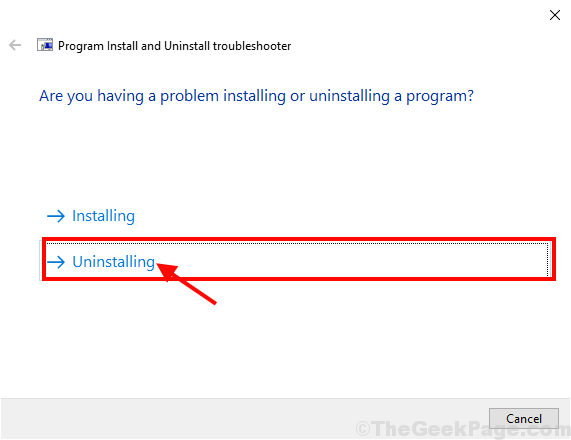
5. When you will be asked “Are you having a problem installing or uninstalling a program?” on your computer, simply click on “Uninstalling“.

6. In the “Select the program you want to uninstall” window, select the program from the list of the programs and packages, and then click on “Next“.

7. Finally, click on “Yes, try uninstall” to start the uninstallation process on your computer.

Wait for the troubleshooter to uninstall the application package from your computer. Once the uninstallation process is over, reboot your computer.
Further, if you want to know various methods to uninstall application packages from your computer follow this guide.
Run Program & Uninstall Troubleshooter to Install-
If you face the problem during the installation of a package on your computer, follow these steps to solve the issue.
1. You have to double click on “MicrosoftProgram_Install_and_Uninstall.meta” to run the troubleshooter on your computer.

2. Now, you have to click on “Next” to run the troubleshooter on your computer.

3. Now, what you have to choose is “Installing“.

4. In the next window, select the software package you are having trouble installing, and after that click on “Next” to start the installation process.

Once the installation process is done, close the troubleshooter window.
Your problem should be solved.