A Network Adapter is a hardware built-in your PC/Laptop used for connection over a network. The network may be wired (Ethernet) or wireless (Wi-Fi, Bluetooth) depending upon the nature of the network adapter. As mobile devices are used more often, wireless network adapters are in a greater demand over the wired network adapters.
In this article, we will get to know how to Reset Wired or Wireless Network Adapter in Windows 10:
Method 1:Using Command Prompt
As Command Prompt is ubiquitous in all Windows platforms (i.e. Windows 7/8/8.1/10), the steps described below will reset all kinds of network adapters in almost every windows platform.
Step 1:
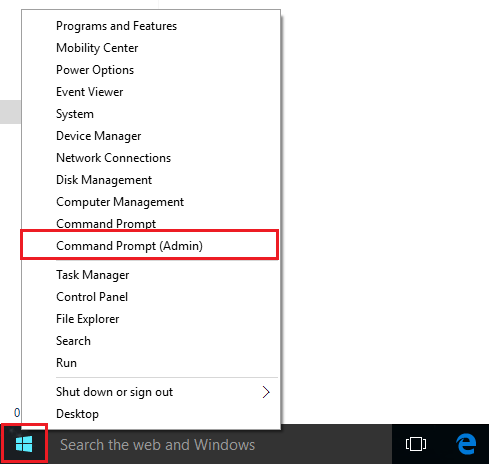
Right click on “Start” icon positioned at the bottom left corner of your screen. Click on “Command Prompt (Admin)”.

Step 2:
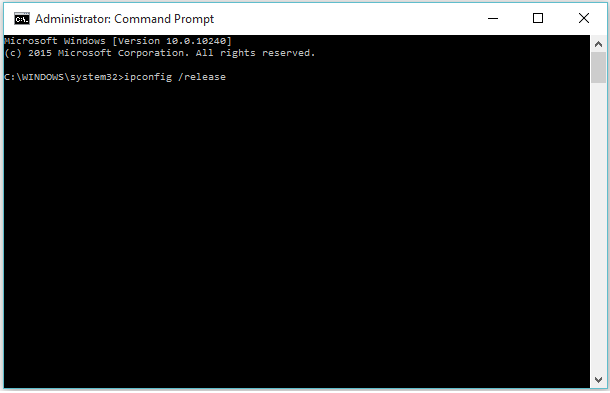
Type the following command as given in the Screenshot:
Ipconfig /release

Step 3:
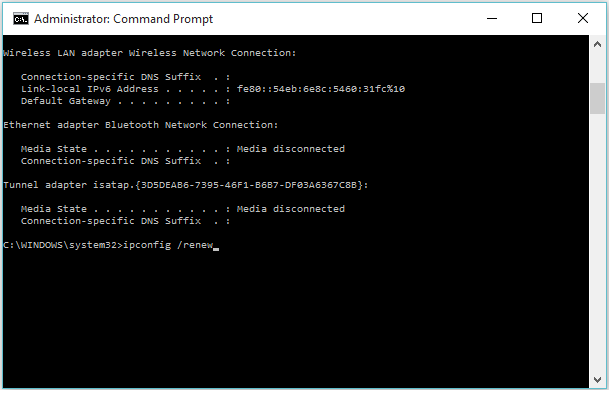
Type the following command as given in the Screenshot:
Ipconfig /renew

Note: Windows will reset all the network adapters which are found in your system.
Method 2: Using Device Manager
Device Manager contains the list of devices (Hardware Devices) which are installed in your system. You can Enable, Disable, Update or Install any device anytime.
Performing a hardware reset without restarting windows can help you fix both wired and wireless network adapter related issues. This method can be applied by following steps:
Step 1:
Right click on “Start” icon positioned at the bottom left corner of your screen. Click on “Device Manager”.

Step 2:
Double click on “Network adapters”. Click on the network adapter in which you are having problems. Right click on the chosen network adapter and click “Disable”.
Step 3:
A warning message box will appear on the screen. Click on “OK” to confirm.

A small triangle like structure will be formed on that network adapter icon which means that the hardware is non-functional or disabled.
Step 4:
Right click on that network adapter again and click on “Enable”.

Note: After enabling it, the device will re-configure its previous setting.