Here are the steps needed to reinstall any windows 10 app using powershell.
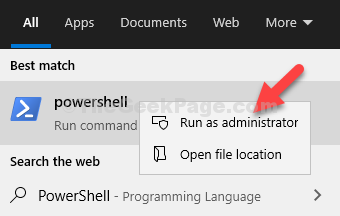
1. Search powershell in Windows 10 search box.
2. Now, right click on powershell icon and run as adminsitrator.

3. Now, Run the command given below to get list of all apps in a file.
Get-AppxPackage -AllUsers > C:\listofapps.txt
This will put all app details on a file listofapps.txt in C folder.
4. Go to C folder and open listofapps.txt.
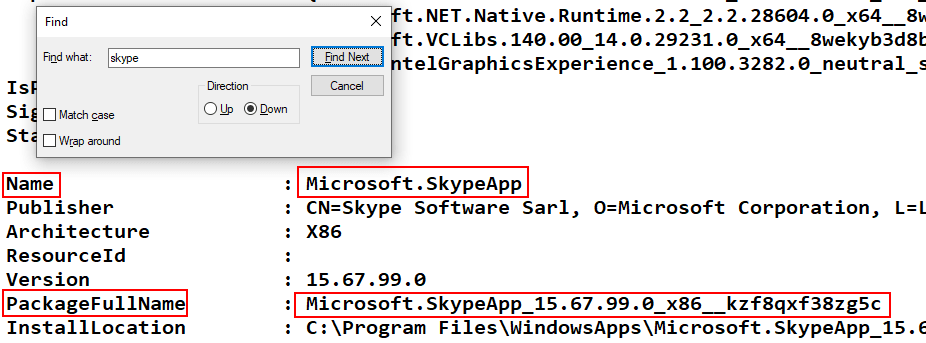
5. Now, Press CTRL + F and find the app by writing app name.
All the details of app will be given.
We only need two details , that is , Name and PackageFullName

6. Now, run the command given below to remove a certain app. Just replace the PackageFullName with PackageFullName of the app you noted from listofapps.txt
Remove-AppxPackage PackageFullName
For example , if you want to remove skype, you will run Remove-AppxPackage Microsoft.SkypeApp_15.67.99.0_x86__kzf8qxf38zg5c
7. After that run the command given below.
Get-AppxPackage -allusers *Name* | Foreach {Add-AppxPackage -DisableDevelopmentMode -Register "$($_.InstallLocation)\AppXManifest.xml"}
Just replace NAME with your app Name.
For example , if you want to reinstall skype, you will run Get-AppxPackage -allusers *Microsoft.SkypeApp* | Foreach {Add-AppxPackage -DisableDevelopmentMode -Register “$($_.InstallLocation)\AppXManifest.xml”}