In many cases, you might have a huge Excel file, but only a specific portion of that Excel file might be of importance to you. In such cases, printing the entire Excel document is a waste of time, resources, and energy. Also, if you print all the data, the recipient might get confused about what is the actual data that needs to be focused on. Obviously, if you have some way using which you can print only a specific part of your Excel document on a single page, that would ease your life to a great extent. Also, if you have the option to print multiple sections of your Excel on multiple pages, I’m sure that’s also an idea that would be welcomed warmly.
Here in this article, we explain how you can easily print a part or multiple parts of your Excel, but obviously not the whole document, in single or multiple pages as per your requirement. So let’s dive into the article, shall we?
Example Scenario
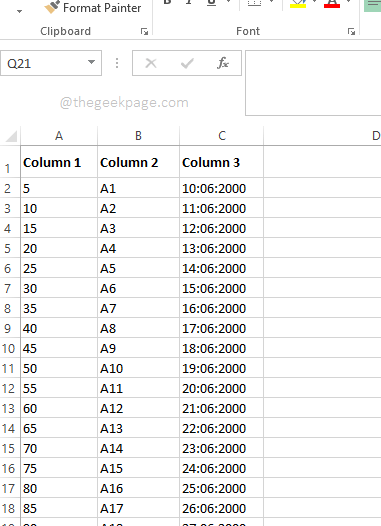
We have an Excel document that has data spanning over more than one page.
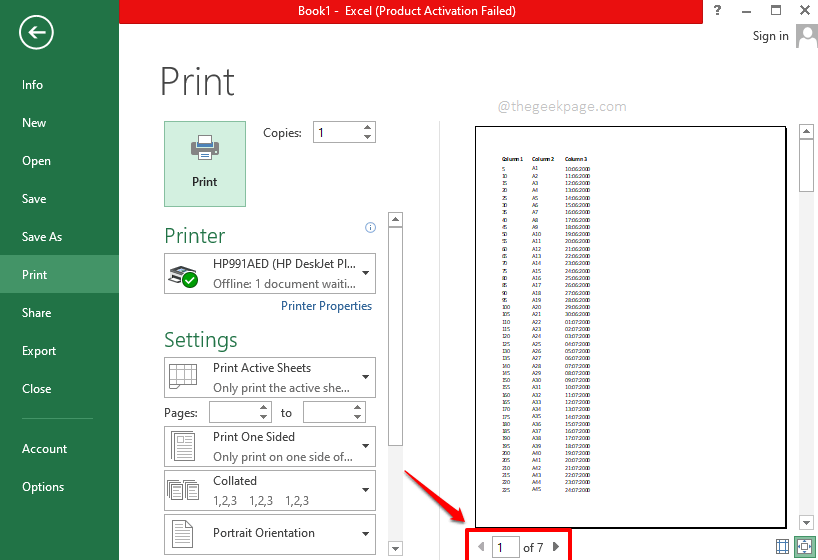
Now if you simultaneously press the keys CTRL + P, the Print setup page would open, and it would give you the print preview notifying you that all the 7 pages of the document are going to get printed, whereas you want only a portion of the data to be printed. Let’s see how you can easily tackle this issue.
Section 1: How to Set a Print Area and Print Only a Specific Portion of your Document
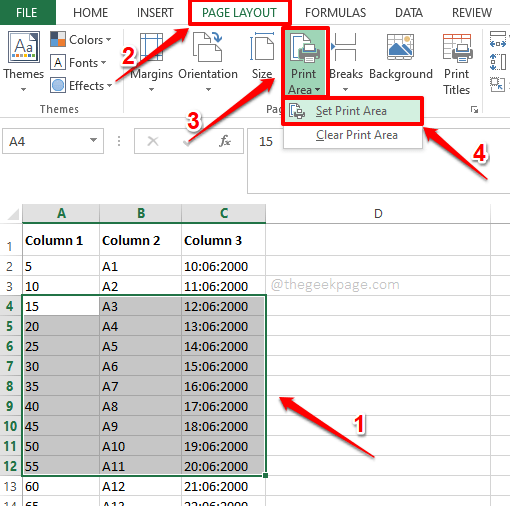
Step 1: Firstly select the portion of the data that you want to be printed.
Once the data is selected, click on the PAGE LAYOUT tab at the top.
Now, click on the dropdown menu named Print Area. From the options available, click on the one that says Set Print Area.
Step 2: If you look at the Excel, you can see that your selected data is now enclosed inside a small box. This is the Print Area.
Step 3: Now if you press the keys CTRL + P together, on the Print Preview, you can see that only the data inside the preset print area is going to get printed. That’s it.
Section 2: How to Extend the Print Area and Print on the Same Page
Let’s say you got the Print Area set and everything is perfect. Suddenly you realize that you have to add some more data. The best part is that the new data is adjacent to the original data. So you want to print the new data along with the old data on the same page itself. We can get this done through 2 different solutions.
2.1: Extend Print Area Using Name Manager
Step 1: Click on the FORMULAS tab from the tab ribbon. Now click on the button Name Manager from the section named Function Library.
Step 2: On the Name Manager window, you will be able to view the print area that you created in Section 1. Click on the Print_Area and then hit the Edit button at the top.
Step 3: Now click on the Cell Selection icon against the Refers to field.
Step 4: You will be able to view the original print area in this step. This is the print area that you are going to expand.
Step 5: You can drag and select the new area that you want to be merged with the old print area. But remember to keep the old print area also inside the selected range of rows.
Once you are done with adding the new print area to the original print area, hit the Cell Selection icon once again.
Step 6: You will be back at the Edit Name window now. Hit the OK button to proceed.
Step 7: Now if you open the Print settings page by pressing the CTRL + P keys together, you will be able to see that your Print area is modified and that the new range of rows is successfully added to your print preview and ready to be printed.
2.2: Extend Print Area Using Page Layout Settings
Simply select the new area that you want to be added to the original print area. After selecting the new area, hit the PAGE LAYOUT tab from the top ribbon. Now hit the Print Area dropdown menu and then click on the Add to Print Area option.
That’s it. You can now press CTRL + P keys together to view the print preview. The new area would be successfully added to the print preview.
Note: Please make sure that the new print area is adjacent to the original print area. Also, make sure the data has the same dimensions as the original print area. That is, the number of columns should be the same in both the print areas for instance. If these conditions are not met, then the new print area would not be considered as an extension of the old one and the 2 print areas would be printed on 2 different pages.
Section 3: How to Add a New Print Area and Print on a Different Page
As mentioned in the sections above, you can set print areas, you can extend them, and can print them. But the sections above focus on printing data that are consecutive. What if you have to print data that are not adjacent and are of different dimensions? Is it possible to print 2 different print areas? Well, it is very much possible. But remember that if the data is not adjacent, then if you try to print them, they will be printed on different pages and not on the same page.
Step 1: Firstly, select your new set of data. This data can be anywhere on your document, of any number of columns.
Once the data is selected, hit the PAGE LAYOUT tab at the top.
Hit the dropdown menu named Print Area and then click on the Add to Print Area option.
Step 2: That’s it. If you hit the CTRL + P keys simultaneously, you can see that the 2 print areas now come on 2 different pages and they are ready to be printed.
Section 4: How to Clear All Print Area
Now let’s say you want to get rid of all the print areas that you set and want to print the whole document instead. In such cases, you need to clear all the print areas that you created. For that, simply click on the PAGE LAYOUT tab at the top, as usual. Hit the Print Area dropdown and then click on the Clear Print Area option.
That’s it. All your print areas are now cleared and you can now freely print your whole document with no print area causing any trouble. Enjoy!
If you are stuck at any of the steps, please do drop a comment, we are happy to help. Thank you for reading.


