Collecting donations in Roblox is a fun to way to accept in-game contributions for gamers. But, setting up this PlS Donate box is a feat of it’s own and involves many steps along the way. So, if you want to set up a nice Pls Donate box in Roblox to get more donations, this is the ultimate guide for you.
How to set up a Gamepass in Roblox Pls Donate box in Roblox
This quick tutorial is very easy to implement on your own phone. Follow these steps minutely –
STEP 1 – Create the Game Pass
Step 1 – Close the Roblox game on your phone. Make sure, close all the instances of the game in your system.
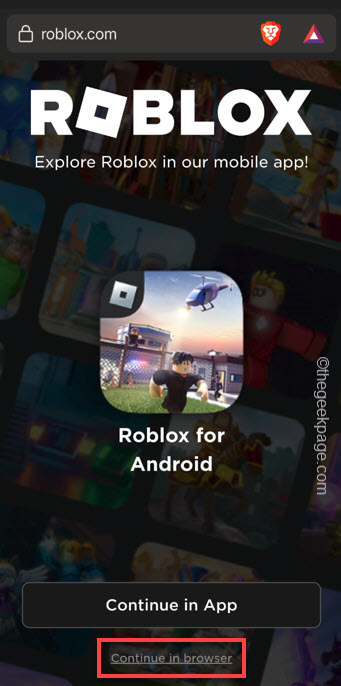
Step 2 – Open the Roblox Homepage on the Google Chrome browser.
Step 3 – Then, tap the “Continue in browser” option just below the main option.
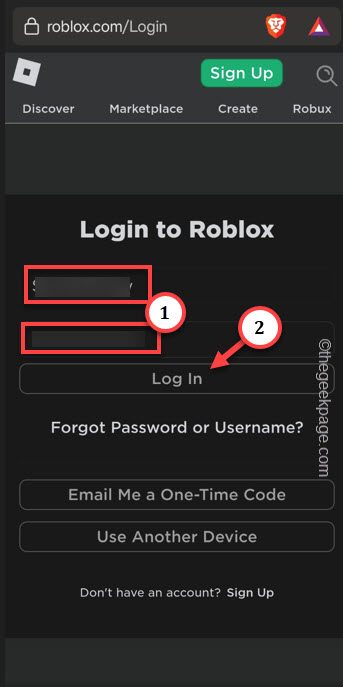
Step 4 – If you haven’t logged into Roblox previously, tap the “Log in” option.
Step 5 – Then, input the Roblox account credentials and tap “Log in“.
Step 6 – Slide scroll a bit and tap “Create“.
Step 7 – This page won’t load up properly on your phone. So, tap the three-dot menu and tap “Desktop site” to load the website in desktop mode.
Step 8 – On the following Creator page, you will see the experience that you have enjoyed in Roblox. Tap the “Your nickname’s place” to see it’s options.
Step 9 – Now, tap “MANAGE EXPERIENCE” to manage that experience settings.
Step 10 – Now, tap the “≡” to see the expanded menu.
Step 11 – Then, tap “Associated items” to open the associated items.
Step 12 – Go straight to the “PASSES” section.
Step 13 – Then, tap “Create a pass” option.
Step 14 – On pass creation page, you will see an option to upload an image that will be shown in the Roblox box.
Step 15 – Give a name to the pass.
Step 16 – Then, add a line of random description of the pass.
Step 17 – Finally, tap “CREATE PASS” to create the pass.
After creating the pass, you will get back to the Passes page.
Step 18 – Now, tap the pass that you have just created.
Step 19 – Finally, tap the three-bar and tap “Sales” in the DETAILS section.
This will take you directly to the Sales page.
Step 20 – On the main Sales page, toggle the “Items for Sale” option, first.
Step 21 – Then, include the Robux in the box.
[Remember, Roblox takes 30% of the Robux you earn through these donation boxes.]
Step 22 – Finally, tap “SAVE CHANGES” to save the changes in Roblox.
Now, getting back to the main Associated Items page, you will see the Gamepass in there, along with the price tag.
If you don’t see that there, you may have done something wrong and you will have to redo it from the beginning.
Close the browser.
STEP 2 – Create the Stall in the box
Now, you have to just find an empty stall and apply the Game Pass in there.
Step 1 – Launch Roblox on your phone.
Step 2 – Then, search for “Pls Donate” experience.
Step 3 – Tap the green play button to start the experience.
Step 4 – Once it loads up, run up to an empty stall beside the road and you shall see the “Create” button.
Step 5 – Tap and hold that down until the square completes.
That’s it! You will see the Gamepass along with the Robux tag directly on the board.
You can go back and edit the Gamepass any time you want and acquire a new stall.
Hope these steps have helped you!


