Finding a user who has used the WinRAR but never faced a Checksum error is hard. The Checksum errors are common during the extraction process. Checksum errors indicated possible file corruption during the transfer of the file. There are some fixes that you can apply to fix this Checksum error to extract the files successfully.
Fix 1 – Use the Keep broken bits
Usually, WinRAR shows up this CheckSUM error message only when a broken file component is detected in the archive.
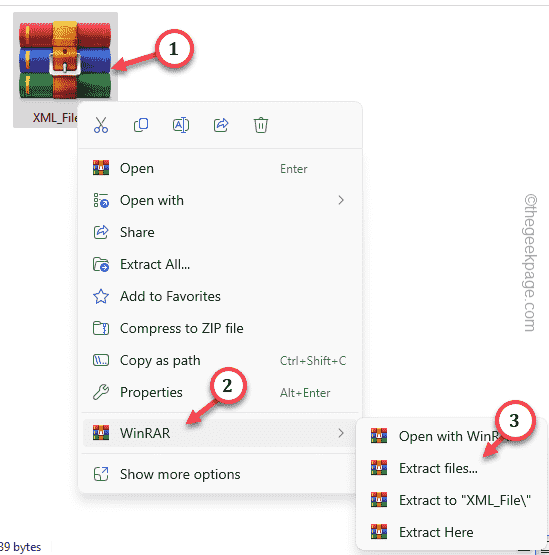
Step 1 – To use this workaround, reach the location of the compressed file.
Step 2 – Right-tap the compressed file and tap “WinRAR>”
from the context menu.
Step 3 – Finally, click “Extract here…“.
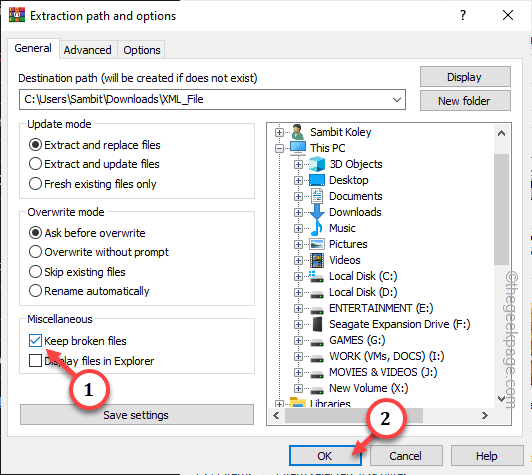
Step 4 – When the Extraction panel appears, check the “Keep broken files” box.
Step 5 – After this, tap “OK” to start the extraction process.
This time, there won’t be any CheckSUM errors during the extraction process.
But, if the core file is corrupt, broken files won’t be of any help.
Fix 2 – Repair the archive
WinRAR has a repair feature built right into the application. You can take the help of this and repair the corrupted archive file.
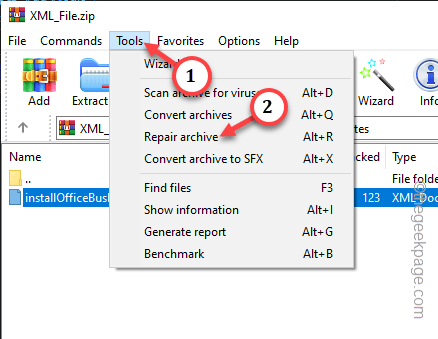
Step 1 – You have to open the compressed file using WinRAR first. So, open the affected file in WinRAR.
Step 2 – Go to the “Tools” menu as the file loads up.
Step 3 – Afer this, tap “Repair archive” to run a repairing operation on the archive file.
Usually, WinRAR uses the part of the files to repair the whole package file or rebuild the entirety of the compressed file. So, if just a small fragment of the file is missing from
Fix 3 – Use other extractor apps
There are other free extractor apps available that can decompress the compressed file without any checksum errors.
Step 1 – Go to the latest version of the 7z and tap “Download” to get the 7z setup file.
Step 2 – Now, run the 7z Setup file.
Step 3 – Go through the installer and complete the installation.
Step 4 – Once the installation steps are complete, go back to the zip file.
Step 5 – Next, right-click the compressed file and click the “Open with>” option.
Step 6 – Now, tap “Choose another app“.
Step 7 – Scroll down through the entire list of apps and tap “Choose an app on your PC“.
Step 8 – Go to the installation location of the 7zip. The default location is –
C:\Program Files-Zip
Step 9 – Go here and select the “7z.exe” in there and tap “Open“.
Step 10 – Coming back to app usage window, make sure to select the “7-Zip Console” option.
Step 11 – Finally, tap “Just once“.
Now, complete extracting the files using the 7z app and check. You won’t face the CheckSUM errors again.
Fix 4 – Get another copy of the file
The compressed file on your device may be corrupt. So, consider getting another version of the file. If you have received the file as an email attachment, you may ask the sender to resend the same file to you.


