Google Chrome receives regular updates and bug fixes. Now, if you are on a metered internet connection, this will be very problematic for you to keep track of as this update is delivered in the background. In this article, we are going to discuss how to stop automatic updates in Google Chrome. Follow this process and the problem will be solved very easily.
Disable automatic updates in Google Chrome-
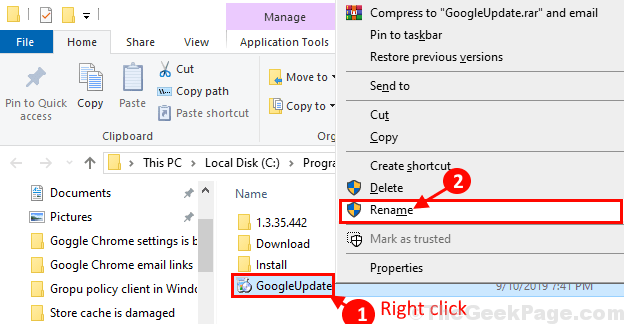
Renaming ‘GoogleUpdate.exe‘ will solve this issue for you. Follow these steps to do it-
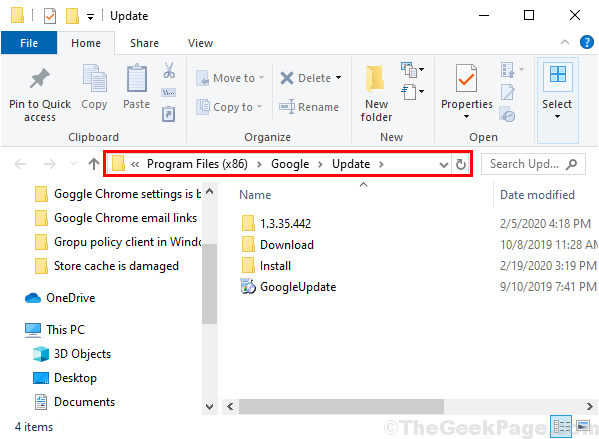
1. Press Windows key+E to open the File Explorer window. Now, navigate to this location according to the CPU-architecture of your system-
For 32-bit Windows 10: C:\Program Files\Google\Update
For 64-bit Windows 10: C:\Program Files (x86)\Google\Update

2. In the Update folder, right-click on “Google Update” and click on “Rename“.
3. Rename the file to “GoogleUpdate1“.

Close File Explorer window.
Reboot your computer to save the changes.
That’s it! From now on, Google Chrome will be not be updated automatically. Your problem should be solved.
In case, if you are still unable to find the location of Update application, look at this location-
C:\Users\%username%\AppData\Local\Google\Chrome\Update
[NOTE–
Replace “C:” with the drive letter of Windows installation drive on your computer.