By default, whenever you launch Excel, it opens with a specific number of blank sheets based on the version of Excel you are using. For the 2013 version, if you launch Excel, you get only 1 blank sheet by default. But if you are someone who needs a specific set of sheets always, to do your work, then it would be very convenient for you if your Excel launches new workbooks with your required number of blank sheets; say 5 sheets, every single time you launch a new workbook.
This article is all about changing the default number of blank sheets with which a new Excel workbook launches. Read on, to learn how you can quickly master this amazing Excel hack. Hope you enjoy reading!
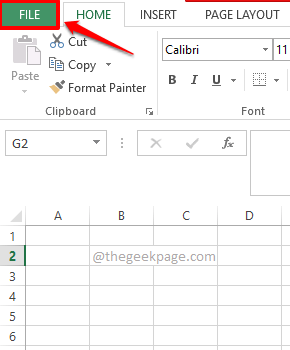
Step 1: Launch Microsoft Excel and hit the FILE tab at the top ribbon.
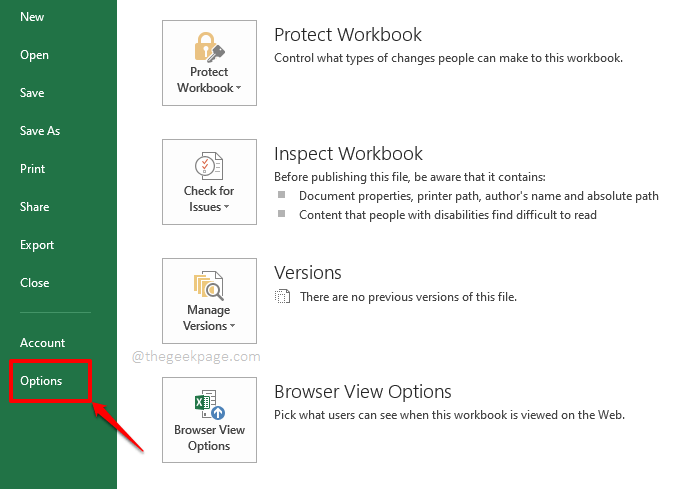
Step 2: Now on the left pane of the FILE options, click on the Options tab.
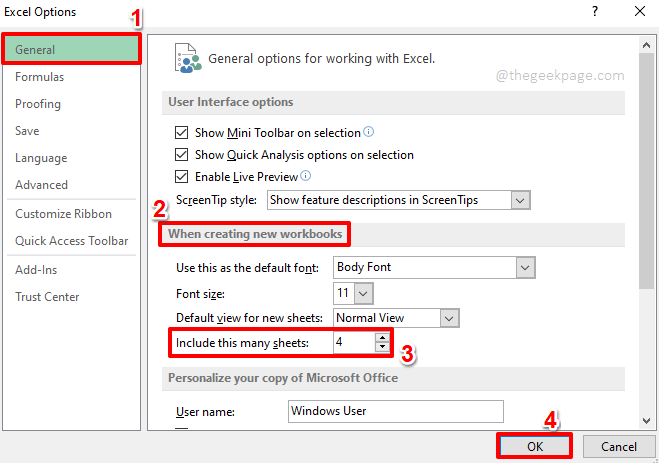
Step 3: On the Excel Options window, click on the General tab on the left pane first.
Now on the right window pane, locate the section named When creating new workbooks.
Now, under this section, there will be a field called Include this many sheets. You can assign a number to this field using the UP and DOWN arrows associated with it, or you can straight away type in a number. It is this number that determines with how many sheets your default Excel workbook will open every time you launch Excel.
Hit the OK button at the bottom to proceed.
Note: You can have up to 255 blank sheets when you open Excel. The minimum number that needs to be given is 1.
Step 4: That’s it. Let’s test whether this is working now. For that, hit the FILE tab from the top ribbon once again.
Step 5: On the left window pane, click on the New option, and on the right pane, click on Blank workbook.
Step 6: When the blank workbook opens up, you can see that there are as many new sheets as you specified, as opposed to the default 1 sheet settings. Enjoy!
Do drop a comment in the comments section if you are facing any difficulties, we are always a comment away.
Hope you found the article helpful. Stay tuned!


