To secure your system from any attacks like stealing your data, it is better to have a PIN assigned for it, which is also required in case of any face or fingerprint recognition failure. It is a good practice to change / update your PIN on your system from time to time. If you are wondering how to do it, then don’t worry. We have explained in this post how to change a PIN for your windows 11 pc with a few simple steps given below.
How to Change PIN for Windows using Settings app
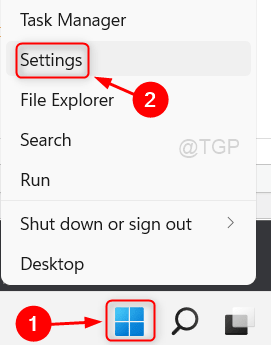
Step 1: Go to Taskbar and Right click on the Start button.
Step 2: Then, Select Settings option from the context menu as shown in the below screenshot.

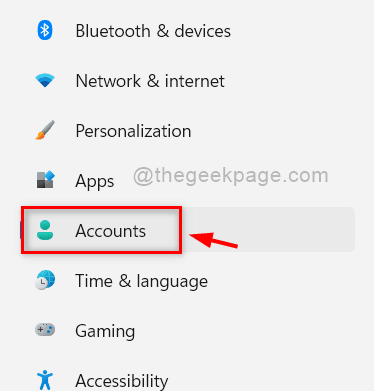
Step 3: Then, Select Accounts option present on the left menu of Settings app.

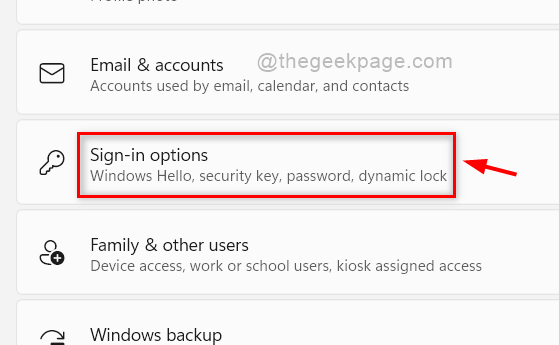
Step 4: Click Sign-in options feature in the Accounts page on the right side as shown in the below screenshot.

Step 5: In the Sign-in options page, Click PIN (Windows Hello) section and then, tap on Change PIN button as shown below.

Step 6: In the Change you PIN window, Check the Include letters and symbols checkbox.
Step 7: Enter your current PIN, new PIN and Confirm new PIN in their respective fields.
Step 8: Finally, Click OK button to change the PIN.

Step 9: After changing the PIN for windows system, Close the Settings app.
This way you can change the PIN for your Windows 11 system.
That’s it guys. Hope this post was interesting and helpful.
Please leave us comments below.
Thank you!