The accuracy of colors on your computer’s monitor is especially very important if you are a designer or a visual expert. Have you tried getting print outs of your designs and visuals, and experienced a not up to the mark result altogether? That’s when you would want to perfect the look of the visuals on the screen, and get exactly the same in the printout, won’t you?
What you would want are lifelike colors that would make your visuals looking more professional. Worry not, as this issue can be easily resolved using the color calibration tools and settings that come integrated Windows 10. The only downside s, that it’s hidden and you would need to look for it. So, let’s see where to find this extremely handy color calibration tool in Windows 10 and how to deliberate your PC monitor’s colors.
How to Calibrate Your Windows 10 Monitor Colors
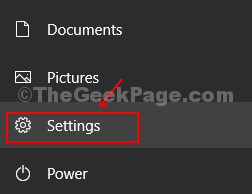
Step 1: Click on the Windows icon, click Settings in the context menu located above the Power option.

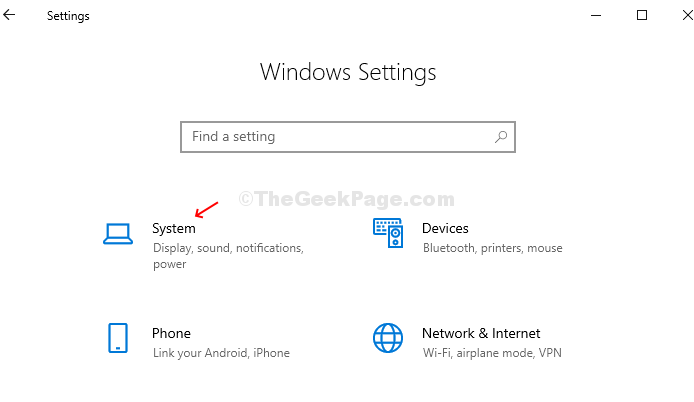
Step 2: In the Settings window, click on the System option.

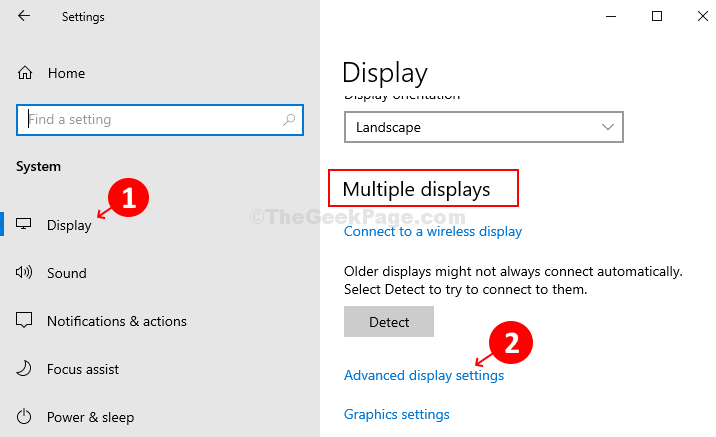
Step 3: In the System window, click on Display on the left side of the pane and on the right-side scroll down to the category – Multiple displays. Under that, click on the Advanced display settings option.

Step 4: In the Advanced display settings window, under the Display information category, click on the blue link > Display adapter properties for Display 1.

Step 5: In the net pop-up window, click on the Color Management tab. Then click on the Color Management button.

Step 6: In the Color Management window, click on the Advanced tab and then click on the Calibrate Display button.

Step 7: It will open the Display Color Calibration wizard. If you are doing this for the first time, know more about it by click on the link > How do I calibrate my display? If you are ready for the calibration, click Next.

Step 8: Follow the instructions mentioned in the next window to set the basic color settings using the menu button of your display. If you are unable to do that, click Next to continue.

Step 9: It will take you to the Gamma adjustments that ensure how the red, blue, and green colors are displayed on your screen. Check the example shown in the Gamma window, and click Next.

Step 10: In the next window, move the slider to adjust the visibility of the faint dots. The lower the visibility of the dots the clear your colors are. If you are unable to understand the difference compared to the previous page, click Reset to try again, or click Next to continue.

Step 11: Follow the next display control for adjusting the brightness of your monitor. It’s suggested to calibrate the brightness in a natural light environment for the best results. If you don’t have the option to adjust brightness (especially for laptops), then click on Skip brightness and contrast adjustments. Else, click Next.

Step 12: Check the examples of the three levels of brightness in the next window and click Next.

Step 13: In the next window, check further example and click Next when complete.

Step 14: Follow the same process for adjusting the contrast, as you did for brightness.

Step 15: Check further example, and click Next when complete.

Step 16: Finally, you come to the Color Balance wizard. You can adjust your monitor’s color accuracy when showing a specific shade of gray. Click Next to start.

Step 17: Move the sliders to get an accurate color balance. Click Next when done.

Step 18: Once you are done with the calibration, you can click on the previous calibration and current calibration buttons in the next window to compare the earlier settings with the current calibrations. If not happy, go back and make changes. If you are satisfied with the changes, click Finish to save the changes or Cancel to keep the previous calibrations.

That’s it! You are done calibrating your Windows 10 monitor colors.