Windows 11, just like the other Windows versions, allows you to see the list of available WiFi networks if you click on the WiFi icon. However, if for some reason you do not want to see a specific WiFi SSID in your WiFi networks list, you can easily do so by following a very few steps.
But first of all, since the UI has changed drastically for Windows 11, let’s see how you can view the list of available WiFi networks, that you can connect to, in Windows 11.
How to Hide the SSID of a particular WiFi Network
How to View the Available WiFi Networks
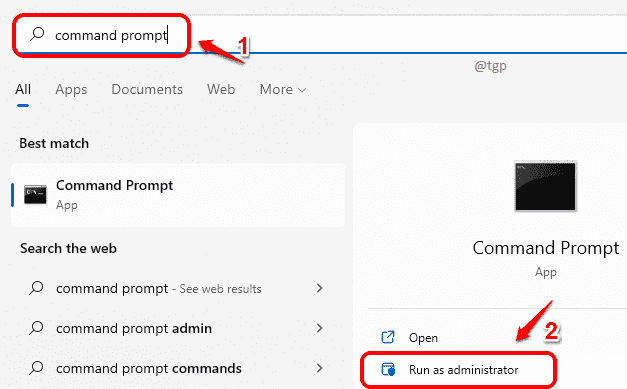
Step 1: Firstly, click on the Search icon in the taskbar.
Step 2: In the search bar, type in command prompt. Now click on the Run as administrator option.
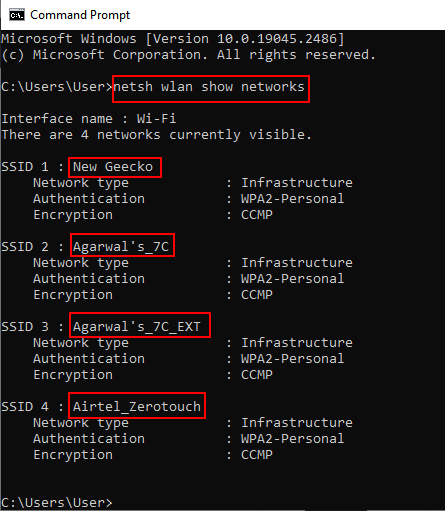
Step 3 – Copy and paste the command given below to show list of available networks on your computer
netsh wlan show profiles

Step 4 – Now, Copy and note down the SSID name you want to block.
Hide Selected WiFi SSID from Networks List
Now, type in or copy paste the following command and hit Enter key.
netsh wlan add filter permission = block ssid = WIFI_NETWORK_NAME networktype = infrastructure
Note: Replace WIFI_NETWORK_NAME with the name of the network that you want to hide.
E.g: netsh wlan add filter permission = block ssid = Oreo networktype = infrastructure
Show Back the Hidden WiFi SSID
Now, if you want to unhide the WiFi network that you just hid, you can type in or copy and paste the following command in the command prompt. Once done, hit Enter key.
netsh wlan delete filter permission = block ssid = WIFI_NETWORK_NAME networktype = infrastructure
Note: Replace WIFI_NETWORK_NAME with the name of the network that you want to unhide.
E.g: netsh wlan delete filter permission = block ssid = Oreo networktype = infrastructure
Please tell us in comments whether the method worked for you.

