How To Hide Your Personal Info From The Windows 10 Login Screen:- When you boot your Windows 10, your email id will be shown to you at the login screen. You need to enter your password to log in. If you are at a private place, then this wouldn’t be an issue for you at all. But let’s say that you are a teacher and that your laptop is connected to a projector. You definitely wouldn’t appreciate your email id being displayed for everyone to see till you walk towards your laptop and enter the password to log in. If you are in any such situation and are looking for ways to stop Windows 10 from displaying your user data on its login screen, you are in right place. Read on, to learn how to hack this simple trick.
Make Change In Settings If You Have Got The Anniversary Update
With the Windows 10 anniversary update, disabling the user data from the login screen is very simple. You just need to turn a toggle button off for that.
STEP 1
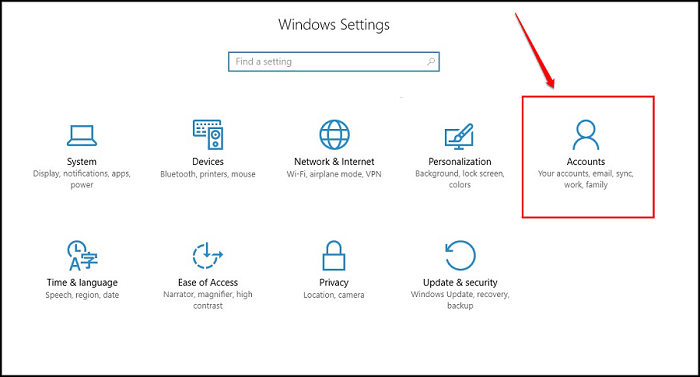
- Open the Start menu and click on the Settings app icon to launch it. Once the Settings app launches, click on the Accounts tile from the list of options available.
STEP 2
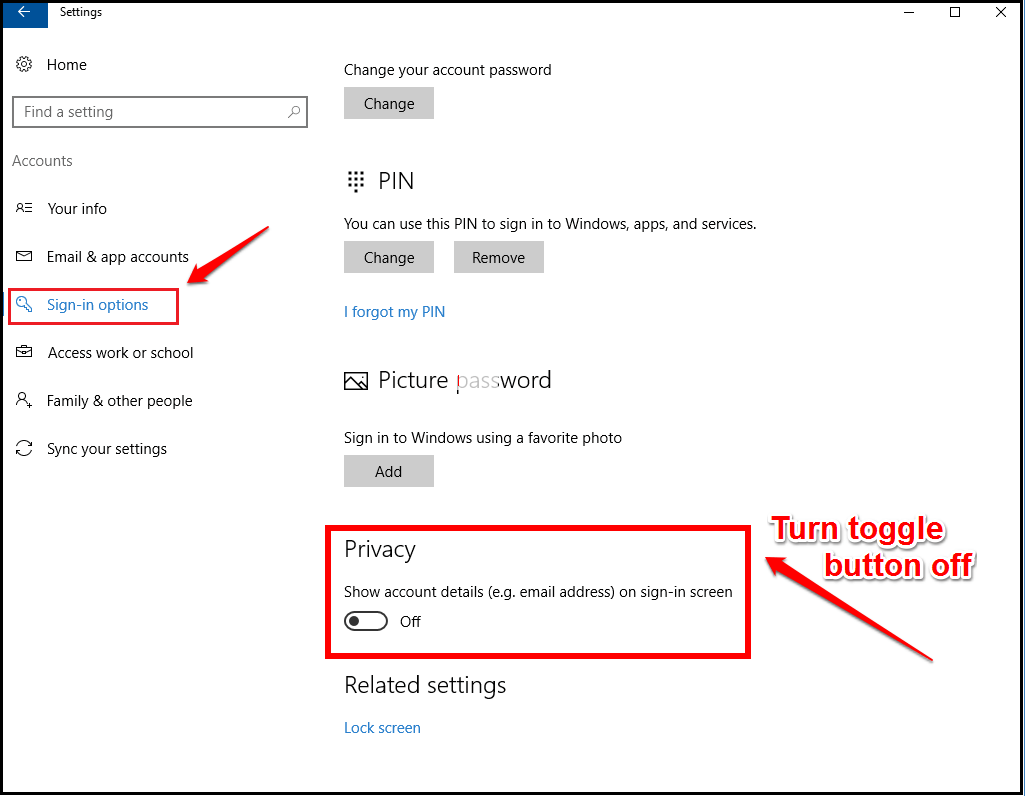
- Under the Accounts settings, find the option named Sign-in-options and click on it. In the right window pane, you will find a section named Privacy. Under the Privacy section, turn off the toggle button corresponding to the option Show account details (eg email address) on sign-in screen. That’s it.
Change Registry Editor Entries If You haven’t Got The Anniversary Update Yet
STEP 1
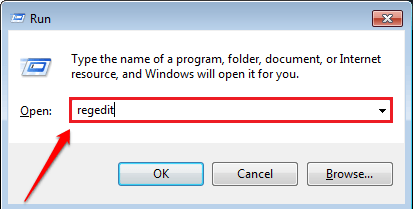
- Press WIN+R keys together to launch the Run dialog box. When it opens up, type in regedit and hit Enter key.
STEP 2
- The Registry Editor window opens up. As next, navigate to the following path:
HKEY_LOCAL_MACHINE\SOFTWARE\Microsoft\Windows\CurrentVersion\Policies\System
- Once you are at the path specified, please make sure that the path is correct as shown in the following screenshot. Highlight the System key by clicking on it. Now in the right window pane, look for an entry value by the name dontdisplaylastusername. If you can’t find that value, refer to step 4 to learn how to create a new DWORD value. Once you have created it, you can name it as dontdisplaylastusername.
 STEP 3
 - Double click on the dontdisplaylastusername to modify its Value data. Enter 1 as the value in the Value data field and hit the Ok button.

STEP 4
- As next, look for the DWORD value by the name DontDisplayLockedUserID. If you can’t find it, right click on an empty space in the right window pane, click on New and then click on DWORD (32-bit) value.

STEP 5
- Name the newly created DWORD value as DontDisplayLockedUserID. Double click on it to modify its Value data.

STEP 6
- Set the value in the Value data filed as 3. Click on Ok button once you are done. You are done.

Restart the system for the changes to take over. See if the methods worked for you. If not, please leave comments, we would be happy to help. Stay tuned for more tricks, tips, and hacks.


