How To Stop Whatsapp From Sharing Your Data With Facebook For Ad Targeting:- The world’s most popular chat application, Whatsapp, has changed its terms and policies by a bit. According to the new terms and policies, if you hit the Agree button without reading the policies completely, your data will be shared by Whatsapp with its parent company Facebook. As Whatsapp and Facebook says, these data will be used to improve the user experience. To put it simply, your data will be used for ad targeting. If you do not want this to happen, you have to stop it from happening. Read on, to learn how to make that happen.
Method 1 – Read Before You Click On Agree Button
STEP 1
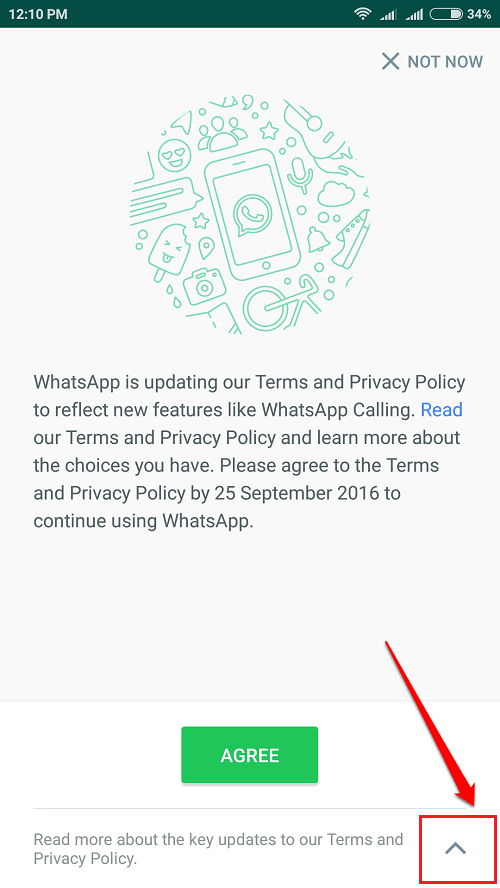
- After you update Whatapp, when you launch WhatsApp, you will be shown the following screenshot. Do not click on the Agree button yet. There will be an Up Arrow button. Click on it to read more about the new terms and policies of Whatsapp.
STEP 2
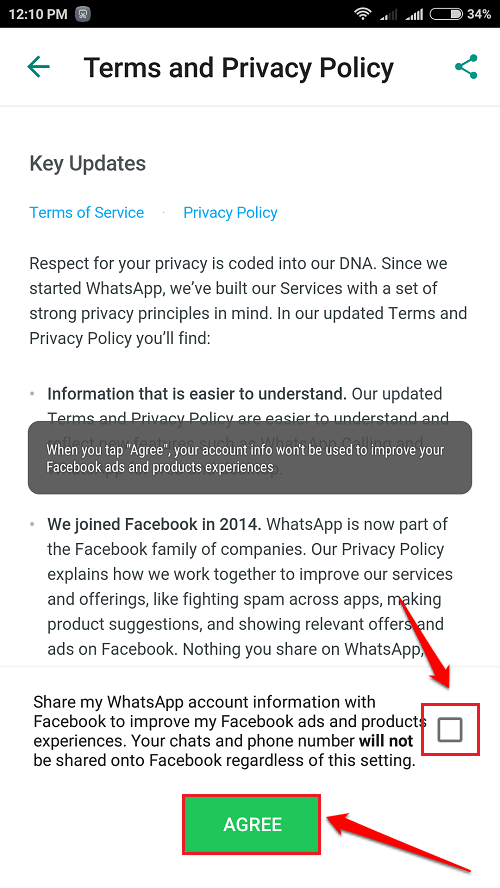
- In the next screen, there will be a checkbox that says Share my Whatsapp account information with Facebook to improve my Facebook ads and products experiences. Your chats and phone number will not be shared onto Facebook regardless of this setting. Uncheck this checkbox to prevent Whatsapp from giving your data over to Facebook. Once you are done, hit the Agree button.
Method 2 – Change Settings
Even if you have accidently clicked on the Agree button without reading the terms and policies, you can still change them from the Settings.
STEP 1
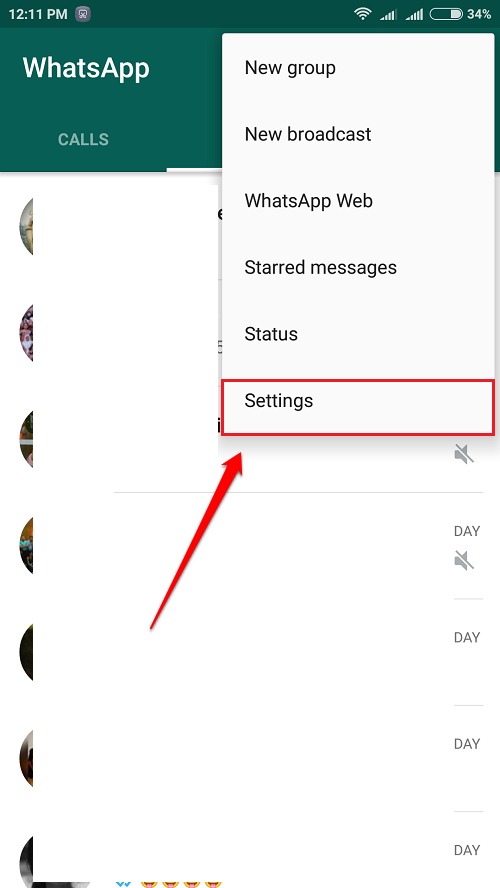
- Launch Whatsapp and click on the 3 Dots icon at the top right corner. From the context menu that gets expanded out, find and click on the Settings option.
STEP 2
- As next, click on the Account option.
STEP 3
- Under the Account settings, you will be able to see a checkbox that says Share my account info. Uncheck this checkbox.
STEP 4
- You will then be asked for confirmation whether you are sure that you do not want Whatsapp to share your data with Facebook. Click on DON’T SHARE button if you do not want your data to be shared. Remeber that this action cannot be undone.
STEP 5
- Now if you check again, you will be able to see that the Share my account info checkbox is gone.
Hope you found the article useful. If you have any doubts regarding any of the steps, please leave comments, we would be happy to help. Stay tuned for more tricks, tips, and hacks.


