Google Chrome is undoubtedly one of the most popular browsers across the world. While it comes with a lot of advanced features, is easy to use, and offers some great extensions to try, it comes with its own set of problems too. It can sometime behave extremely annoying while in the midst of an important work.
For instance, you may come across strange errors, it can slow down, and even totally stop responding even as you keep clicking on it. Worst still, it doesn’t even shut down unless you use the Task Manager. So, how do you deal with this issue. We have a better idea. Let’s get into the solution.
Method 1: By Uninstalling Chrome Via Settings App and Reinstalling
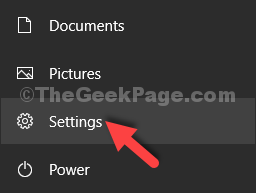
Step 1: Click on the Start button on your desktop and click on Settings located above the Power option.

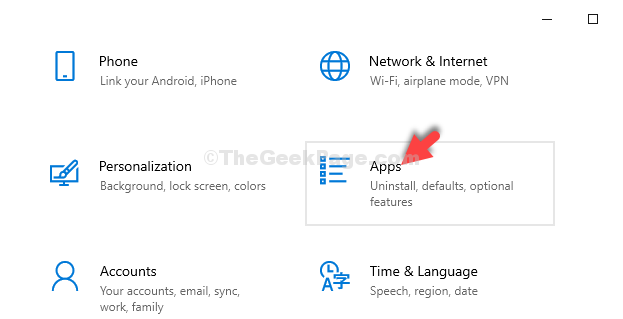
Step 2: In the Settings window, click on Apps.

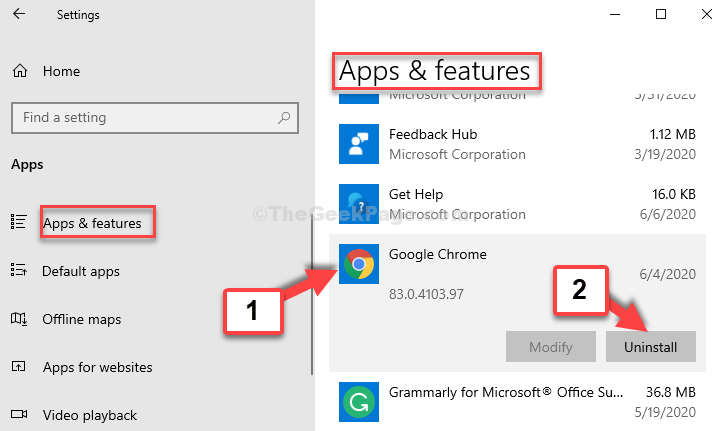
Step 3: In the Apps window, under Apps & Features section on the right side, scroll down and look for Google Chrome. Select it and click on Uninstall.

Step 4: In the prompt that appears, click on the Uninstall button again.

Click Yes on the UAC prompt to continue with uninstallation process and wait for it to get uninstalled.
Alternatively you can uninstall chrome via control panel.
Press Windows key and R key together from keyboard to open RUN command box
Type appwiz.cpl in it and click OK

Find Google Chrome from the list, select it and click on Uninstall at the top.

Now, Reinstall Google Chrome
Step 1: Go to any other browser (since you have already uninstalled Chrome) and type google.com/chrome/ in the address bar and hit Enter.
As you reach the Google Chrome download page directly, click on the Download Chrome button in blue.

Step 2: Click on the Setup.exe file and wait for the download and installation to complete.

That’s all. Your Google Chrome is now reinstalled and you should be able to use it hassle free now.
Method 2: Rename chrome shortcut
1 – Search Chrome in Windows taskbar search.
2 – Now, Right click on it and choose open file location.

3 – Now, do a right click on Google chrome icon in the folder which just opened up, and then select Open file location again.

4 – Now, rename the Chrome.exe by adding a DOT at the end of chrome

5 – Now, Create shortcut of this new renamed chrome icon on desktop and now, click that to open chrome.

Method 3: Reset Chrome by renaming default folder
Step 1: Press the Windows + R key together on your keyboard to open the Run command. Now, type %localappdata% in the search box and hit Enter to open the Local App Data folder.

Step 2: In the Local App Data folder, navigate to the below path step by step:
- Chrome
- User Data

Step 3: Now, select the Default folder, right-click and select Rename.

Step 4: Now, rename the folder as Defaultold.

You are done. Now, you can restart Google Chrome and its should work fine.
Restart your computer for the changes to be effective. Your Google Chrome should work perfectly fine now.
Note: – All your bookmarks will get deleted using these methods. So, if you want to preserve bookmarks, go to chrome://bookmarks/ in chrome. Now, click on export to export the bookmark. At the end of this method, just import old bookmark.
If you can’t open chrome even for exporting, try opening your PC in safe mode and then export.
