The most common whine with Windows systems is that users report that it gets very slow at times. Other than that it hangs or freezes a lot. Windows 10 is much better than its predecessors in this matter, but still has a long way to go.
Whenever we face a situation in which the system is hanging or freezing, the first thing to be checked is the disk utilization in Task Manager. Most probably, it would be nearing 100%. This means that the RAM of the computer is being overutilized for some reason.
Check the process which is causing high disk utilization in the Task Manager. If the process is WUDFHost.exe, we could use this troubleshooting guide to fix the issue.
What is WUDFHost.exe?
WUDFHost.exe stands for Windows User Driver Framework Host. First brought up in Windows Vista, the process is used to provide better stability to external devices like sensors, MTP devices, portable devices, etc.
We could try the following steps to resolve the issue:
Solution 1] Check which device is pushing the process
Just like every process in the Task Manager, the WUDFHost.exe process is also triggered by an action. Here the action is whenever an external device that is dependant on the process is connected to the system. If that device is in use, even the more reason.
Since the device would most probably be peripheral, try disconnecting all the external devices other than those which are critically necessary (eg. keyboard, mouse, etc). Now reconnect each device one by one and check which one causes the disk utilization to shoot up.
It may happen that despite disconnecting all the devices, the disk utilization still remains high.
Solution 2] Increase the RAM
If you are using a Windows 10 system, the ideal RAM would be 4GB instead of the recommended 2GB. 2GB of RAM would slow down the system and cause such issues. Thus, it is highly recommended to increase the RAM.
Solution 3] Update the drivers of the troublesome device
If we find any specific device which is causing the issue in solution 1, instead of disconnecting it forever or replacing it, we could first try updating its drivers.
Here’s the procedure to update drivers.
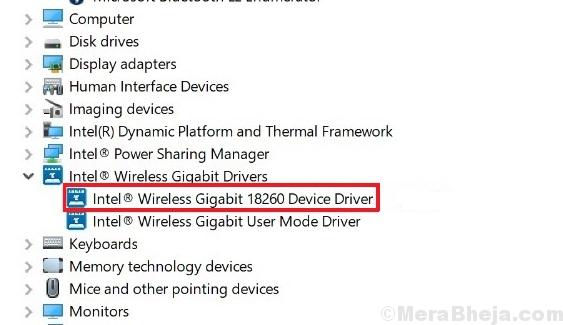
Solution 4] Disable Intel Wireless Gigabit 17265 User mode driver
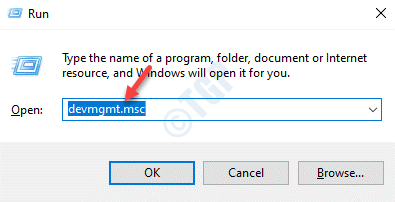
1] Press Win + R to open the Run window and type the command devmgmt.msc. Press Enter to open the Device Manager window.
2] In the Network adapters section, find the Intel Wireless Gigabit 17265 User mode driver.
3] Right-click on it and select Disable device.
4] Restart the system.
Solution 5] Disable NFC settings
Try disabling the NFC settings on your computer.
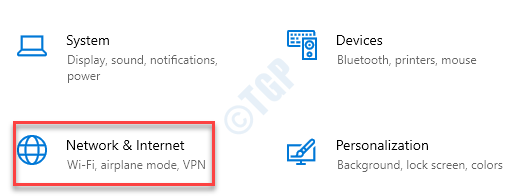
1. Press the Windows key+I to access the Settings window.
2. Once you have opened the Settings window, click on “Network & Internet” settings to access it.

3. Here, click on the “Airplane Mode” on the left-hand side.
4. Toggle the “NFC” settings to “Off“.
Once you have switched the NFC settings, restart the system.
Open the task manager and check again.
Solution 6] Disable the portable devices
Portable devices (like smartphones, flash storages) attached to your machine can cause this problem.
1. Press the Windows key+R.
2. After that, type “devmgmt.msc” and click on “OK“.

3. When the Device Manager opens up, expand the “Portable Devices“.
4. Right-click on the devices one-by-one and click on “Disable device” to disable them one by one.

5. Click on “Yes” to disable the device.

After disabling the devices, check the CPU usage again.
This should have fixed your problem.
Solution 7] Run SFC scan
If there is any problem of corruption in the system files, SFC and DISM can detect and fix the issue.
1. You need to press the Windows key+R keys
2. Then, type this code and hit Ctrl+Shift+Enter keys together.
cmd

3. Paste this code in the terminal. Thereafter, hit Enter to run the scan.
sfc /scannow

SFC scan will commence.
4. To launch a DISM scan, paste this command in the terminal and then hit Enter.
DISM.exe /Online /Cleanup-image /Restorehealth

Check if this works for you.
