Many users using Virtual Box noticed seeing The instruction at 0x* referenced memory at 0x* error in their system. It is seen when the user tries to open the Virtual Box in Seamless or Full Screen Mode.
The complete error is as shown below-
The instruction at 0x* referenced memory at
0x* . The memory could not be read.
Note: The Memory location would vary everytime you restart the system.
Potential Causes for this issue :
- RAM Errors in the System.
- Third-party applications intervening with the operation of Virual Box.
In this article, we have compiled different ways to fix the above problem.
Fix 1: Run an SFC scan
If your system files have been corrupted, run an SFC scan to repair those files.
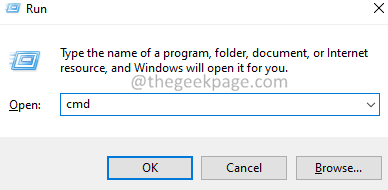
1. Open the Run Terminal using Windows and R.
2. Type cmd and hold the keys Ctrl+Shift+Enter to open the Command Prompt in Admin mode.
3. If you see a User Access Control window, seeking permissions, click on Yes.
4. In the Command Prompt window that opens, enter the below command, and press Enter.
sfc /scannow
5. The scan will take some time. Wait patiently.
6. Once the scan is finished, restart the system.
Fix 2: Increase the Virtual Memory
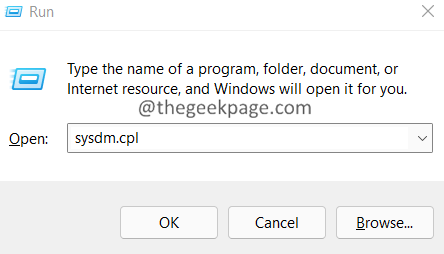
1. Open the Run Dialog using Windows+R.
2. Type sysdm.cpl, and press Enter.
3. In the System Properties window, go to the Advanced tab.
4. Click on the Settings button.
5. The Performance Options window opens. Click on the Advanced tab.
6. Go to the Advanced tab.
7. Under the Virtual Memory section, click on Change.
8.In the Virtual Memory window that opens, check the option, Automatically manage paging file size for all drivers.
9. Check the number of partitions. If you have 1 partition,
- Set the initial size to 1.5 times the total available RAM.
- Set the Maximum Size to 3 times the initial size.
For example, if you have 8GB RAM,
- The initial Size should be 8*1.5*1024 MB. That is 12288 MB.
- The final Size should be 36864MB.
10. Click on the Set button.
11. Press the OK button twice to save the changes.
9. Restart the system.
Fix 3: Run the Windows Memory Diagnostics tool
1. Open Run Dialog using Windows+R.
2. Type mdsched.exe, press Enter.
3. In the Windows Memory Diagnostic window that shows up, click on Restart now and check for problems.
4. Once the tool completes running, restart the system.
Fix 4: Boot the system in Safe Mode
1. Open the Run Dialog using Windows+R.
2. Type the command ms-settings:recovery, and press Enter.
3. In the appearing window, click on the Restart no button next to Advanced startup.
4. In the appearing window, locate Troubleshoot using the arrows on the keyboard.
5. Click on Advanced Options.
6. Click on the Startup Settings.
7. Click on the Restart.
8. Press the F5 key from your keyboard and hit Enter.
9. Now, try opening Virtual Box in Seamless/Full-screen mode. If it works perfectly, it means that some application is interfering with the operation of Virtual Box.
10. To figure that out, clean boot your system.
11. Open the Run Dialog using the keys Windows+R.
12. Enter msconfig and hit Enter

13. In the General tab, check the Selective startup option.
14. Ensure that Load system services and Load startup items are checked.

15. Go to the Services tab
16. Tick on Hide all Microsoft services and then click on Disable All button
17. Click on Apply and then click on OK
18. Restart your computer.
19. Check if the issue is still found. If it is not, then enable the applications one at a time and restart the system to check if the enabled application caused the issue.
20. Repeat the process till you figure out the application that is causing the problem.
21. Once you find the application causing the problem. Uninstall that application.
Check if you see the error. If you do, try the next fix.
Fix 5: Update the .Net Framework
1. Open the Microsoft .NET Download Page
2. Now, click on the required version.
3. Now, click on Download .NET Framework 4.8 Runtime button.
4. Once the download is complete, double-click on the file and follow the on-screen instructions to install it on your system.
Fix 6: Turn Off the Auto-hide taskbar option
1. Right-click on your taskbar and choose Taskbar settings.
2. In the appearing window, scroll down and click on Taskbar behaviors.
Fix 7: Update your Graphics driver
1. Open the Run Terminal with the keys Windows and R.
2. Enter devmgmt.msc, and hit Enter

3. In the Device Manager window, Double-click on the Display adapters
4. Right-click on the display device and choose Update driver
5. In the Update Drivers window, click on Search Automatically for Drivers
6. You will be notified if any updated version of the Driver is found.
7. Follow the on-screen instructions and complete the updation process.
Check if this helps.
That’s all.
We hope this article has been informative. Kindly comment and let us know the fix that helped you solve the error.
Thank you for Reading.


