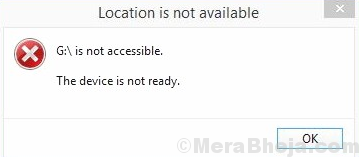
We all know how necessary external hard drives and USB flash drives are. Usually, they are simply a plug and play device and work well. Most brands could be trusted for your data. However, at times, users get the following error while trying to connect their external hard drives:
Cause
The cause behind the problem could be a hardware failure or an issue with the drivers or a malware or the fact that the device might not be formatted properly.
Try the following troubleshooting steps one by one to resolve the issue:
Solution 1] Try connecting the external drive to a different PC
To isolate whether the issue is with your system or the external drive, try connecting the external drive to a different PC. If it works fine with the other PC, then we would have to proceed to troubleshoot on the primary system. Else, you might need to replace the external drive.
Solution 2] Check the USB ports
At times, the USB ports might be loose because of which we might face this error. A good method for isolating the case would be to connect the external drives on different USB ports. All of them couldn’t be bad. Other than this, you could try other external drives with the same USB port to check if the port is working. If yes, proceed to the next solution.
Solution 3] Update Windows
Updating Windows updates a lot of functions in the system. It might be helpful in resolving this problem. Here’s the procedure to update Windows.
Solution 4] Update the Disk drive drivers
We could update the drivers for the external drive. It is under the Disk drives section in the Device manager. Here’s the procedure to update drivers.
Solution 5] Run the Hardware and devices troubleshooter
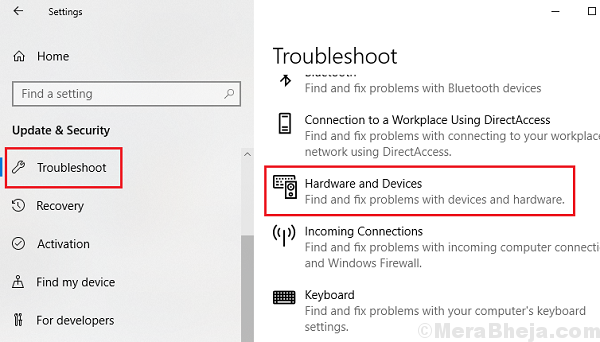
The in-built Hardware and devices troubleshooter, if run could check issues with the external hard disk and fix it, if possible.
1] Click on the Start button and then the gear-like symbol to open the Settings page.
2] Go to Updates and Security and then to Troubleshoot.
3] Select the Hardware and Devices troubleshooter.
4] Restart the system once the troubleshooter finishes its job.
Solution 6] Run CHKDSK
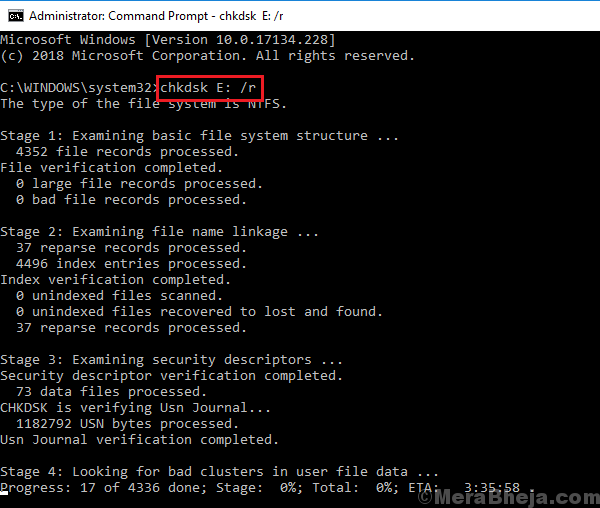
1] Search for Command Prompt in the windows search bar and right-click on the icon. Select Run as administrator.
2] Type the following command in the Command Prompt window and press Enter after each command:
chkdsk X: /r
chkdsk X: /f
Where X: is the drive letter of the external drive.
3] Restart the system once they complete the process.
Solution 7] Change the Drive letter of the external drive
At times, the issue could be with a drive letter, moreover if it conflicts for another device. The drive letter assigned for the external device is usually used by multiple devices. This should be rectified after using the Hardware and devices troubleshooter as suggested in Solution 5, but if it doesn’t work, here’s the fix:
1] Press Win + R to open the Run window. Type the command diskmgmt.msc and press Enter to open the Disk management window.
2] In the Disk management window, right click on external drive and select Change Drive Letter and Paths and then click on Change.
3] Select the radio button at Assign the following drive letter and select the appropriate drive letter from the drop-down menu.
Solution 8] Format the external device on another PC
Since we cannot access any function on the external drive on your PC, connect it to another PC to format it. The procedure is as follows:
1] Go to File Explorer >> This PC.
2] Right-click on the external drive and select Format.
3] Check the checkbox corresponding to Quick format and click on Start.
4] Restart the system.
Hope it helps!


