Some Windows 10 users, who use NVIDIA graphics card on their computer, are complaining about an issue they are facing with NVIDIA driver. According to these users, when they are trying to update their NVIDIA driver, on their computer the process is halted with an error message “Supported NVIDIA driver is not installed on your system“. Now, if you are facing similar kind of situation at your end, don’t worry. This problem can be solved with very easy fixes.
Fix-1 Install NVIDIA graphics panel from MS Store-
You can use the NVIDIA graphics panel app from MS Store as an alternative to the native desktop app.
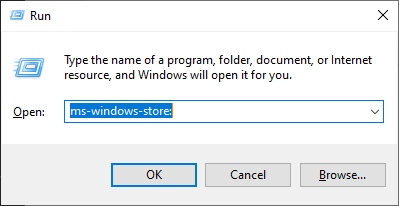
1. Press Windows Key+R to launch Run window.
2. Then, write this command and hit Enter to access the Microsoft Store.
ms-windows-store:

2. In the Microsoft Store window, click on the search box on the top-right corner and type “NVIDIA“.
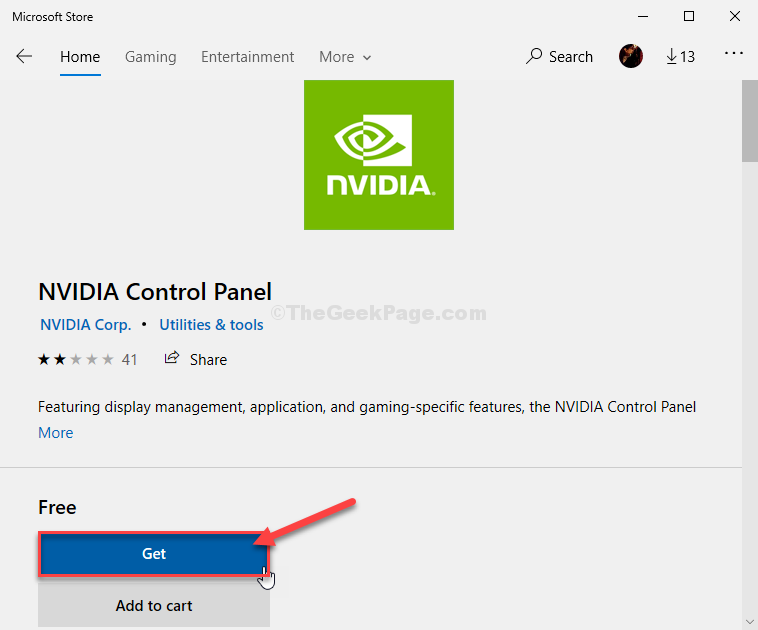
3. Click on the “NVIDIA Control Panel” in the elevated search result.

4. Now, click on “Get“.

5. After that, click on “Install” to install the application on your computer.

Wait for a while to complete the download process.
6. Now, click on “Launch” to launch the NVIDIA Control Panel app.

Check if you are facing the same issue or not.
Fix-2 Modify registry-
Modifying the registry will fix the issue on your computer.
1. To open up the Run window, press ‘Windows key+R‘.
2. Then, type this run-code and press Enter.

3. Expand the left-side headers in this way-
Computer\HKEY_LOCAL_MACHINE\SYSTEM\CurrentControlSet\Services\nvlddmkm\FTS
4. On the right-hand side of the Registry Editor window, scroll down and check for the key “EnableRID69527“.
If you can’t find the above-mentioned key, follow these steps to create a new key-
a. Right-click on a space and then click on “New>” and then click on “DWORD (32-bit) Value“.

b. Name the key as “EnableRID69527“.
5. Now, double-click on “EnableRID69527” to modify it.

6. Set the ‘Value data:‘ to “1“.
7. Now, click on “OK” to save the changes.

Close Registry Editor window.
Restart your computer to let this change take effect.
After restarting your computer, try to start the NVIDIA Control Panel application.
Fix-3 Run a registry script-
If modifying the registry on your computer didn’t help you at all, try these steps.
1. Download ‘Nvidia-control_panel_app‘ on your computer. Click on “Download“.

2. Press Windows key+E to open the File Explorer window.
3. In the File Explorer window, go to the download location on your computer.
4. Right-click on “Nvidia-control_panel_app” registry and then click on “Merge“.

5. If there is a warning message, click on “Yes“.

Reboot your computer.
After rebooting your computer, check out Nvidia Control Panel application.
Fix-4 Install the NVIDIA driver yourself-
Manually installing the driver may solve this issue.
1. Search “Nvidia drivers” from a browser.
2. Once the search results appear, click on “Download Drivers|NVIDIA“.

3. Then, choose “Product type“, “Product series“, “Product“, “Operating System“, “Windows Driver Type“, “Download Type” specifically according to your driver specifications.
4. Once you have done so click on the “Search” to search for the latest driver.

5. Then, click on “Download” to download the driver.

6. Once the driver is downloaded, go to the download location.
7. Then, double-click on it to start the installation process of the driver.

8. After that, click on the “NVIDIA Graphics Driver and GeForce Experience” option.
9. Next, click on “Agree and continue“.

10. Under Installation Options, choose “Express (Recommended)”
11. Then, click on “Next” to start the installation process.

12. Once the installation is done, click on “Close” to close the NVIDIA Graphics Driver Installer window.

Restart your computer to finish the installation process.
After rebooting your computer, try to open the NVIDIA Control Panel on your computer. It will work for sure.