Some Windows 10 users are reporting about a problem since they updated their Windows 10 device. Their computer keeps freezing at the blurry Log In screen as they are trying to sign in on their device. If you are facing the same problem, don’t worry. There are fixes available to solve the problem. Follow these fixes to solve your problem.
Deleting the contents of the Cache folder can solve your problem, and that can be done in two ways-
1. Delete contents of the Cache folder using command prompt from Troubleshooter.
2. Delete contents of the Cache folder in Safe mode.
Method-1 Delete contents of Cache folder (using Command Prompt)-
1. For this, you have to go to recovery mode. To reach recovery screen , you have two options. If you are able to login to the system, just go to settings > Update & Security > Recovery > Restart Now (Under Advanced Startup).
If you are not being able to login, then try force restart AUTOMATIC REPAIR method.
- Make sure Your PC is Shutdown completely.
- Now, press the power button for 5 seconds to turn it on.
- As soon as the PC screen turns on and any logo appears on screen, press the power button and keep it holding for 5 seconds continuously.
- Repeat this process 3 to 4 times until you reach Preparing Automatic Repair screen.
- Then Diagnosing your PC message will be displayed.
- Then you will reach a screen which says Restart and advanced options
- Click on Advanced Options
2. On next screen click on the “Troubleshoot“.

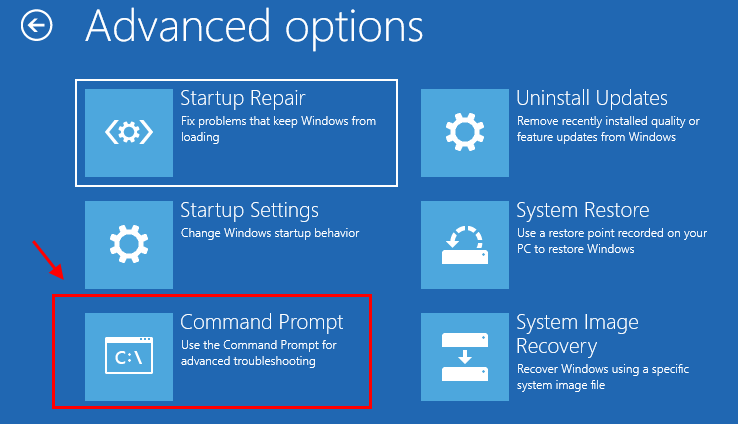
3. Then click on “Advanced options“.

4. Now, within the Advanced options window, click on the “Command Prompt“.

5. Now, choose the account with administrative privilege. Enter your account password and click on “Continue“.

6. Now, you have to redirect to the Windows drive( generally it is C:/ but it can be different for you). Just input the drive letter ( like “C:/“) and hit Enter.

7. Now, copy and paste this below-mentioned command and hit Enter.
CD %windir%\system32\config\systemprofile\appdata\local\microsoft\windows\caches
8. Type “DIR” and hit Enter. Now, try to find “.db” files.
If you don’t see any files in the folder, then you can execute these below-mentioned steps .
9. Now, type “DEL *.*” and hit Enter.

Now, close Command Prompt. Reboot your computer back to normal mode and check if your computer still keeps stalling at the login screen.
There is another process of deleting the cache- by rebooting your computer to safe mode and then deleting the cache files.
Method-2 Delete the contents of Cache folder in Safe mode-
You can delete the cache folder in Safe mode. If the previous process has not worked out for you, then following this method you can easily delete the contents of the Cache folder. At first, you have to boot your computer to Safe mode, then you can empty the Cache folder.
If you are not being able to login, then try force restart AUTOMATIC REPAIR method.
- Make sure Your PC is Shutdown completely.
- Now, press the power button for 5 seconds to turn it on.
- As soon as the PC screen turns on and any logo appears on screen, press the power button and keep it holding for 5 seconds continuously.
- Repeat this process 3 to 4 times until you reach Preparing Automatic Repair screen.
- Then Diagnosing your PC message will be displayed.
- Then you will reach a screen which says Restart and advanced options
- Click on Advanced Options
5. After that, click on “Advanced options“.

6. Now, within the Advanced options window, click on the “Startup Settings“.

7. Now, click on “Restart” to restart your computer to safe mode.

8. Now, as your device is rebooting, you will be shown options of Startup Settings.
9. Then, press ‘4‘ to “Enable Safe Mode“.

In Safe mode, the background of your desktop will be black.
10. Now, open the File Explorer just by pressing Windows Key+E.
11. Navigate to this folder location-
Local Disk(C:) > Windows > system32 > config > systemprofile > appdata > local > microsoft > windows > caches
12. Now, empty the ‘Caches‘ folder.

If you don’t see any files in the folder, then you can execute these below-mentioned steps and then proceed to the Step-9.
a. Press Windows Key+R to launch Run, and then copy and paste this command and hit Enter to go the location of the cache folder of the local user account.
%localappdata%\microsoft\windows\caches

b. Now, press Ctrl+A to select all the files of the directory, and then press Shift+Delete to delete all of them.

Reboot your computer back to normal mode. Your computer should not be stalled at the blurry log in screen.