Minecraft can run on almost any PC or laptop. Though the system requirements are very minimal to run the game, it can be challenging to reduce the LAG in Minecraft. Without proper settings, you can’t enjoy the recent ray-tracing update from Minecraft. So, in this article, we have shown and given the most appropriate settings for your rig to enjoy Minecraft without any lag!
Best settings for Minecraft PC
Before we dive deep into the game settings, let’s check whether your system satisfies the bare minimum to recommend the requirements of Minecraft PC.
Minimum System Requirement to play Minecraft 1080p
You need these bare minimum specs to play Minecraft in lower settings.
| Operating System | Windows 7 and up |
|---|---|
| CPU | Intel Core i3-3210 3.2 GHz / AMD A8-7600 APU 3.1 GHz or equivalent |
| GPU | Intel HD Graphics 4000 or AMD Radeon R5 series | NVIDIA GeForce 400 Series or AMD Radeon HD 7000 series |
| HDD | 180 MB to 1 GB available space |
| Memory | 4 GB RAM |
Recommended System Requirement to play Minecraft 1440p or 4K
| Operating System | 64-bit Windows 10 |
| CPU | Intel Core i5 4690 | AMD A10 7800 or equivalent |
| GPU | NVIDIA GeForce 700 Series | AMD Radeon Rx 200 Series |
| HDD | 4 GB (SSD recommended) available space |
| Memory | 8 GB RAM |
Now, let’s look at how to set Minecraft to the best settings so that you experience no lag at all. We have described the best optimum components for your system.
Fix 1 – Adjust the video settings
There is an optimum video setting that you can apply to experience next to zero lag in Minecraft.
Step 1 – Launch Minecraft, if you haven’t already.
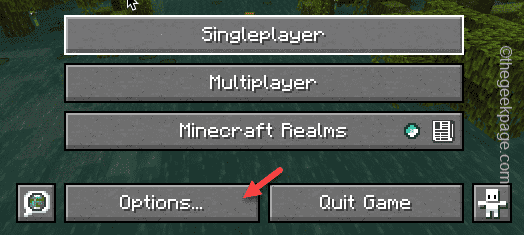
Step 2 – Then, go ahead to “Options” on the main homepage. [If you are in the middle of a world, then, press the Esc keys and tap “Options“. ]
Step 3 – Next, tap “Video Settings” to open it up.
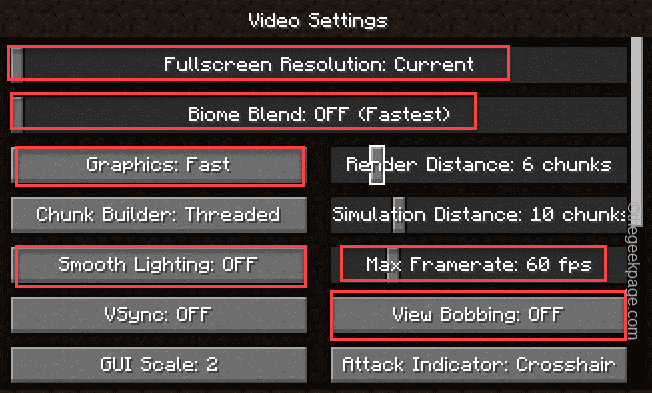
Step 4 – You will see all the components of the game settings here. Set them as we have mentioned below –
- Fullscreen Resolution – Current
- Biome Blend – Off
- Graphics – Fast
- Chunk Builder – Threaded
- Smooth Lighting – Off
- VSync – Off
- GUI Scale – 2
- Render Distance – 6 chunks
- Simulation Distance – 10 chunks
- Max Framerate – 60 fps
- View Bobbing – Off
Step 5 – After setting the video settings, scroll down to find the later part of the settings.
Step 6 – There, set the second half of the video settings like this –
- Cloud – Off
- Fullscreen – Off
- Particles – Minimal
- Mipmap Levels – 4
- Entity Shadows – Off
- Distortion Effects – 100%
- Entity Distance – 100%
- FOV Effects – Off
Step 7 – Once you have changed all the settings, tap “Done” to save the changes.
Now, just play Minecraft, and load up a realm or a world that you have created.
You won’t face any further lags at all.
Fix 2 – Give extra RAM to Minecraft
You can provide extra RAM to Minecraft Launcher so that it doesn’t lag at all.
Step 1 – You have to find out how much RAM your system has. You can easily do that by pressing the Win key+Pause Break keys together.
Otherwise, you can also go this way to find out the installed Physical RAM on your system –
Settings > System > About
Step 2 – On the About page, look for the Installed RAM in there. Like in our system, the Installed RAM is 16 GB.
Step 3 – Launch the Minecraft Launcher.
Step 4 – There, go to the MINECRAFT: JAVA EDITION on the left-hand pane.
Step 5 – Head on to the “Installations” tab. Then, click the three-dot menu and tap “Edit“.
Step 6 – On the Edit installation page, click on “MORE OPTIONS” to reveal further settings.
Step 7 – Look for the “JVM arguments“.
Step 8 – Now, this is very important. You will see the “-Xmx2G” argument.
Here, 2G denotes the 2GB RAM usage. You can set this to 4,8,16, etc.
Like – if you want to allot 8GB of free RAM, you have to use this JVM argument “Xmx8G“. Do not put a number beyond 75% of the Physical RAM. Better to allot 4GB or 8GB RAM.
Step 9 – Finally, click “Done” to save the changes.
Now, launch Minecraft from the Minecraft Launcher and let the game load up.
You will see a significant uplift in the performance and no lag whatsoever.
Fix 3 – Give Java process higher priority
You can set the Java process to a higher priority so that a higher amount of resources are allowed.
Step 1 – Right-tap the Windows icon and tap “Task Manager“.
Step 2 – Tap the ≡ on the left-hand side.
Step 3 – Go to the “Details” pane.
Step 4 – Then, select the “java” process and tap “Set priority” to “High” mode.
After setting this process to high mode, exit Task Manager.
Continue playing Minecraft and test whether you can see any lag or not.
Fix 4 – Clear out unnecessary tasks
Clear out any unnecessary tasks that is going in the background. This way, you can free up resources by killing any resource-hungry apps.
Step 1 – Press the Ctrl, Shift, and Esc keys to open the Task Manager.
Step 2 – Then, look for the programs that are running behind and consuming a high amount of resources.
Step 3 – Next, right-tap the app and click “End task” to kill those apps.
Close the Task Manager after this.
Now you can play Minecraft without any issues anymore.


