How To Fix DVD Not Working Issue In Windows 10:- The DVD driver can stop working because of various reasons. However, this issue can be solved effectively with the help of two solutions. One is by using the Command Prompt and another is by updating the DVD driver. Dive into the article to learn about these two solutions and to solve the issue by today itself without anybody’s help.
Method 1 – By using CMD
STEP 1
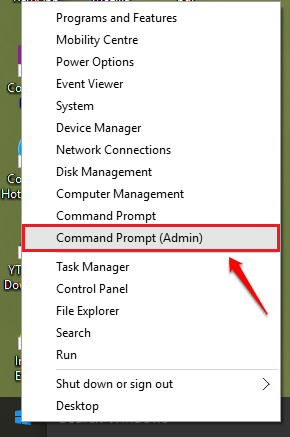
- Right click on the Windows icon and from the context menu that expands out, find and click on the option named Command Prompt(Admin). It is very important that you open the Command Prompt in the Administrator mode itself.
STEP 2
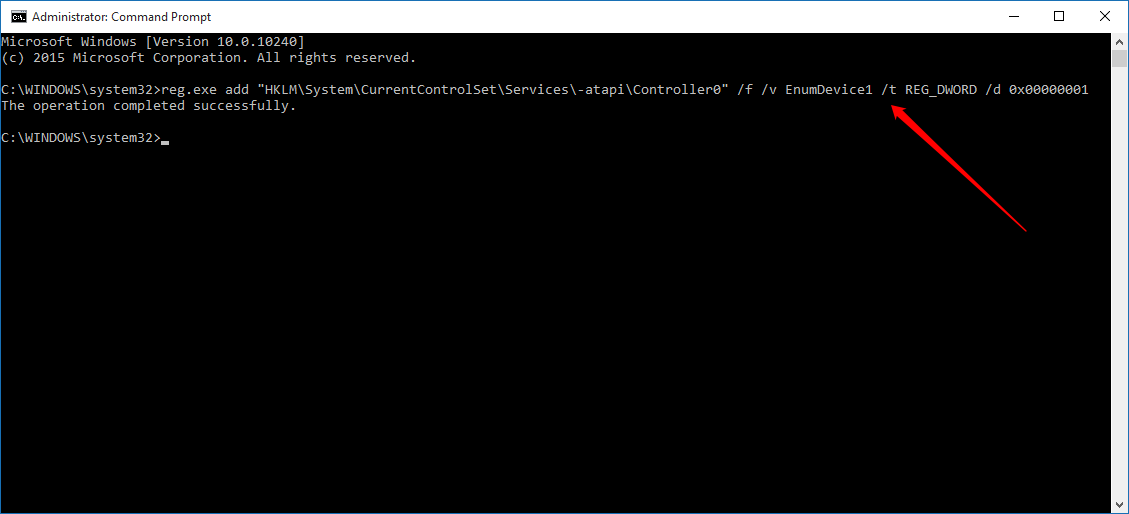
- Now copy-paste the following command into the Command Prompt and hit enter key. Do not try typing in the command instead of copy-pasting, as it could lead to errors.
reg.exe add "HKLM\System\CurrentControlSet\Services\atapi\Controller0" /f /v EnumDevice1 /t REG_DWORD /d 0x00000001
Method 2 – By Updating the Device Driver
STEP 1
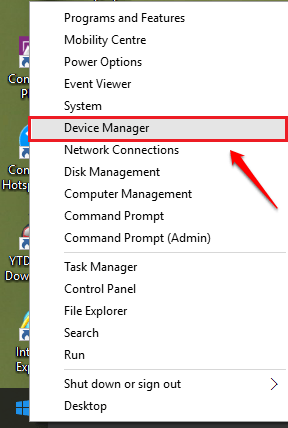
- Right click on the Windows icon and from the context menu that appears, find and click on the option named Device Manager.
STEP 2
- A separate window for Device Manager opens up. Now look for an entry named DVD/CD-ROM Drives and expand it by clicking on the associated side arrow. Right click on the DVD driver in use, and click on the Uninstall option.
STEP 3
- When asked for device uninstall confirmation, click on OK button.
STEP 4
- As next, click on Action tab and then on Scan for hardware changes as shown in the following screenshot.
STEP 5
- Now find the standard DVD driver just like before and right click on it. This time, click on the Update Driver Software option.
STEP 6
- Click on Search automatically for updated driver software option as shown below when asked.
Try out the above methods today itself to solve the DVD not working problem in Windows 10. Hope you found the article useful. Feel free to leave comments if you get stuck at any of the steps. We would be happy to help.


