Is your Windows 11 PC shutting down or restarting automatically when you are working or there are application crashes? Generally, such problems are seen due to corrupt system files on your computer.
When you download and install apps from unauthenticated sources, there is no guarantee that all the files will be present for the app to install and run without issues. Installing such apps with some files missing can cause issues during the installation process. At times it is seen that such apps get installed without issue but when you run them you see an error that says files are missing or corrupted. Interruption during app installation like system crashes, power disruption, or disruption in the network can cause system file corruption.
In this article, we have discussed some fixes that can help you resolve the issue of corrupted files on your Windows 11 computer.
Fix 1 – Run System File Checker (SFC)
1. Hit the Windows key and type cmd in the search box.
2. Right-click on Command Prompt in the search result and select Run as administrator.
3. Type the command given below and hit Enter.
sfc /scannow
4. Wait for some time for the System File Checker to verify the system files. Don’t interrupt this process and let the command prompt be open.
5. It identifies any problems and repairs the system files.
6. If the scan completes with a message that says any of the following then move over to the next fix and perform a DISM scan.
Windows Resource Protection found corrupt files but was unable to fix some of them
Windows Resource Protection did not find any integrity violations
7. If you see a message, that says the files were successfully repaired, then check if the problem is fixed.
Fix 2 – Use the Deployment Image and Servicing Management (DISM ) Tool
1. Press Windows and R key combination to open the Run dialog.
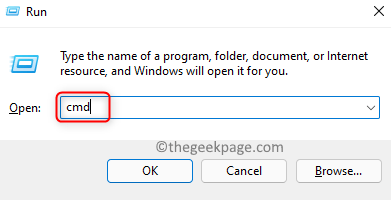
2. Type cmd and press Ctrl + Shift + Enter to open Command Prompt as administrator.
3. Execute the command below to perform a DISM scan.
DISM /Online /Cleanup-Image /RestoreHealth
4. DISM tool can take a few minutes to complete the repair process. It helps to fix any corruption issues that the SFC tool was unable to detect.
5. Restart your PC once the tool completes running. Check if the corruption issue is fixed.
Fix 3 – Perform SFC Scan in Safe Mode
1. Open Run using the Windows and R keys on your keyboard.
2. Type msconfig and hit Enter to open System Configuration.
3. In the System Configuration window, navigate to the Boot tab.
4. Select the option Safe Boot in the Boot options section.
5. Click on Apply and then on OK to apply and save the changes.
6. Restart your computer.
7. After your system restarts in safe mode, hit the Windows key and type cmd in the search box.
8. Right-click on Command Prompt in the search result and choose Run as administrator.
9. Type the command below and execute it.
sfc /scannow
10. Wait for the scan to look for corrupt files and fix them.
11. Once the scan completes, restart your PC in the normal mode by changing the System Configuration.
- Perform Steps 1 – 3 above.
- Unselect the option Safe boot in Boot Options.
- Click on Apply and then on OK.
- Restart your PC to start in the normal mode.
Fix 4 – Perform a System Restore
1. Press Windows + R to open Run.
2. Type rstrui and hit Enter to open System Restore.
3. In the System Restore window, either choose the recommended restore point or choose a different restore point.
Note: You can create a restore point if you have not created any till now. Follow the steps in this article to create a new restore point.
4. If you have previously created a system restore point, then select Choose a different restore point and click on Next.
5. Select the restore point that you want to use and click on Next.
6. Confirm the chosen restore point and click on Finish to start the process.
7. Wait for some time till the restoration process is completed. Check if the problem is resolved.
6. In Step 4, you can use the Recommended restore and click on Next to revert your system to a previous point in time.
If none of the above fixes cleared the issue of corrupted system files in Windows 11, then you can try performing a reset of your system using the steps mentioned in this article.
Thanks for reading.
We hope that the troubleshooting methods in this article have helped you fix the corrupt files on your Windows 11 computer. Please let us know the fix that worked for you in the comments below.

