The Services app in Windows provides information regarding the various background services that are running on your Windows PC along with their status, description, and startup type. You can open the Services app by typing services.msc in the Run (Windows +R) dialog. A few Windows users have come across a problem with the services that are listed in the Services app.
Users have reported that in the service Description column, a message that reads as “Failed to Read Description. Error Code 2” is displayed instead of the actual description of the service. Basically, this error indicates that some files related to the service are missing. But after checking the files and running a System File Checker (SFC) scan, users have noticed no change in the error. In this post, we have detailed some of the troubleshooting methods that has helped many users to resolve this error code 2 in the Services window on their Windows 11/10 PC.
Method 2 – Run the System File Checker (SFC) Scan
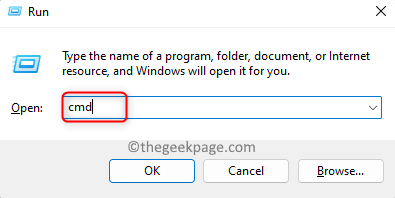
Step 1. Open the Run box using the Windows + R key combination.
Step 2. Type cmd and just press the Ctrl + Shift + Enter keys simultaneously to run Command Prompt as an administrator.
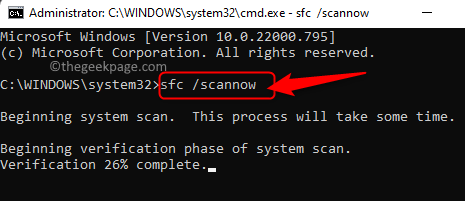
Step 3. In the command prompt, type the below command and hit Enter to execute it.
sfc /scannow
Step 4. Wait for sometime until the scan starts the verification process of the system files.
If there are any corrupt files found, repair process will be done after the system reboot.
Step 5. Restart your computer.
Check the Services app to see if the error code 2 with the services is resolved or not.
Method 3 – Delete the Service
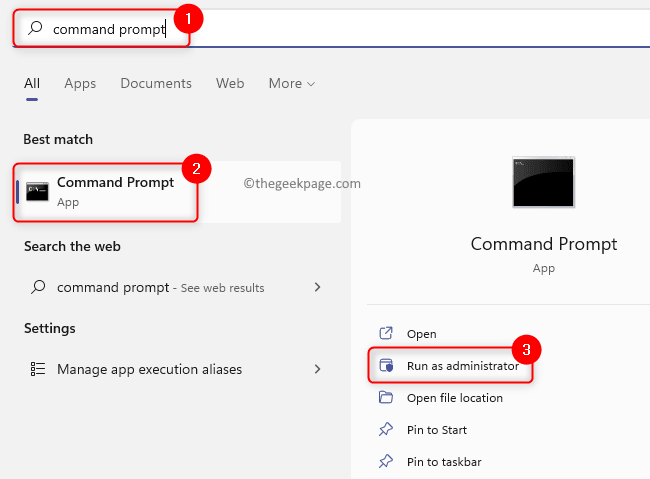
Step 1. Hit the Windows key on your keyboard and type command prompt in the Windows search bar.
Step 2. In the search result, select Command Prompt and then click on Run as administrator in the right pane.
Click on Yes when prompted by UAC for permissions.
Step 3. Type the command below and hit Enter.
sc delete "name of the service to be deleted"
Note: Replace “name of the service to be deleted” with the service name and not its display name.
For example, if you want to delete Human Interface Device Service, then type hidserv in place of the name of the service.
This name for service can be seen in the Properties window of the service. In the Services app, double-click on the service’s display name in the list to open its Properties.
Also, if the service name has any spaces between then enclose it withing double quotes.
Step 4. Once the service is deleted, you will no longer see it in the Services app.
The error code 2 must be fixed now.
Method 1 – Make Changes in the Registry Editor
Step 1. Open the Run box using the Windows + R key combination.
Step 2. Type regedit and hit Enter to open the Registry Editor.
When prompted by User Account Control for permissions, click on Yes.
Step 3. Before performing any changes to the Registry, create a backup of it so that if anything goes wrong you could easily restore it back.
Go to the File menu and select the option Export…
Give a file name for the file that you are creating as a backup of the Registry. It is recommended that you name the file with the date on which you are creating the backup.
Select the option All under Export range.
Choose a location to save the file from where it can be easily found.
Finally, click on the Save button.
If you need to restore the registry at any time in the future, open the Registry Editor and go to File –> Import. You can then select the backup file.
Step 4. Now, navigate to the path given below using the folders in the left pane of the Registry or copy and paste the path in the navigation bar.
HKEY_LOCAL_MACHINE\SYSTEM\CurrentControlSet\Control\MUI
Step 5. Double-click on the MUI folder to expand it.
Here, you will find a folder with the name StringCacheSettings.
Note: If you don’t find the folder, then create it following the steps below:
Right-click on the MUI folder and choose the option New –> Key.
Name this new key as StringCacheSettings.
Step 6. Once the above key is selected in the left pane, move over to the right side and locate a DWORD that is named as StringCacheGeneration.
Note: If the DWORD is not found, then right-click on any empty space in the right pane and choose New –> DWORD (32-bit) Value.
Name this DWORD as StringCacheGeneration.
Step 7. To make changes in the value of the DWORD StringCacheGeneration, double-click on it.
Step 8. In the Edit window, change the Value data field to 38b.
In the Base section, make sure that the Hexadecimal option is selected.
Then, click on OK to save the changes.
Step 9. Close the Registry Editor.
Reboot your computer for the changes to come into effect.
Step 10. Open the Services app and check if the error is fixed.
That’s it!
Thanks for reading.
You must now be able to see the actual service description instead of the message “Failed to Read Description. Error Code 2” in your Services app on your Windows PC. Did you find this article informative enough in resolving error code 2 with the background services? Please let us know your thoughts and opinion in the comments below.


