Error checking for updates is one common issue faced by many Android users when dealing with Google Play Store. The error makes its appearance when you try to update any of the already installed applications to its latest version. Though the error is simple and straightforward, the error message doesn’t throw much insight into what exactly is the reason why you might be getting this error. Whatever be the reason, the need to rectify the error at the soonest possible is of utmost importance as delays in this error resolution can lower the efficiency of your device by a great bar.
The first solution would definitely be to try and restart your phone once. The error must most probably go away with this simple solution. However, if it is still not gone, you can try all the solutions listed in our article one by one. So what are you waiting for? Let’s jump in straight away, shall we?
Important Note: We have used the Android device Samsung Galaxy Note 10 Lite- Android OS Version 12, to explain the steps in this article. The screenshots might slightly vary based on the model and version of your device. If you have any queries regarding this, kindly drop your concerns in the comments section for us to address them.
Solution 1: Clear Google Play Services Cache and Data
Sometimes Google Play Services cache can accumulate and get to a point where it gets corrupted and results in the Error checking for updates issue. In this method, let’s try and reset the Google Play Services data and cache.
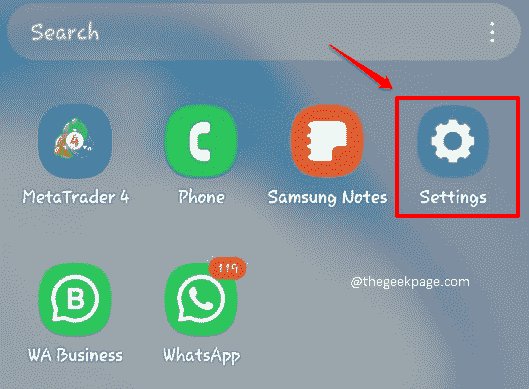
Step 1: Launch the Settings application by clicking on its icon from the apps drawer.
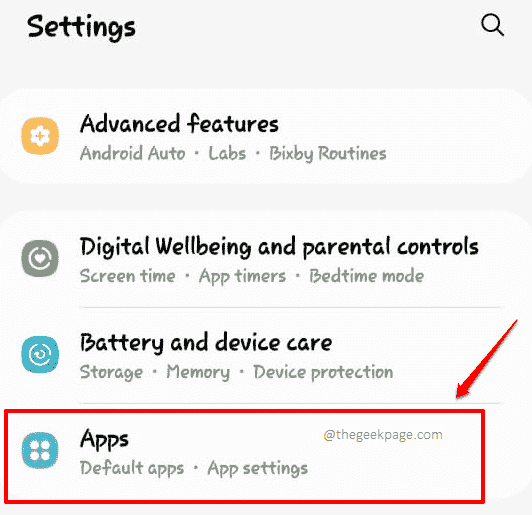
Step 2: Scroll all the way down in the Settings application and then click on the Apps tile.
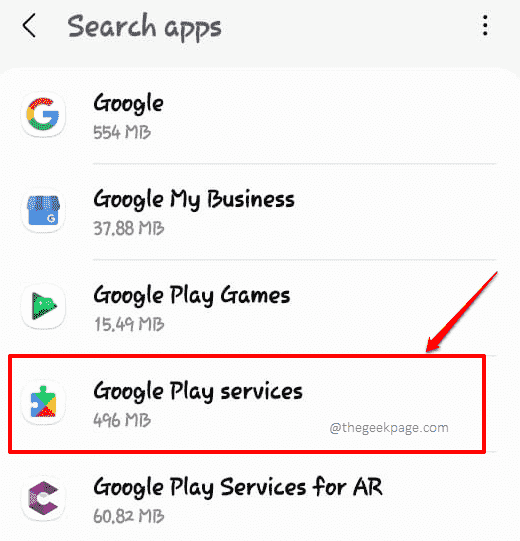
Step 3: Scroll down through the Apps, locate and click on the tile corresponding to the application named Google Play services.
Step 4: Click on the Storage tile on the screen that follows.
Step 5: As next, on the Google Play services screen, click on the button named Clear cache at the bottom.
Step 6: Then click on the Manage storage button to clear off the application data as well.
Step 7: On the Manage storage screen, go ahead and click on the CLEAR ALL DATA button as shown in the screenshot below.
That’s it. Check if your issue is resolved or not.
Solution 2: Clear Google Play Store Cache and Data
Just like the Google Play Services cache, the Google Play Store cache can also cause issues sometimes and mess up your seamless Android experience. Let’s see how you can clear the Google Play Store cache and data.
Step 1: Launch the Settings application by clicking on its icon from the apps drawer.
Step 2: On the Settings screen, scroll down and click on the Apps tile.
Step 3: Now, find and click on the Google Play Store option.
Step 4: On the screen that follows, click on the option for Storage.
Step 5: You will be able to see the amount of space used up by the application on the screen that follows.
Click on the Clear data button to clear all the application data. Also, click on the Clear cache button next to clear all the cache data.
The issue should now be fixed. If not, please go ahead with Solution 7.
Solution 3: Uninstall Google Play Store Updates and then Update to the Latest Version
Sometimes a buggy update can create all sorts of issues in the world. Let’s try and get your Google Play Store to its initial version and then update it to the latest version available.
Step 1: Click on the Settings icon from the apps drawer to launch the Settings application.
Step 2: Once again, click on the Apps tile on the Settings screen.
Step 3: Now from the list of applications available, click on the application named Google Play Store.
Step 4: On the top right corner of the screen, you should see 3 vertical dots. Click on it.
Step 5: As next, click on the Uninstall updates option.
Step 6: Your Play Store should now be without any updates installed. As next, let’s get your Play Store updated to the latest version available.
For that, launch the Play Store application from the list of apps.
Step 7: You should be logged into the Play Store application using a Google account.
Once you are logged in, at the top right corner of the Play Store screen, you should be able to see your profile icon. Click on it to view the application settings.
Step 8: From the list of settings that expand out, click on the option Settings.
Step 9: Now, scroll down and find the section named Play Store version.
Under which, you will find a link that says Update Play Store. Click on it to update your Play Store to the latest version released.
Once the application is updated, check if your issue is resolved or not.
Solution 4: Try Turning Off Phone Wi-Fi
If your internet connection is not strong enough or if the connection is not proper, this error can often come up. So, simply try turning off your Wi-Fi connection and then turn it back on. Check if your issue is resolved or not. If not, go ahead and try the next solution.
Solution 5: Try Turning Off the Router
Sometimes physically turning your router to the off state and then turning it back on fixes the issue. If your issue is still not resolved even after turning the router to the off state and then to the on state, then you can try connecting your phone to any other Internet connection, maybe to mobile data. If that also doesn’t solve your issue, please head on to the next method.
Solution 6: Check the Amount of Storage Available
If your internal storage space is running low in memory, your Google Play Store can throw the Error checking for updates error. If you are low in memory, simply free up some space and then try updating the application once again. Check if your issue is resolved or not.
Solution 7: Try Installing a VPN
Another reason why you might be getting the Error checking for updates error could be because of geographical restrictions. You might have installed the application from a country where the application is supported. Later on, you might have flown to a different country and then tried to update the application from there. In that case, you might face the issue of Error checking for updates.
In that case, install a VPN application, connect to a different country than your residing country and then check if your issue is resolved or not.
Solution 8: Try Removing Google Account and Adding it Again
If your issue is still not resolved, let’s try removing the google account with which you are logged in to Play Store and then try adding it back.
Step 1: Launch the Settings application as always.
Step 2: From the list of settings options, click on the one that says Accounts and backup.
Step 3: On the Accounts and backup screen, click on the option Manage accounts.
Step 4: On the screen that follows, all your accounts will be listed. Click on the Google account using which you have logged into your Play Store. This should be the account that gives the Error checking for updates issues.
Step 5: Now you will have the option to delete the account by clicking on the Remove account button.
Step 6: You will now be back at the Manage accounts page. Simply add the account back at this stage. Click on the Add account button as shown below.
Step 7: Once you click the Add account button, you will be taken to the Add account screen, where you have to click on the tile named Google and then follow the instructions to add the Google account back. You can even try adding a different Google account and see if that resolves your issue.
Solution 9: Download and Install Latest Software Updates
Sometimes your phone might be missing some important software updates and it could create some issues. In such cases, if you update your phone with the latest software updates, your issue must be resolved. Let’s see how this can be done, quick and easy.
Step 1: Launch the Settings application. You can do so by clicking on the Settings application icon from the list of applications.
Step 2: As next, scroll down through the settings and click on the Software update option.
Step 3: On the Software update screen, click on the tile Download and install as shown below.
Step 4: On the screen that follows, you will have the option to download the updates if at all they are available. Click on the Download button to proceed with downloading the updates.
Once the download process is complete, when asked for confirmation, give the approval to proceed with the installation of downloaded updates. Your phone will then restart and the updates will be installed. Once the phone boots back up, check if your issue is still present or not.
Solution 10: Factory Reset your Android Device
If none of the solutions resolved your issue, you now have the option to factory reset your Android device. Remember, performing this step would wipe your phone clean. It would be just like how you bought it from the store. So, go ahead with this solution only as the last resort and also at your own risk. Make sure you take all the important data out of your phone before you proceed.
Step 1: Launch the Settings application.
Step 2: From the list of settings options, click on the General management option.
Step 3: As next, on the General Management screen, click on the Reset option.
Step 4: DO NOT FORGET TO TAKE BACKUP!
On the Reset screen, click on Factory data reset. When asked for confirmation, confirm the operation. Remember, this action will wipe your phone clean.
We are all ears to hear about the method that worked perfect for you.
Please tell us in the comments section if your issue is still not resolved after trying all the solutions listed.
Do come back for more amazing and mind-boggling articles on all your favorite technical topics. Happy Geeking!


