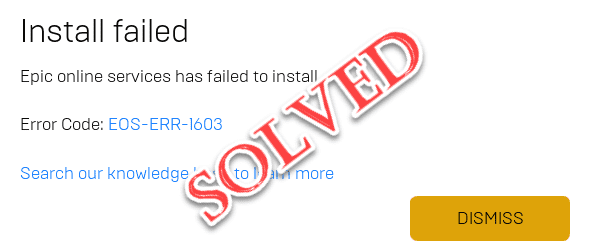
Are you seeing the EOS ERR 1603 while installing a purchased game in the Epic Games installer? If you are, you are not alone. Some other users have also exclaimed that they have also seen a similar kind of issue while installing the game. The real reason behind this annoying issue may be anything, but in most cases, the problem is with the Windows installer service itself. Just follow these easy fixes to work out the problem on your computer.

Fix 1 – Run the Epic games launcher as an administrator
You can repel this issue simply by running the Epic Games launcher as an administrator.
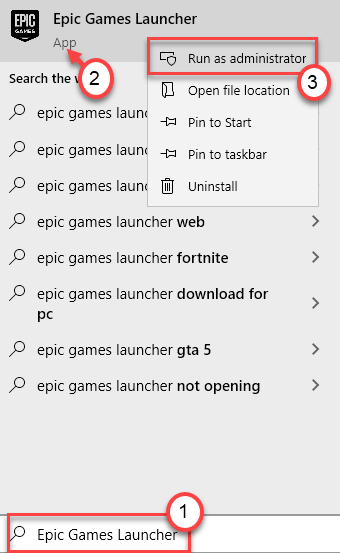
1. Press the Windows key+S keys together.
2. Then, type “Epic Games” in the search box. Just, right-click on the “Epic Games Launcher” and click on “Run as administrator“.

This should run the Epic Games with administrative rights. Try to install the online services again.
Fix 2 – Check the read/write permission of the Epic Games launcher
This problem may occur if the launcher lacks proper read-write permission.
1. Click on the search box and type “Epic Games launcher“.
2. Then, right-click on the “Epic Games launcher” and click on “Open file location“.

3. Now, right-click on the “Epic Games launcher” and click on the “Properties“.

4. Now, tap on the “Security” tab.
5. Then, click on the “Edit” to edit the security settings.

6. In the ‘Group or user names:’ section, select the username from the list.
7. Then, tick marks the “Read” and “Write” boxes.

8. After that, click on “Apply” and “OK“.

Further, try to install the Epic Online services once again from the Epic Games launcher. This time it should work out normally.
Fix 3 – Enable the .NET Framework 3.5
The lack of the .NET Framework 3.5 on the computer may cause this issue.
1. Press the Windows key+R keys together.
2. Then, type “optionalfeatures” and hit Enter.

3. Now, check the box beside the “.NET Framework 3.5 (includes .NET 2.0 and 3.0)“.
4. Then, click on “OK“.

5. Further, click on the “Download and install this feature” to install the feature on your computer.

Once the process finishes, you will see a prompt – “The following feature was successfully installed“. Close the installer window.
After that, restart your computer and try to install the online services again.
Fix 4 – Install Epic games on the Windows drive
Some users have explained that the problem doesn’t occur if the Epic Games launcher is installed on the same drive where the Windows is installed.
So, we suggest you uninstall the Epic Games launcher from your computer and install the same on the C driver or where you have the Windows.
Fix 5 – Install the EOS manually
You can install Epic Online Services manually from the installation location.
1. Click on the search box and type “Epic Games launcher“.
2. Then, right-click on the “Epic Games launcher” and click on “Open file location“.

This will open up the ‘Programs’ folder inside the Start menu folder.
3. Again, right-click on the “Epic Games launcher” and click on the “Open file location“.

4. Then, go to this location –
Epic Games\Launcher\Portal\Extras\EOS
5. In the EOS folder, you will find the “Epic Online Services“.
6. Just double-click on it to start the installation process.

Follow the instructions mentioned on the screen and complete the installation process.
This should safely install the Epic Online Services.
Fix 6 – Restart the Windows Installer services
Restarting the Window Installer services should do the job.
1. You have to access the Run terminal. You have to press the ‘Windows key+R‘ keys together.
2. What you need to do next is to type this command. Afterward, click on “OK“.
services. msc

3. After that, scroll down to find out the “Windows Installer” service.
4. Then, right-click on it and then click on “Start” to start the Windows installer service on your system.

4. Once the Windows Installer service is started, right-click on the “Windows Installer” service.
5. This time, tap on “Restart” to restart the service.

This should restart the service on your machine.
Close the Services window and try to install the Epic online services.
Fix 4 – Re-register Windows Installer
Re-register the Windows Installer from the Command Prompt.
1. Press the Windows key and start to type “cmd“.
2. Now, right-click on the “Command Prompt” and tap on “Run as administrator“.

3. Copy and paste these 4 commands one by one and then hit Enter.
This will unregister and re-register the Windows Installer service from two different locations.
%windir%\system32\msiexec.exe /unregister
%windir%\system32\msiexec.exe /regserver
%windir%\syswow64\msiexec.exe /unregister
%windir%\syswow64\msiexec.exe /regserver

Close the Command Prompt.
Relaunch the Epic Games launcher. Test this out again.
Fix 5 – Update the Epic Games launcher
Check if the Epic Games launcher is the latest or are there any new pending updates.
1. Open the Epic Games Launcher on your computer.
2. After opening the Epic Games launcher, click on the “Settings” on the left-hand side.

Epic Games launcher downloads the latest package on the computer.
3. Then, click on the “Restart and Update“.

The Epic Games launcher will update and restart automatically.