You may need to remove a program while on the normal mode of Windows, but for some reason you are unable to. In such a case, you would need to uninstall the program in the safe mode. However, you are unable to remove the program in the Windows 10 safe mode also and rather see an error “The Windows Installer Service could not be accessed. This can occur if the Windows Installer is not correctly installed. Contact your support personnel for assistance.”
Why Do You See the Error?
That’s because, Windows safe mode doesn’t run the Windows Installer by-default and that’s when you see the above error message. This can cause trouble, because if there’s an app that’s causing a problem, you would need to uninstall it. And, if it doesn’t get uninstalled, it may later prevent your Windows 10 PC to boot.
In such a case, you would need to enable Windows Installer in safe mode in Windows 10. Let’s see how.
Method 1: Enable Windows Installer in Safe Mode Using Command Prompt
You can also enable the Windows Installer in safe mode with or without network using the a Command Prompt as well. Let’s see how.:
Step 1: Press the Win + R keys together on your keyboard to open the Run command window.
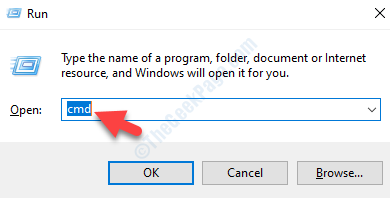
Step 2: In the Run command search field, write cmd and press the Ctrl + Shift + Enter shortcut key to open Command Prompt in admin mode.

Step 3: Now, copy and paste the below three commands one after another in he Command Prompt (admin) window and hit Enter after each command:
REG ADD "HKLM\SYSTEM\CurrentControlSet\Control\SafeBoot\Minimal\MSIServer" /VE /T REG_SZ /F /D "Service"
net start msiserver
Once completed, Now, run the command given below in command prompt
net start msiserver
Now, close the Command Prompt window and the Windows Installer should be installed now in Windows 10 Safe Mode. You can now uninstall any applications easily.
Note: – If you want to enable installer in safe mode with networking , you should run the code given below
REG ADD “HKLM\SYSTEM\CurrentControlSet\Control\SafeBoot\Network\MSIServer” /VE /T REG_SZ /F /D “Service”
Method 2: Enable Windows Installer in Safe Mode Using Registry Editor
How to enable Windows Installer in Safe Mode without network
Step 1: Right-click on Start menu and select Run to open the Run command box.

Step 2: Type regedit in the Run command search field and press OK to open the Registry Editor window.

Step 3: In the Registry Editor window, navigate to the below location:
HKEY_LOCAL_MACHINE\SYSTEM\CurrentControlSet\Control\SafeBoot\Minimal
Now, right-click on Minimal and select New and then Key.

Step 4: Rename the new key as MSIServer.

Step 5: Now, select the MSIServer key and go to the right side of the window.
Double-click on Default.

Step 6: In the Edit String dialogue box, go to the Value data field and set it to Service.
Press OK to save changes and exit.

Step 7: Now, press the Win + R keys together on your keyboard to launch Run command.
Step 8: In the search box, type cmd and press the Ctrl + Shift + Enter shortcut key to open Command Prompt in elevated mode.

Step 9: In the Command Prompt (Admin) window, run the below command and hit Enter:
net start msiserver

*Note – Make sure that you create a back up of the Registry settings, before you make any changes to the Registry Editor. This is to ensure that if you lose any data during the process, you can recover it.
Now, exit Registry Editor and the Windows Installer should now be enabled in your Windows 10 PC. You can now remove any program from your PC that may be causing an issue, easily.
How to enable Windows Installer in Safe Mode with network
Step 1: Press the Win + X shortcut key and select Run.
Step 2: In the Run command window that opens, type regedit in the search field and hit Enter.

Step 3: In the Registry Editor window that opens, copy and paste the below location in the address bar and hit Enter:
HKEY_LOCAL_MACHINE\SYSTEM\CurrentControlSet\Control\SafeBoot\Network
Select Minimal, right-click on it and select New. Then select Key.

Step 4: Rename the new key you just created as MSIServer.

Step 5: Now, click on the MSIServer key to select it, navigate to the right side of the window, and double-click on Default to open the Edit String window.

Step 6: In the Edit String window that opens, set the Value data field to Service.
Press OK to save the changes and exit.

Step 7: Now, right-click on the Start menu and select Run. This will open the Run command window.

Step 8: In the Run command, type cmd in the search field and press the Ctrl + Shift + Enter hotkey to open Command Prompt with admin rights

Step 9: In the Command Prompt (Admin) window, execute the below command:
net start msiserver
*Note – Prior to making any changes to the Registry Editor, create a back up of the Registry data to ensure that you can recover any data that is lost during the process.
Now, close the Registry Editor and you the Windows Installer is now activated in the Windows 10 Safe Mode with networking. You should now be able to remove the problem program normally.
