If your monitor or screen display is showing a zoomed-in resolution, then it means that the display settings are not properly configured. Scale and Display resolution help to zoom in on the display and in turn, the icons on your screen are bigger in size. These tools make changes to the screen display by making the images and text clear and readable/viewable to the user. Windows allows the user to modify the display settings of the desktop based on their liking. Generally, the display too zoomed-in issue on Windows 11 has been reported after a Windows update or the graphics driver in the system is outdated or corrupt.
If you find that the display on your Windows 11 PC is zoomed in, then read this article to find some fixes that can help resolve the issue.
Fix 1 – Modify the Scale and Display Resolution Settings
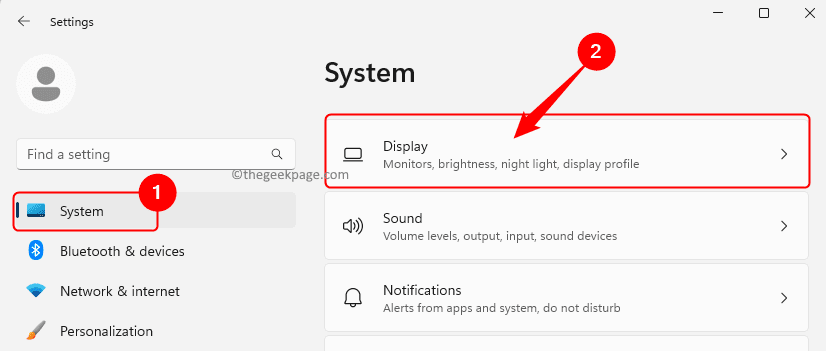
Step 1. Press Windows + I key combination to open the Settings app.
Step 2. Make sure that the System tab is selected on the left panel.
Step 3. Click on the box labeled Display on the right side.
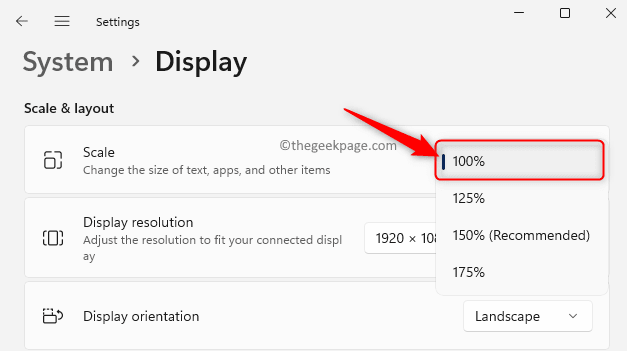
Step 4. Use the dropdown associated with Scale and choose the 100% option or the one that is recommended for your display.
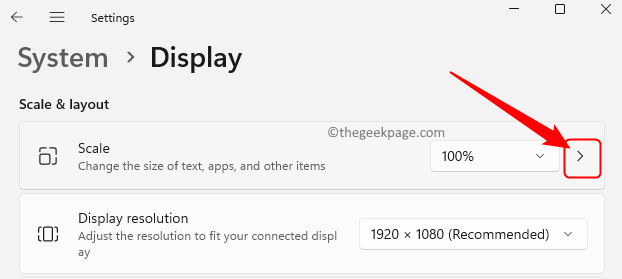
Step 5. If you want to customize it more, then click on the small arrow next to the dropdown box.
On the Custom Scaling page, you can set the Custom scaling size to anywhere between 100 – 500.
Then, click on the tick mark to apply the settings.
Restart your PC and check if the display has zoomed out.
Step 6. If the display still appears zoomed in, then on the Display Settings page, use the dropdown next to Display resolution and select a different value for the screen resolution.
But make sure that the value you choose is reflective of your screen’s display resolution.
Check if the issue with your screen’s display being zoomed-in is resolved or not.
Fix 2 – Rollback the Display Driver
If this issue was seen after installing a recent Windows update on your PC, then you can roll back your display driver and check if it helps.
Step 1. Press Windows + S and type device manager in the windows search bar.
Step 2. Select Device Manager in the search result.
Step 3. Expand the Display adapters section by clicking on the small arrow next to it.
Step 4. Right-click on your display adapter from the list and choose Properties.
Step 5. In the Properties window, go to the Driver tab.
Step 6. Here, if the Roll Back Driver button can be clicked, then click on it and follow the on-screen instructions to roll back the driver to its previous version.
Step 7. Reboot your PC and check if the problem is resolved.
Fix 3 – Update Your Display Driver
Step 1. Press Windows + R to open Run.
Step 2. Type devmgmt.msc and hit Enter to open the Device Manager.
Step 3. In the Device Manager, click on the small arrow next to Display adapters to expand it.
Step 4. Right-click on your display adapter in the list and choose Update driver.
Step 5. In the Update drivers window, select Search automatically for drivers.
Step 6. Windows will search for updated drivers and install them.
Step 7. Restart your computer and check if the issue is fixed after updating the drivers.
That’s it!
Thanks for reading.
We hope you must have been able to zoom out your Windows 11 display. Did you find this article informative enough? Please let us know your thoughts and the fix that worked for you in the comments below.


