If you are seeing the ‘0x800f081f’ error code while running an online DISM check on your system files and searching for a solution, you have just landed on the correct page. “DISM/RestoreHealth” searches Windows Updates for the corrupted system files on your system and attempts to replace those. Here you have to manually specify an additional repair location on your system to solve this problem.
How to fix DISM 0x800f081f in Windows 10
Before you proceed further to the main solutions thoroughly read the requirements.
You need a Windows image file or install.wim to enact this solution.
Requirements –
a. The install.wim file needs to as the same as the Windows version, Edition & Language installed on your computer.
b. You can find the install.wim inside the “Sources” directory inside the folder of a Windows installation media (CD/DVD or USB).
You can easily create a Media Creation Tool for your computer from here –
Create Windows 10 Media Creation Tool
NOTE –
If you have downloaded the ISO image of Windows 10 with the MCT, you have taken some further action to extract the install.wim from the image. This is needed because usually, these ISO files contain the install.esd file under the ‘Sources‘ directory. This install.esd contains several versions of Windows 10 images (Home, Pro & Business Edition). You have to manually extract a similar Windows 10 image as the Windows 10 specifications installed on your computer.
Are you wondering how to do it? Follow this detailed approach to extract the install.wim from the install.esd file.
Step A – Download the WIm as an ISO file
At first, you have to download the Windows Installation Media as a form of MCT.
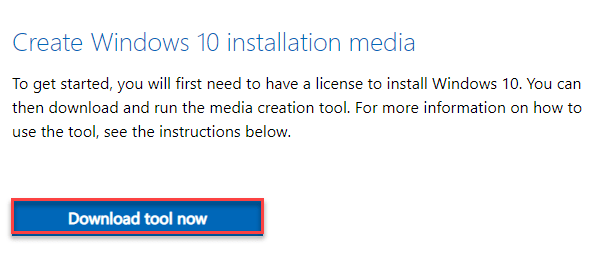
1. Go to the Windows 10 downloads website.
2. Then, scroll down to the ‘Create Windows 10 installation media’ section.
3. After that, click on “Download tool now” to download the tool.

Once the downloading is complete, close the browser.
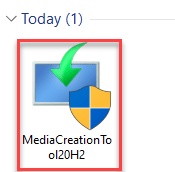
4. Then, go to the ‘Downloads‘ section on your computer.
5. Next, double click on the “MediaCreationTool20H2” application.

Wait till it collects the necessary information. Meanwhile, don’t forget to accept the terms of licenses.
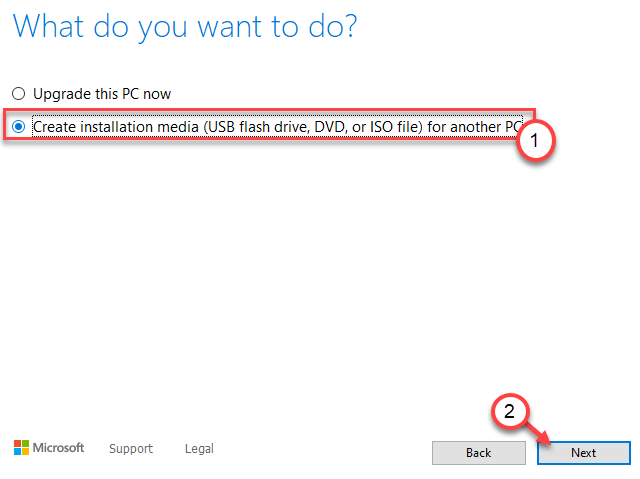
6. Then, select the radio button beside “Create installation media for another PC“.
7. Then, click on “Next” to download the installation media file.

8. In the next window, make sure that the “Use the recommended option for this PC” option is checked.
9. Then, click on “Next” to download the ISO file.

10. When you are asked to select the media device, click on “ISO file” to download the image of Windows 10.
11. Then, click on “Next“.

12. Choose a location on your device to download the Windows 10 image file.
13. Then, click on “Save“.

Now, all you have to do is to wait for Windows to download the latest version of Windows 10.
This process may take 15 minutes to half an hour.
14. Once it has finished downloading, you will see the location of the ISO file.
15. Click on “Finish“.

Now, proceed to the next step.
Step 2 – MOVE INSTALL.ESD filE
Once you have downloaded the image file, follow these steps.
1. Go to the location of the downloaded image file.
2. Then, right-click on the “Windows” iso file and click on “Mount“.

3. Now, on the left-hand side, select the “ESD-ISO” that you have just mounted.
4. Then, double click on the “sources” folder to access it.

5. Inside the ‘Sources’ folder, look for the “install.esd” file.
6. Right-click on it and click on “Copy” to copy the file.

7. Now, go to the “Local Disk (C:)” drive.
8. Paste the “install.esd” file here.

Then, close the File Explorer.
9. Now, press the Windows key+R keys together.
10. Then, type “msinfo32” and hit Enter.

11. When the System Information window opens up, check out the “OS Name” on the right pane.
12. Just notice what version of Windows you are using.
(We are using the Windows 10 Pro)

Close the System Information window. Proceed to the next step.
STEP 3 – Extract the install.wim from install.esd
Now, you have to pass some simple commands to extract the install.wim from the install.esd file.
1. Now, just write “cmd” in the search box, just beside the Windows icon.
2. Then, right-click on the “Command Prompt” and click on “Run as administrator” to access the terminal.

3. Once the Command Prompt opens up, type these commands one at a time. Hit Enter two execute these commands one after another.
cd\
dism /Get-WimInfo /WimFile:install.esd

Now, you will see a list of indexed Windows versions (like Home, Pro, and Business Editions) in the terminal.
In this list, carefully identify the Windows version you are using. Now, jot down the Index number associated with the particular Windows version.
(Example -We are using a Windows 10 Pro. In the list of Windows versions. the Index number associated with this version is “6” )

4. Now, copy-paste this command in the terminal. Modify it accordingly and then hit Enter to execute it.
dism /export-image /SourceImageFile:install.esd /SourceIndex:IndexNumber /DestinationImageFile:install.wim /Compress:max /CheckIntegrity
[
NOTE –
Replace the IndexNumber with the Index number you have noted before.
Example – As the Index number is “6” in our case, the command will be –
dism /export-image /SourceImageFile:install.esd /SourceIndex:6 /DestinationImageFile:install.wim /Compress:max /CheckIntegrity
]

Now, install.wim will be extracted from the install.esd file. This process will take a while. The percentage of completion will be shown on the terminal.
Once it is done, the “The operation completed successfully” message will appear on the terminal.

Close the Command Prompt terminal.
The process to extract instal.wim from install.esd is complete now.
Finally, it is time to fix the DISM error 0x800f081f.
1. Now, just type “cmd” in the search box, just beside the Windows icon.
2. Then, right-click on the “Command Prompt” and click on “Run as administrator” to access the terminal.

3. Once the Command Prompt opens up, paste these commands one-by-one in the terminal. Then, hit Enter to cleanup existing image files.
DISM /Online /Cleanup-Image /StartComponentCleanup
DISM /Online /Cleanup-Image /AnalyzeComponentStore

4. Now, finally to repair the Windows image with the DISM command, execute this code in the terminal.
DISM /Online /Cleanup-Image /RestoreHealth /Source:WIM:c:\install.wim:1 /LimitAccess

Again, this process will take a while to complete. Wait until the percentage of completion reaches the ‘100%‘ mark and show up ‘the operation completed successfully‘ message on the terminal.
5. The last thing to do is perform a system file checker scan on your computer.
sfc /scannow

That’s it! You have just successfully resolved the DISM 0x800f081f code on your device.