There are many apps that automatically launch with the startup and too many apps loading with the startup may cause issues. One of them is the OneDrive app and disabling the OneDrive app from opening on startup seems to be the best solution.
The apps that automatically launch with startup, keep running in the background, further slowing down the system. While we may need a few apps to launch automatically with the startup, not all are required. OneDrive is relatively bigger in size and may lead to sluggish performance sometimes when left running in the background, unused. Hence, it will be smarter to disable the app from opening on startup and launch it manually whenever needed. Heere are a few solutions that may help you with the issue.
Method 1: Disable Microsoft OneDrive at Startup via OneDrive Settings
This is the basic method that everyone should try once before trying any other solution to possibly disable OneDrive from opening at Startup through its settings. Follow the below instructions to make the changes:
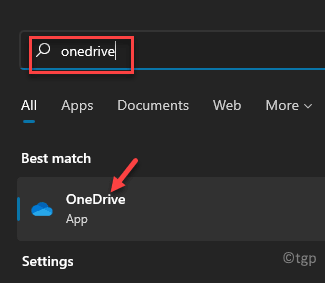
Step 1: Go to Windows search and type OneDrive in the search bar.
It pulls up the result under the Best match section, click on it to open the OneDrive app.
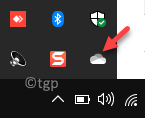
Step 2: Now, go to the extreme bottom right side of the Taskbar and click on the arrow to expand it and open the System Tray.
You should see the OneDrive app icon here. Click on it.
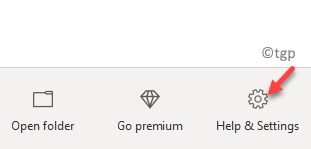
Step 3: This will open the OneDrive panel and click on Help & Settings located at the bottom right.
Step 4: Next, click on Settings in the list.
Step 5: It will open the Microsoft OneDrive dialogue box.
Here, click on the Settings tab and uncheck the option – Start OneDrive automatically when I sign in to Windows.
Press OK to save the changes and exit.
Now, reboot your PC and now, you OneDrive should not open with the
Method 2: Disable Microsoft OneDrive at Startup from Settings App
If the above method does not work, you can try and disable the app from Windows Settings. Let’s see how to disable Microsoft OneDrive from opening on startup on your Windows 11 PC:
Step 1: Press the Win + I keys together on your keyboard to open the Settings app.
Step 2: In the Settings window, click on App on the left side of the pane.
Step 3: Now, go to the right side of the pane, scroll down and towards the bottom, click on Startup.
Step 3: Next, in the Startup window, on the right side, go to the Startup apps section.
Now, locate Microsoft OneDrive and turn it off.
Once you are done making the changes, exit the Settings app and restart your PC. Your OneDrive app should not open on startup automatically anymore.
Method 3: Disable Microsoft OneDrive at Startup through Task Manager
In addition, you must also ensure that the OneDrive app is disabled from the Task Manager startup section. This will make sure that the app does not open automatically on system startup. Follow the below steps to disable Microsoft OneDrive to open on startup on your Windows 10/11 PC:
Step 1: Press the Win + R shortcut keys on your keyboard to open the Run command window.
Step 2: In the Run command window, type Taskmgr and hit Enter to open the Task Manager.
Step 3: In the Task Manager window, go to the Startup tab.
Here, look for Microsoft OneDrive, right-click on it and select Disable.
This will disable the OneDrive app from opening automatically on startup.
Method 4: Disable Microsoft OneDrive at Startup with Command Prompt
This method helps you to make changes to the registry keys using the Command Prompt and is a great manual way to disable the OneDrive from opening on Startup in Windows 10 or Windows 11. Let’s see how to run the command:
Step 1: Press the Win + R hotkeys simultaneously to open Run command.
Step 2: In the Run command search box, type cmd and press Ctrl + Shift + Enter keys together on your keyboard to open the Command Prompt window in admin mode.
Step 3: In the elevated Command Prompt window, run the below command and hit Enter:
reg delete "HKCU\Software\Microsoft\Windows\CurrentVersion\Run" /f /v "OneDrive"
This will delete the OneDrive key from the registry editor.
Now, the OneDrive app should be disabled and it should not open on startup every time you start your Windows 10/11 PC>
*Note – Make sure that you create a backup of the registry editor settings as there are chances that you may lose data during the process. Backing up the registry data will help you recover the lost data easily.


