Integrated cameras on computers can be pretty useful especially if you enjoy using Skype or similar video calling programs. But those of you who don’t have much use for the camera might be irritated by it as it is enabled by default on Windows 10. Moreover, built-in webcams are in these days and any user would be hard pressed to find a new version of Windows without an inbuilt camera. Security concern is a valid reason why you might want to disable your webcam, as webcams are often easy targets for malware. Regardless of the rapid advancement of technology and the new security measures Windows 10 has come up with, webcams remain an effective tool for suspicious sources to hack into your system and spy on you.
You could always take the help of external software to disable the webcam, but why go to all that trouble when you could easily use the Device Manager method?
Just follow these simple steps to disable the built in camera for your laptop/PC:
-
Use Windows +R shortcut keys to open the Run command box or manually open it from the Start menu.
-
Type in ‘devmgmt.msc’ in Run and press the Enter key.

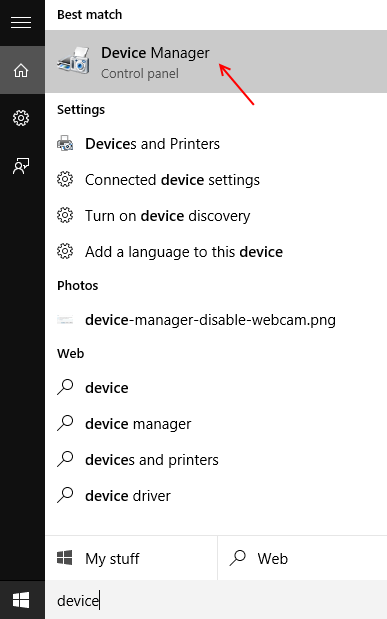
Alternatively – Just search device manager in search box of windows 10 taskbar. Click on device manager.

-
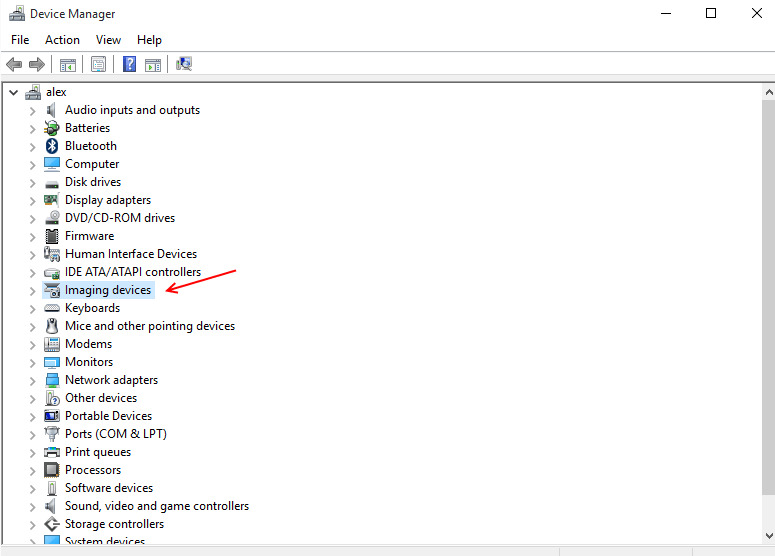
In the Device Manager, select ‘Imaging devices’ from the given list.

Note: – In some other laptops / pc of some other manufacturers, you may find this under different names in place of imaging devices such as: –
Sound, video and game controllers
or
cameras
-
Under Imaging Devices, right click the ‘Integrated Camera’ option and click on Disable. You will get a message saying ‘Disabling this device will cause it to stop functioning. Do you really want to disable it?” Clicking on Yes will disable the camera.

-
If the camera option does not say Integrated Camera, don’t get confused, the name of your webcam will be displayed in that space.
Note :- In case you feel the need to use your webcam later, just follow the above mentioned steps and select Enable after right clicking on the camera option.
If you want to check that your inbuilt webcam has truly been disabled, click on the Start button and navigate to Camera. If you see the message ‘Connect to camera’, your webcam has been disabled successfully. In the event the webcam seems to be still functioning, you have probably disabled another device, not the inbuilt webcam, and will have to go back to the Device Manager and choose the correct device to disable.
The Device Manager method will work on Windows 10 as well as Windows 7, 8 and 8.1.
Some precautions for webcam
Apart from using this method, there are some safety precautions you can take to protect your camera’s privacy. For instance, you could try covering up the camera with opaque tape or a cloth when it is not in use. Anti-virus is essential if you do use your webcam- a good anti-virus may not always be able to guarantee complete protection against webcam hackers, but it can check files received through the webcam and issue warnings if it contains malware. Hence it is a prudent measure for users with integrated camera on their computers.
A lot of third party software will also help you in disabling the webcam, but most users would prefer to use the simple Device Manager method, which unlike any external software does not involve downloading anything. This method is also fool-proof and hundred percent reliable, making it the best way to disable built in web camera.