Gone are those days when we used to use physical money in paper format for all our purchases. This is the digital era, where everything is digital, including making the payments for anything and everything that you can possibly think of. GPay is a very useful mobile payment application using which you can make contactless payments with a very simple user interface. The application is well protected that it doesn’t require any extra security measures from your side. However, you might want to delete some transactions from your GPay transactions history, for one reason or the other.
So wondering how you can quickly and easily remove a single transaction or delete a set of transactions based on a time period from your GPay transactions history with the help of some very simple steps? Well, go nowhere anymore, you are with us, and we have the perfect solution lined up for you! Hope you enjoy reading!
Note: GPay application interface is somewhat similar in iOS and Android. Hence you can follow the same steps to delete transaction(s) from the GPay application on both operating systems.
Solution
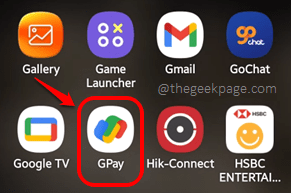
Step 1: Click on the GPay application from the applications drawer to launch it.
Step 2: When GPay launches open, click on the Profile icon located at the top right corner of the screen.
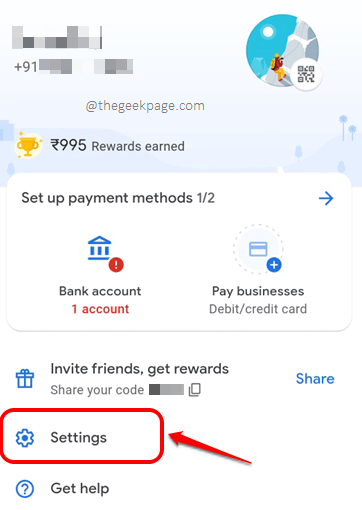
Step 3: On the screen that follows, click on the Settings option.
Step 4: On the Settings screen, click on the option Privacy & security.
Step 5: As next, click on Data & personalization.
Step 6: You now need to click on the link that says Google Account on the Data & personalization screen, as shown in the screenshot below.
Step 7: Scroll all the way down your Google account screen to view all the GPay transactions made.
As next, click on the cross/delete icon associated with the transaction that you would like to delete.
Step 8: You will now get the following confirmation window asking whether you would like to delete the selected activity. Click on the Delete button for the same.
Step 9: That’s it. You will be able to see the following screen that says that the deletion operation has been completed.
You can check the checkbox corresponding to the Don’t show again for 30 days option and hit the Got it button.
Step 10: You will be back at the transactions page once again and you can see that the transaction that you deleted is no longer visible.
Now if you would like to delete transactions of a particular time period instead of deleting them one by one, you need to hit the Delete button as shown below.
Step 11: Here you have various criteria to choose from, to mark the transactions that you need to be deleted. That’s it. Sit back and enjoy!
Please tell us in the comments section whether you could successfully delete the transactions you wanted to delete, from your GPay account, following the steps in our article.
Stay tuned for more mind-boggling tricks, tips, solutions, how-tos, and hacks! Happy Geeking!


