With the Windows 11 build 22557, you can see the Live Captions which is a new accessibility feature being introduced by Microsoft. Live captions are readable textual content that is generated automatically when you play any audio on your PC. These captions are displayed to the user while playing any audio which is helpful for all users and people with hearing disabilities as well to understand the words spoken in the audio. As soon as any content with audio in it starts playing, you will see a black floating window with captions either at the bottom or top of the screen.
Users have the option to personalize the caption display and resize the window in which the caption is displayed. You are allowed to customize the closed captions by changing the color, size, font, background, and opacity.
If you are interested in making changes to the style of the closed captions, then read this post on how this can be done on your Windows 11 PC.
Change the Caption Style
1. Just press and hold the Windows and I key combination on your keyboard to open the Settings.
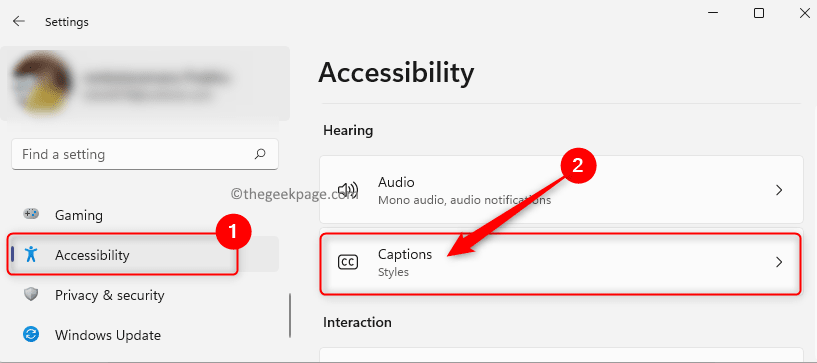
On the Settings page, click on the Accessibility tab in the left panel.
2. Now, move to the right side and search for Captions in the Hearing section.
Tap with your mouse on Captions.
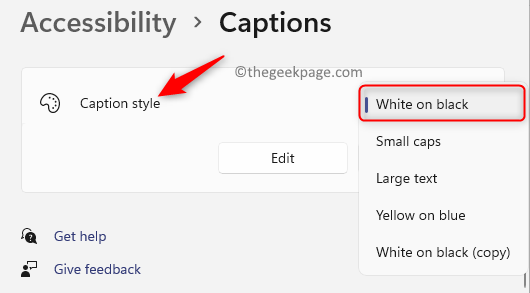
3. Once you are on the Captions Settings page, use the dropdown box next to Caption style and select any caption style of your choice from the list.
4. You can see the caption style will be changed when you play any audio content.
Create/Edit Custom Caption Style
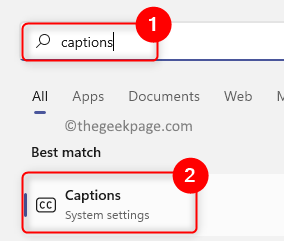
1. Click on the blue Windows button on your taskbar.
In the Windows search bar that appears, type captions.
Click on Captions in the result to open the Captions System Settings page.
2. From the dropdown associated with Caption style, choose a custom or default caption style that you would like to edit.
After the caption style selection, click on the Edit button.
3. On the Caption style editing page, make the changes mentioned below.
Give a name of your choice in the textbox next to Name your caption style.
Below this, select the Text tab. Make changes to the Color, Opacity, Font, Size, and Effects of the text based on your requirements.
Now, choose the Background tab. Change the background color and opacity for the caption style using the options provided.
Thereafter, click on the Window tab. Here also, make changes to the color and opacity of the window for the caption style.
4. Close settings and check if you are able to view the changes you have made to the caption style.
Delete Custom Caption Style
1. Press the Windows + R key combination to open the Run dialog.
Type ms-settings:easeofaccess-closedcaptioning and hit the Enter key to open the Captions Settings page.
2. Here, choose a custom style that you want to remove by using the dropdown next to Caption style.
Then, click on the Delete button below it.
Note: Any of the Windows default built-in caption styles cannot be deleted by the user.
Thanks for reading.
Did you find this article helpful in making changes to the closed caption style on your Windows 11 PC? Please let us know your thoughts and opinions on the same in the comments sections below.


