All of us have used MS Office at one point or the other and saving files has been really easy. But with Office 365, by default, the file is saved in OneDrive. We can forcefully save a file on our PC. But doing so for every single file would be a tedious job. Fortunately, Office provides an option to change the default save location of the files. Using this option we can save the files to our PC directly. In this article, let us discuss how to do that in detail.
Steps to be followed:
Step 1: Open the MS Office and Click on the File Menu Option
NOTE: Here we are demonstrating using MS word. The steps would be similar for other MS Office apps as well.

Step 2: In the window that opens, Select Options.

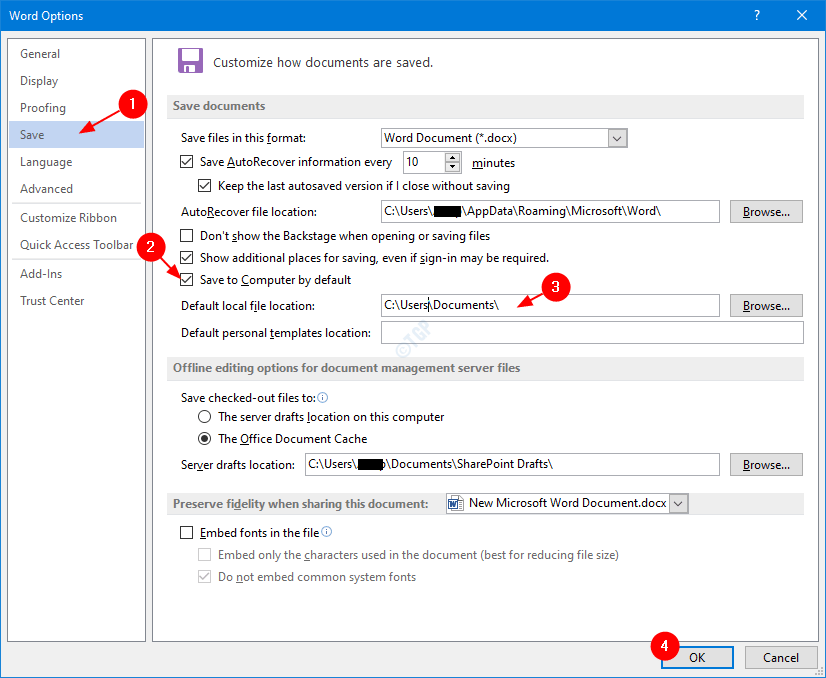
Step 3: In the Word Options window that appears,
- Choose Save from the left-hand side menu
- Tick the Save to Computer by default option
- Specify a Default local file location
- Click on OK

That’s All and the files will be saved on your PC from now on.
NOTE:
The settings will be the same in Office 365 as well as stand-alone MS Office Apps in the PC.
We hope this has been informative. Thank you for reading. Kindly comment and let us know incase this helped.