Are you unable to clear timeline activity on your Windows 11 or windows 10 computer? If you indeed can’t clear the timeline history on your computer, there is no need to worry. This problem is related to a corrupt activity cache on your computer, deleting it will solve your problem. So, simply follow these easy steps and the problem will be over in no time at all.
Fix- Delete ActivitiesCache file-
Deleting the ActivitiesCache file from your computer will solve this issue.
But first, you need to stop a particular service.
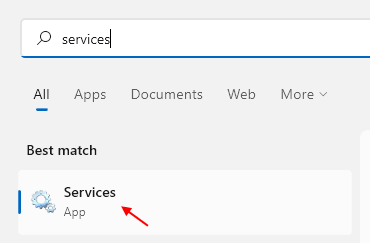
1 – Search Services in Windows search box.
2 – Now, click on services to open service manager.

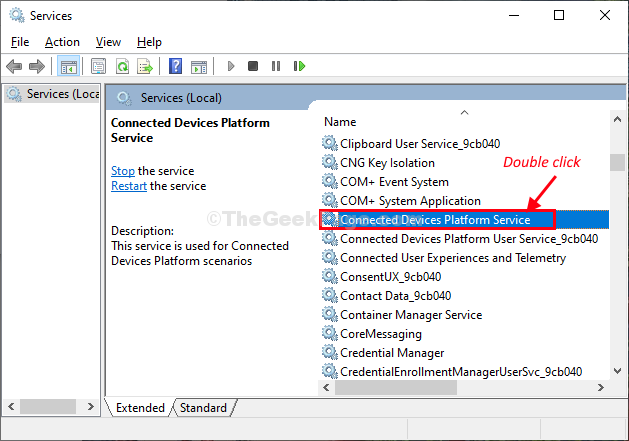
The Services window will be opened.
3. Double click on “Connected Devices Platform Service“.

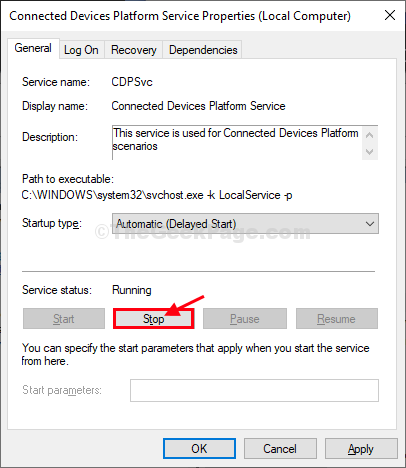
4. In Properties window, click on “Stop“.

5 – Now, search file explorer options in search.
6 – Now, click on File explorer options.

7 – Now, click on View Tab.
8 – Now, select show hidden files option.

Now, press Windows key+R again to open the Run window.
9. Type “appdata” and then click on “OK” to open the Appdata folder on your computer.

10. In the Appdata folder, go this way-
Local > ConnectedDevicesPlatform

11. In ConnectedDevicesPlatform, there will be a single folder. Double click on it to access it.
(Note– The name of the folder may differ from computer to computer.)

12. Right-click on the “ActivitiesCache” file and then click on “Delete” to delete the file from your computer.

*Close File Explorer window.
Reboot your computer to let the changes take effect.
After rebooting you’ll be able to clean the Timeline on your system without any issues.
*NOTE–
Some of the users may face another warning message ‘File In Use‘ trying to delete the ‘ActivitiesCache‘ file as an additional service is required to be stopped before deleting the file.

Follow these steps minutely to do so-
1. Click on the Search box and then type “Services“.
2. Now, click on “Services“.

3. Now, look for “Connected Devices Platform Service“.
4. Right-click on the service and then click on “Stop“.

Close Services window.
5. Now, try to delete the “ActivitiesCache” file from your computer again. (Follow the Step-5 to Step-10 of the fix).
Reboot your computer.
After rebooting your problem will be solved.