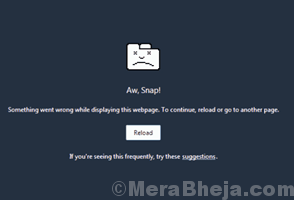
The Chrome Aw, Snap! error is a quite a common problem that Chrome users may face time to time. The full Aw Snap in Chrome shows up along with the following error message: “Aw, Snap! Something went wrong while displaying this webpage“. You may face Aw Snap error while browsing a website. You may also face Aw Snap error while opening a website.

If it is your first time you have faced Aw Snap error in Chrome, then there shall not be much problem. If you get Aw Snap error in Chrome repeatedly or if it has increased over time, then you might need to take some steps in order to fix it.
In this article, I will be discussing certain methods that will help get relief from the Aw Snap Chrome situation real quick. Let’s take a look.
How To Fix Aw Snap Chrome error in Windows 10
There are few basic and primary methods that you must try to get rid of this error on Chrome. These are simple methods and most probably solve your issue.
#1 – Reload Page to fix Aw Snap Chrome Error

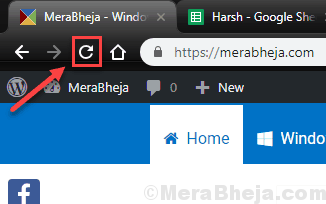
If you are facing this issue for the first time or this error comes up very rarely, then you should try to reload the webpage. Simply press the reload button on Chrome. Or, you can press the F5 button on your keyboard. If this fixes the Aw Snap issue, then continue with your work, else go to the next method.
#2 – Close Extra Tabs in Chrome
If your Chrome browser has too many tabs open in it, that might be taking up too many resources and causing this issue on your PC. You can try to close out all the unnecessary tabs in Chrome. After that, reload the webpage that is showing the Aw Snap error in Chrome.
If you are still getting the error, then try to close some more tabs. You can always bookmark the important web pages to access them later. If this is not helping, give the next method a try.
#3 – Restart Chrome to fix Aw Snap Chrome Error
One of the best ways to fix Aw Snap Error in Chrome is to restart Chrome browser. Restart Chrome and see if the error shows up. If it does, try the next method.
#4 – Restart PC
Sometimes, one or another resource can utilize all your PC’s memory and lead to this error. If none of the above methods worked, simply give your PC a restart. This might fix the Aw Snap Chrome error. Close Chrome, restart PC, then open Chrome and try to access the website you were trying to.
If this method is not working, move on to the next method.
#5 – Clear Browsing History of Chrome
One of the reasons why the Aw Snap error may show up in Chrome could be the accumulation of too much browsing data, cookies, etc. in Chrome. If none of the methods mentioned above works, this one should. Follow these steps to fix Chrome Aw Snap error:
Step 1: Open the Chrome’s menu from the 3 dots on the extreme right side of the Chrome’s address bar. In Chrome’s menu, click on Settings.

Step 2: In the Settings menu, click on the Advanced option.

Step 3: In Advanced Menu, go to the Privacy and Security section. Here, click on the Clear Browsing Data button.

Step 4: Now, a pop-up menu will open up. Here, select all the available options, then from the drop-down menu of Time Range, select the All Time option. Now, click on Clear Data button. All the Browsing history, Cache, and Cookies of Chrome will be erased. After this, restart your Chrome browser.

If the issue is not fixed, give the next method a try.
#6 – Update Chrome
If your Chrome browser is not updated to the latest version, it might be the reason you are getting Aw Snap error in Chrome. Here’s how to update Chrome:
Step 1: Open Chrome’s menu by clicking on 3 dots at the far right end of Chrome’s address bar. In the menu, click on Help, then select About Google Chrome option.

Step 2: A new window will open in Chrome. If a new version of Chrome available, you will get the update option there. Start updating chrome, and when done, restart PC, and see if you are able to access the website without Aw Snap error.

If this doesn’t help, try the next method.
Here on, you will be trying some Advanced Methods to troubleshoot the Aw Snap Chrome error.
#7 – Disable Predict Network Actions in Chrome
Predict Network Actions is a feature of Chrome that may be causing this issue. Follow these steps to disable it and see if that helps:
Step 1: Open Chrome menu and click on Settings.

Step 2: In the menu, scroll down and click on Advanced option.

Step 3: Go to Privacy section, then deselect the box before the Use a prediction service to load pages more quickly option.

Now, restart Chrome and see if Aw Snap error comes upon loading a page. If yes, try the next method.
#8 – Disable Extensions
The outdated or fault extensions of Chrome might also cause this issue. Follow these steps to disable extensions:
Step 1: Go to Chrome’s menu. There, click on More tools and then go to Extensions.

Step 2: A new tab with all extensions will open. Here, disable all the extensions that you do not use now. Once done, restart Chrome and check for error. If the error comes up, open the Extensions window, then try to disable other extensions one at a time and see if any of the extensions are causing the trouble.

If the extensions are not causing the trouble, try the next method.
#9 – Create New Chrome Profile to fix Aw Snape Error
Some issue with Chrome’s user profile might also cause the Aw Snap error. To fix it, and create new Profile, follow these steps:
Step 1: Check if the issue is with Chrome Profile. For this, while Chrome is open, press Ctrl + Shift + N on your keyboard to open Chrome in Incognito mode. In Incognito, try to open the website. If you are able to open it, go ahead with the next step.
Step 2: Close all Chrome windows. Press Win + R to open the Run box. There, type %localappdata% and press Enter.

Step 3: A folder will open. There, go to the following folder: Google > Chrome > User Data

Step 4: Locate the Default folder. Right click on it and click on Rename. Rename the folder to Old_Default.
Start Chrome now; your issue will be fixed.
#10 – Use Chrome Cleanup Tool
If nothing works, you can also try the Chrome Cleanup Tool. Click here to find out more about this tool to fix Chrome issues of any kind.
Finally,
these methods will definitely help you fix Aw Snap Chrome error. Let us know in the comments, which method helped you.