Windows has an On-Screen Keyboard option from Windows Vista. Most of the time, we prefer to use the hardware keyboard. But if your keyboard is faulty then you might want to use an On-Screen Keyboard. The On-Screen Keyboard is very handy to use. You can also adjust its size to an extent if you feel it is taking up much of the space in the desktop. It also suggests the word when you are halfway with typing. This helps you type faster. This article brings out a few simple methods to open On-Screen Keyboard in Windows 10.
Also Read: Best Keyboard apps for your android Phone
On-Screen Keyboard Opening Options in Windows 10 / 11
Method 1 – Using Cortana
- In the search box, type On-Screen Keyboard. You’ll see the best matches. Choose the one that says On-screen Keyboard.
- This launches the On-Screen Keyboard.
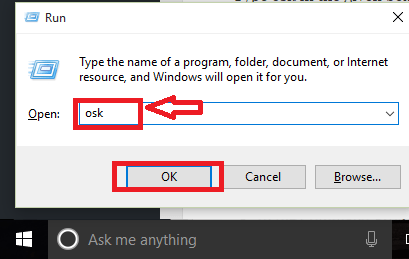
Method 2 – Using Run Command
- Press Win + R and launch Run.
- Type osk in the given box. Press Enter key.
Method 3 – Using Command Prompt
- Press Win + X keys. Click on Command Prompt from the given options.
- In the Command Prompt, type osk. Press Enter key.
Method 4 – Using Windows PowerShell
- Press Win + R to launch Run.Type powershell.exe in the box given. Press OK.
- Type osk on the screen. Press Enter key.
Method 5 – Using Start Button
- Click on the Windows icon. Click on All apps.
- Find the option Windows Ease of Access. Click on this option. It drops down a few features. Click on On-Screen Keyboard.
Method 6 – Using Control Panel
- Press Win + X keys. Click on Control Panel.
- Click on the option Ease of Access.
- Then, click Ease of Access Center.
- Further, click on Start On-Screen Keyboard.
Method 6 – Using Settings
- Click on Windows icon to open Start menu. Then click on Settings.
- Then click Ease of Access.
- Choose Keyboard from the given options. Turn on the On-Screen Keyboard option.
So the next time if something is wrong with your keyboard, don’t worry. These options will help you complete your task without any troubles.


