As everyone uses wireless networks in the form of WiFi these days, Windows 10 offers various handy wireless features. One of the best wireless features found in Windows happens to be Wireless Display that can be great for casting media files like movies, videos, photos, and others to supported devices wirelessly. Although, you will need to install the Wireless Display utility in Windows 10 to use the same. And if you are getting issues while installing it, you can go through the solutions present here to fix wireless display install failed error in Windows 10.
How to Fix Wireless Display Install Failed Error in Windows 10?
Since this issue with the Wireless Display utility installation can be caused due to a number of possible reasons, you can try out these methods to fix them.
Fix 1 – Use a different Internet Connection
Try to change the internet connection. Try to create a hotspot on your Phone and then connect your PC to it and then try to install the Wireless Display
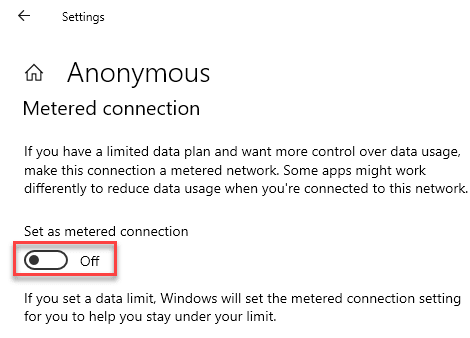
Fix 2 – Disable the Set as Metered Connection Option
While the metered connection option can save a lot of data, it can also cause issues with some Windows 10 functions due to which you should disable it.
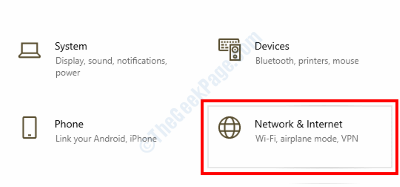
1 – Start by pressing Windows Key + I on your keyboard and heading over to the Network & Internet section.
2 – Now, click on the Properties button under your currently connected WiFi.
3 – Then, scroll down to disable the Set as metered connection option.

4 – Try installing Wireless Display once again.
If you are a Windows 11 User
1 – Press Windows Key and I key together to open settings.
2 -Now, click on Network & Internet from the left menu.
3 – Now, click on Properties located just below your Network in the right side.

4 – Now, scroll down in the right side and set the Metered Connection to Off.

Fix 3 – Install Wireless Display from Command Prompt
If you are not able to install Wireless Display from Windows Settings, you can try the same via Command Prompt.
1 – Press Windows Key + R to open Windows Run and type cmd in here to open Command Prompt. Make sure to press control + shift + enter after typing cmd to run it as an administrator.

2 – Once you are inside the Command Prompt window, type the command given below and press enter on your keyboard.
DISM /Online /Add-Capability /CapabilityName:App.WirelessDisplay.Connect~~~~0.0.1.0

3 – Now Command Prompt will start the download and installation process for Wireless Display
Fix 4 – Install Wireless Display via PowerShell Script
PowerShell can be another viable way to install optional features like Wireless Display especially if you are using a script like this.
1 – Use Windows Search to open Windows Run on your computer and type powershell in it followed by pressing enter on your keyboard.

2 – After opening PowerShell, you can run the following script for installing Wireless Display
DISM /Online /Add-Capability /CapabilityName:App.WirelessDisplay.Connect~~~~0.0.1.0
3 – PowerShell will then install Wireless Display in Windows 10.
Fix 5 – Edit Registry Keys to Install Wireless Display
If you do not want to run a PowerShell script and instead want to manually edit Registry Keys before installing Wireless Display, you can do so via Registry Editor in Windows
1 – Begin by opening Windows Run on your computer by pressing Windows Key + R.
2. In here, type regedit and press enter to open Registry Editor.

2 – Now, head over to the following path
HKEY_LOCAL_MACHINE\SOFTWARE\Policies\Microsoft\Windows\WindowsUpdate\AU
3. On the right side and look for UseWUServer.

4 – After finding it, open it and set its value to 0.
5 – You can then save this value and try installing Wireless Display from Windows Settings.

