Local accounts on a Windows system or a domain do not enjoy the same facilities as a system/domain administrator. So, if you see the error message “The Sign-in method you’re trying to use isn’t allowed. For more info, contact your network administrator“, while trying to log in from a local user account, don’t worry. Usually, the group policy, which the system administrator places, is responsible for this debacle and can be easily fixed in just a few steps. Try rebooting your device and logging in again. If this is a one-time glitch, it will be fixed automatically.
Fix 1 – Use a system administrator account
The best way to end this issue is to use a system administrator account. If you have the administrator credentials, you can directly sign in.
So, just restart the device and enter your administrator credentials on the Sign-In page. This way, you can log in easily.
Fix 2 – Edit the group policy
But, what if you don’t want to use the administrator credentials every time? In that case, you have to edit the group policy to add your user account to the log-on locally.
Step 1
1. To do this, you have to log in with your administrator account.
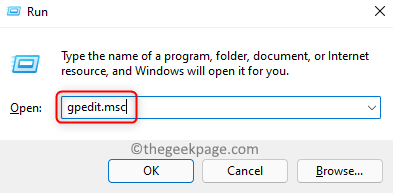
2. Once you are logged in, you can press the Win key and the R keys together.
3. Then, type this there and click on “OK” to open the Local Group Policy Editor.
gpedit.msc
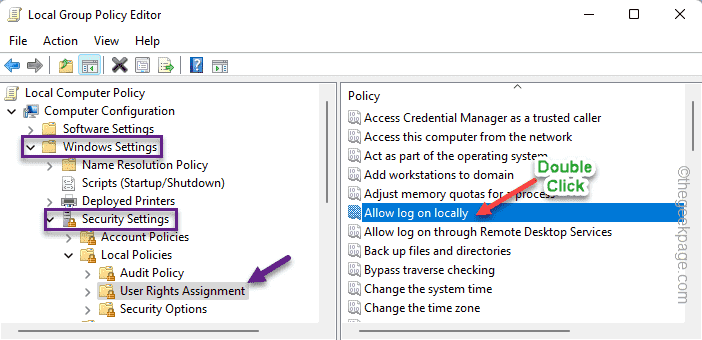
4. When the Local Group Policy Editor opens up, go this way –
Computer Configuration -> Windows Settings -> Security Settings -> Local Policies -> User Rights Assignment
5. After reaching the specified location, look at the right-hand pane. Find out the “Allow log on locally” policy.
6. Double-tap the policy so that you can modify it.
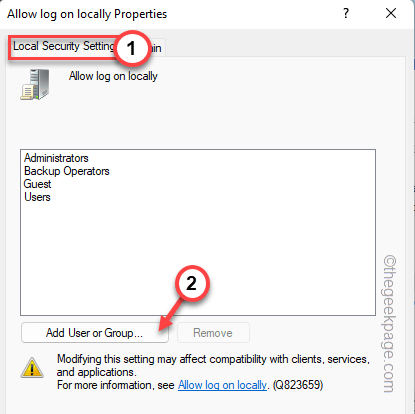
7. In the Allow log-on locally Properties page, go to the “Local Security Setting” tab.
8. Now, click on “Add User or Group…” to add your local account to the list.
9. Now, tap “Advanced” to go to the account selection page.
10. So, click on “Find Now” to get the complete list of accounts.
11. From that list, scroll down and select the local user account that you were facing trouble with.
12. Then, click “OK“.
13. Coming to the next step, click “OK” to proceed to the next step.
14. Now, you will see that your local account has appeared in the list of users able to log in locally.
15. After that, tap “Apply” and “OK” to save the changes.
Step 2
Now, you just have to make sure the “Deny log on locally” isn’t imposed on your local account.
1. On the same Local Group Policy Editor page, double-tap the “Deny log on locally” policy.
2. Now, go to the “Local Security Setting” tab.
3. Here, look for your local account in the ‘Guest’ tab. If you can see your account, just select it and tap “Remove“.
4. Once you are removed the local account from the ‘Guest’ tab, tap “Apply” and “OK“.
Now, you can restart the system. Now, you can input your local account credentials to log in with it.
This should have solved your issue.
Some Additional Notes –
If you are trying to log on locally on a Domain Controller (Windows Server 2012/ 2016), your local account needs to be in one of the following groups –
Administrators
Backup Operators
Administrators
Print Operators
server Operators
You should include your local account in any of these specified groups. But, make sure the local account you are adding is a trusted one. Adding the local account to the ‘Backup Operators’ group should minimize this risk.


