Audio device is equally important while using a system and it can be either for listening to music or online meetings etc. When there are many audio devices connected to your system, it will be quite confusing for the users to select the audio device from the device list if they have similar names. Therefore, the user needs to rename the audio device for their own convenience. If you are also looking for how to change the name of the audio device on your system, then this post will show you how to do it.
How to Rename Audio Devices on Windows 11
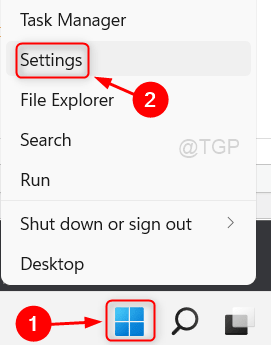
Step 1: Right click on the Start button on the taskbar.
Step 2: Select Settings option from the context menu of Start button as shown in the below screenshot.

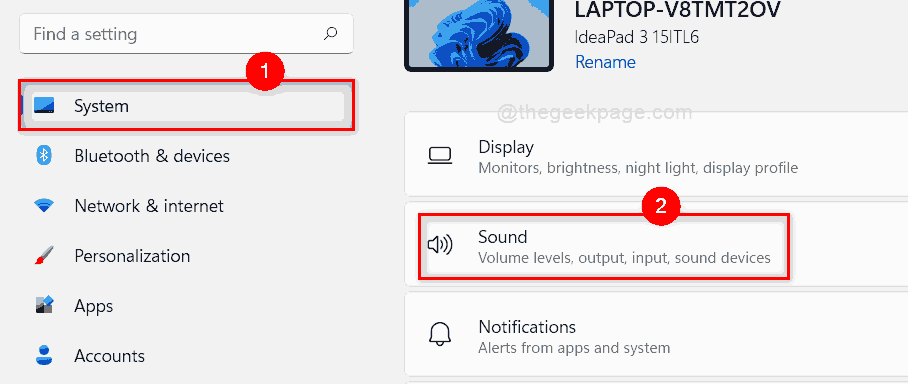
Step 3: In the Settings window, Select System on the left menu.
Step 4: Then, Click Sound option on the right side of the window as shown in the below screenshot.

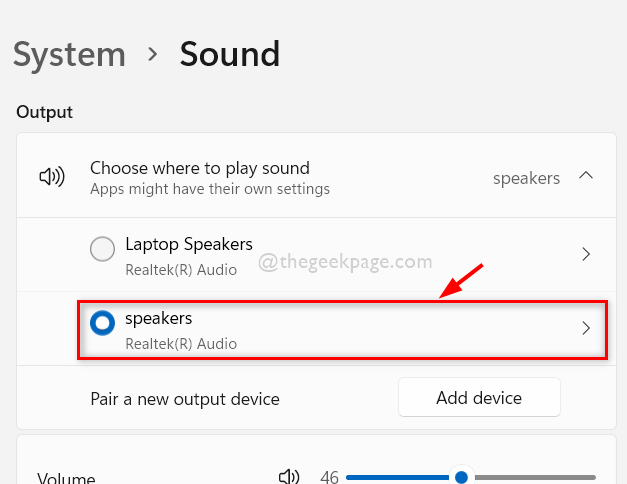
Step 5: Select by clicking on the Sound device which you want to rename as shown below.

Step 6: Then, Click the Rename button under the Sound device on its Properties page as shown below.

Step 7: Rename the sound device to whatever you wish and click on Rename button.

Step 8: Then, Close all the settings window.
Step 9: To verify the sound device, go to Action Center by pressing Windows + A keys together on your keyboard.
Step 10: In the Action Center wizard, Click on select a sound output icon as shown in the below image.

Step 11: Now you can see that the sound device which you had renamed appears on this list.

That’s all.
This is how one can rename the audio devices on windows 11 system.
Hope you liked this post and found it useful.
Please leave us comments below.
Thank you for reading!