Many users have experienced an issue where they are not able to rename files on their Windows 11/10 PCs. The problem needs to be fixed based on the error message that is displayed to you. There can be varied reasons why you cannot rename files on Windows 11/10 PC. So, if you are confronting this issue while trying to rename files, then read this article to identify the situation you are in and the solution to fix it.
Scenario 1: Cannot Rename File Name too Long
One of the scenarios where you can face this issue with renaming a file is when the file name is very long. If the number of characters in the name of the file crosses 255, Windows will not allow you to rename the file and show you the error “The file name is too long”. In this case, you will need to cut short the filename to reduce the number of characters in it.
Scenario 2: Cannot Rename File Action Cannot be Completed because the file is open in another program
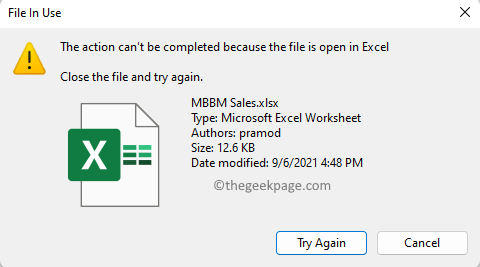
When you see the error message The action can’t be completed because the file is open in [program name] while renaming a file, it means that the file you are trying to rename is open in some other application.
If you read the error message, you will find the name of the application in which the file that you are trying to rename is open. Once you know the app, you can open it and close the file that was giving the error.
For instance, if the error was showing that the file is open in Excel, then you need to open Excel app on your system. Close the file that you are having an issue with renaming, and then close Excel. Now, try renaming the file to see if the issue is resolved.
Scenario 3: Cannot Rename File Access Denied
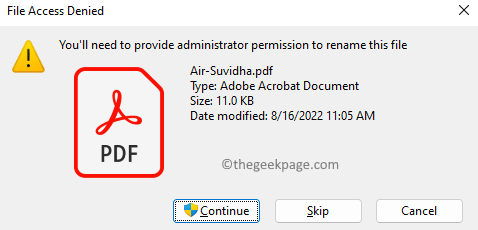
Many users have faced file renaming issues while trying to rename a file that was shared with them through OneDrive. In this case, you will see an error that reads You’ll need to provide administrator permission to rename this file. The reason for this error is that you don’t have ownership of this file or you are not given permission to make any modifications to the file.
If you are seeing this error message and it is your own file, then you can change the owner of the file to your admin account. Follow the steps mentioned below to take ownership of the file.
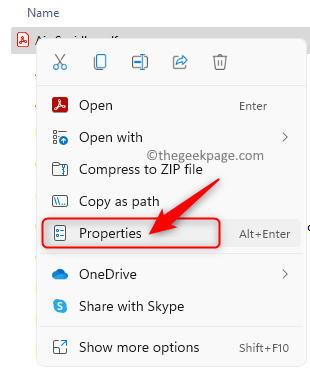
1. Right-click on the file that you are trying to rename and choose Properties.
2. Go to the Security tab in the Properties window.
3. You will see that you don’t have permission to make any changes to the file.
To take ownership of the file, click on the Advanced button.
4. In the Advanced security settings window, click on the Change link next to the Owner name that is displayed.
5. In the Select User or Group window, click on the Advanced button.
6. In the window that pops up, click on Find Now.
In the Search results displayed below, search for your name in the list and select it.
Then, click on OK.
Back in the Select User or Group window, click on OK to confirm the object name.
7. You will notice that the Owner’s name has changed to your name.
Then, click on Apply.
In the warning message that is shown, click on Yes to continue with this operation.
Click on OK two times to complete the change of permission process.
8. Now, click on the Advanced button again in the Properties window.
In the Advanced security settings window, you will see the change in the owner name along with options to add multiple objects.
9. You can click on Change permissions to add multiple objects and inherit permissions.
10. To add a new object, click on Add.
Then, click on Select a principal.
Type in the object name.
Then, enable the Basic permissions by checking the boxes next to them.
Finally, click on OK.
11. To inherit permissions for an object, click on the Enable inheritance button.
Close the Properties window.
Check if you are able to rename the file.
Scenario 4: Cannot Rename File on Desktop
On your Windows 11 PC, if you are trying to rename a file on your desktop and are not able to do so, then try any one of the methods mentioned below.
1. Click once on the file to select it and then press the F2 key on your keyboard to rename the file. Type a new name for the file.
2. Right-click on the file on the desktop that is to be renamed. Then, click on the Rename option in the context menu that opens.
3. Right-click on the file and click on the option Show more options.
Now, select Rename in the new context menu that opens up.
If you are encountering any other error message other than the ones mentioned in this article with respect to renaming a file, click on this link to find a solution to this file renaming problem.
That’s it!
Thanks for reading.
We hope that the issue you were facing with respect to renaming files on your Windows 11/10 PC is resolved. Please comment and let us know your thoughts and opinions on the same.


